
Introduction to Homemade Taiyaki
What is Taiyaki and Why You Should Try Making It at Home
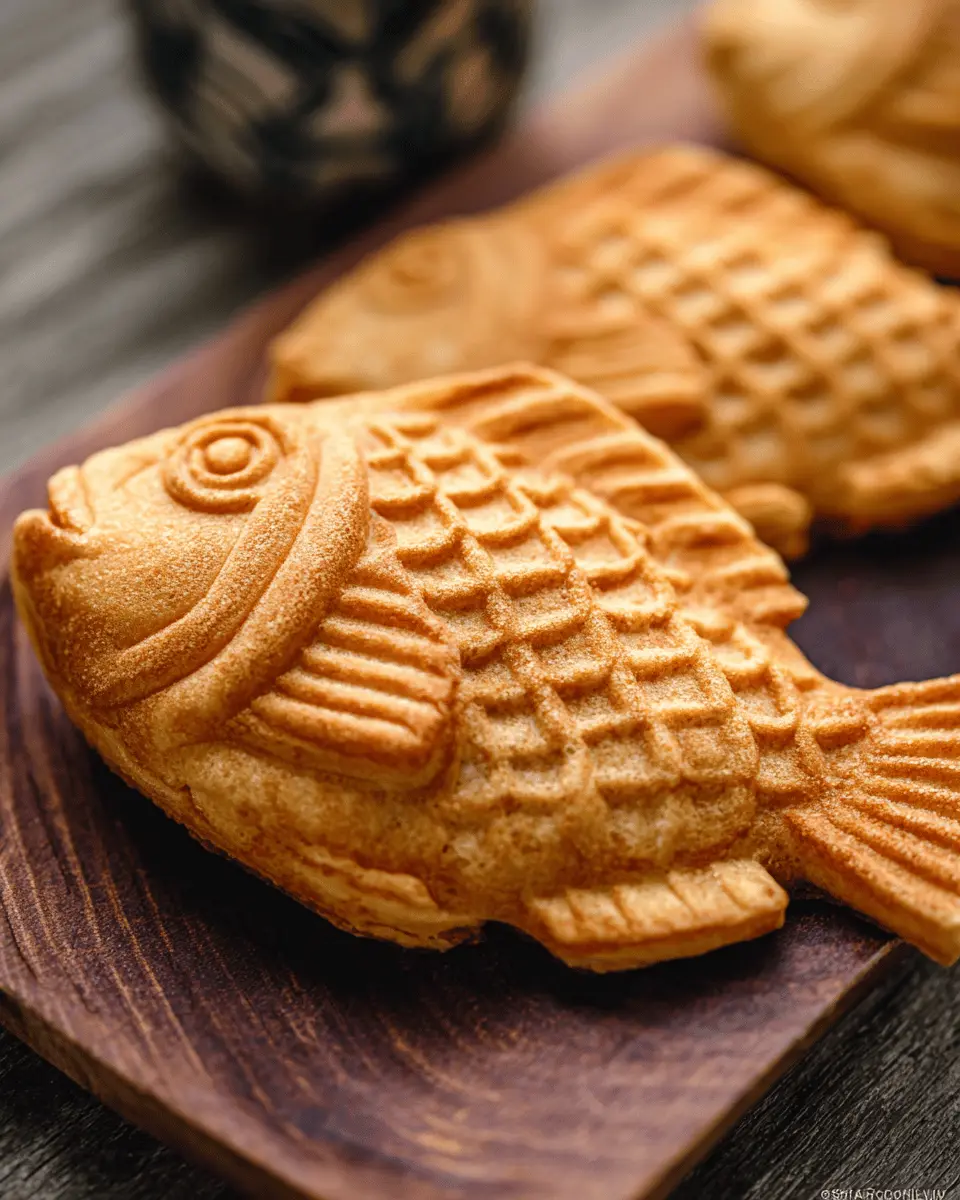
Taiyaki is a delightful Japanese fish-shaped pastry typically filled with sweet red bean paste, custard, or even Nutella. Originating from the streets of Japan, this treat has become a symbol of comfort and nostalgia for many. While you can easily find it at Asian bakeries or festivals, there’s something incredibly satisfying about crafting your own homemade taiyaki.
Making taiyaki at home allows you to experiment with flavors and fillings, catering the dish to your personal preferences. Have you ever wanted to create a unique dessert that reflects your tastes? The beauty of making taiyaki is that you can fill them with anything—from traditional sweet red bean paste to innovative flavors like matcha or chocolate.
Additionally, the process of preparing taiyaki can be a fun activity to share with friends or family. It’s a great way to bring people together, invite over some friends, and have a taiyaki-making party! With just a few ingredients and specialized tools like a taiyaki maker, you’ll be on your way to creating these charming pastries in no time. Plus, homemade taiyaki are fresher and more satisfying than store-bought versions. So why not give it a go?
Ingredients for Homemade Taiyaki
Creating homemade taiyaki is a delightful adventure that brings a taste of Japan right to your kitchen! Here’s a quick overview of the essential ingredients and filling options.
Essential Ingredients for the Taiyaki Batter
To craft the perfect taiyaki batter, you'll need:
- Cake Flour: 1¼ cups is recommended for a fluffy texture. You can also make homemade cake flour if you prefer!
- Baking Powder and Baking Soda: 1 teaspoon each helps the batter rise.
- Sugar: Just 3 tablespoons balances the flavors beautifully.
- Egg: One large egg adds richness.
- Whole Milk: About ¾ cup, adjust slightly based on egg size.
- Neutral Oil: Use 1 tablespoon for greasing the taiyaki maker.
Filling Options for Your Taiyaki
While sweet red bean paste (anko) is a classic filling, don’t hesitate to explore other options! Here are a few popular alternatives:
- Nutella: For a chocolatey twist.
- Custard: A creamy and dreamy choice.
- Fruits: Try fresh fruit or fruit preserves for a refreshing flavor.
Feeling adventurous? Mix and match your fillings to find your perfect homemade taiyaki combo! If you're unsure how to prepare the fillings, our homemade Anko recipe can guide you through making your own delicious paste. Enjoy the process, and happy cooking!
Step-by-step Preparation of Homemade Taiyaki
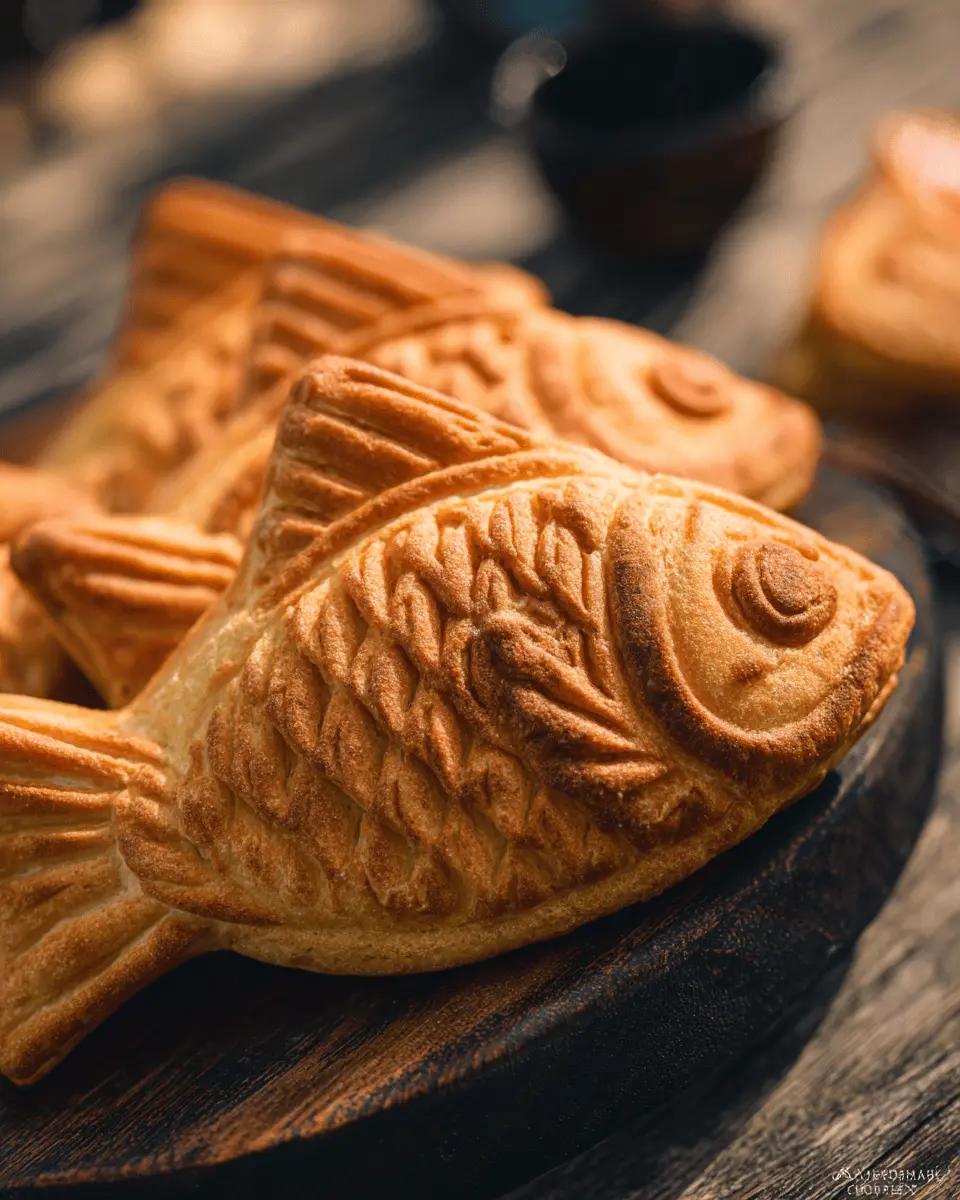
Making homemade taiyaki is a delightful experience that transforms your kitchen into a little slice of Japan. With a bit of preparation and some fun ingredients, you'll have delicious fish-shaped pastries to enjoy. Let's dive into the step-by-step process to get you started!
Gather your ingredients and tools
Before you get your hands dirty, it’s essential to gather everything you need. Here’s what to have on hand:
-
Ingredients:
-
1¼ cups cake flour
-
1 teaspoon baking powder
-
1 teaspoon baking soda
-
3 tablespoon sugar
-
1 large egg
-
¾ cup whole milk
-
8 tablespoon sweet red bean paste (anko) or your choice of filling
-
1 tablespoon neutral oil for greasing
-
Tools:
-
A taiyaki maker, which can be either stovetop or electric. They come in various sizes, so it’s wise to test with a small batch first.
-
Mixing bowls, a whisk, and a measuring cup.
Make the taiyaki batter
- Start by sifting the cake flour, baking powder, and baking soda into a large bowl. This step adds air, making your taiyaki light and fluffy.
- Add the sugar and whisk until combined.
- In a separate medium bowl, whisk the egg and milk together. Once mixed, pour these wet ingredients into the dry ingredients.
- Using a whisk, mix until smooth. Let this batter rest in the refrigerator for at least one hour. Trust me, this resting period is crucial as it allows the flour to absorb the liquid and the gluten to relax.
Preheating the taiyaki maker
Now, it’s time to heat your taiyaki maker. Set it on medium-low heat. Waiting for the right temperature is key; you want it hot enough to cook the taiyaki perfectly without burning, around 350°F (175°C).
Cooking the taiyaki
- Once preheated, lightly grease the taiyaki mold with some neutral oil. This prevents sticking and ensures a beautiful, crispy exterior.
- Fill the mold about 60% full with the batter, leaving space for the filling!
- Add about 1 tablespoon of red bean paste (or your chosen filling) in the center, then cover with more batter.
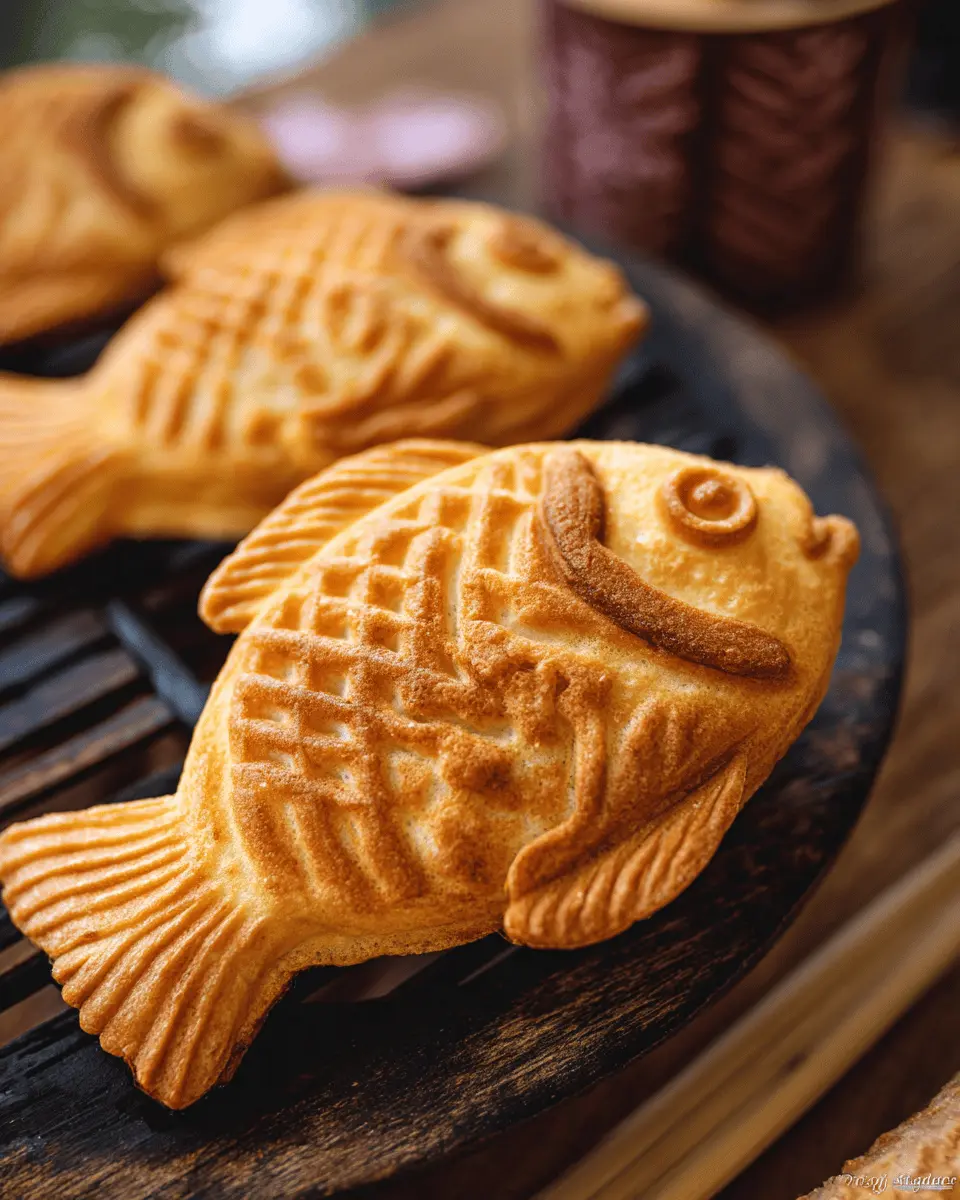
- Close the lid and flip it immediately—this is essential for even cooking. Cook for about 2-2½ minutes on each side. Gently open the maker to check for that beautiful golden-brown color.
Letting the taiyaki cool and serve
After removing the taiyaki from the mold, allow them to cool on a wire rack. It might be tempting to dive in immediately, but giving them a moment helps improve texture. Serve them warm for the best experience! If you have extras, store them in an airtight container in the fridge or freezer, reheating them in a toaster oven when cravings hit again.
Enjoy creating your own homemade taiyaki! With practice, you'll become a taiyaki whiz, impressing friends and family with your culinary skills. Consider trying different fillings, as the options are endless! Nature's sweetness in a golden, fish-shaped package is all set to keep you coming back for more. Dive into this journey and relish every crispy bite!
Variations on Homemade Taiyaki
Taiyaki is a delightful Japanese treat that offers endless possibilities for customization. Let’s explore some mouthwatering variations that will undoubtedly elevate your homemade taiyaki experience!
Sweet fillings beyond red bean paste
While traditional taiyaki often features sweet red bean paste (anko), why not get creative? Try fillings like:
- Matcha custard, adding a touch of earthy flavor.
- Chocolate Nutella for a rich, indulgent twist.
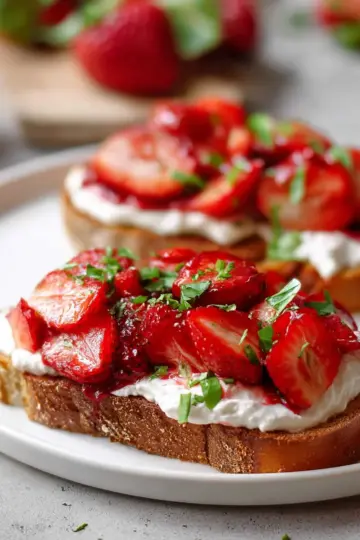
- Fresh fruits, such as sliced bananas or strawberries, combined with a light cream for freshness.
These alternatives not only provide a unique taste but also colorful presentation!
Savory taiyaki alternatives
Looking for something hearty? Customize your homemade taiyaki with savory fillings. Consider:
- Turkey bacon and cheese, a savory breakfast option.
- Chicken ham with spinach and cream cheese for a rich yet balanced flavor.
- Beef curry, offering a comforting and satisfying bite.
These savory variations make taiyaki suitable for brunch or as a delicious snack! Which variation will you try first?
Cooking Tips and Notes for Homemade Taiyaki
Common mistakes to avoid
Making homemade taiyaki can be a fun adventure, but don’t let common pitfalls ruin your experience! One major mistake is skipping the resting time for the batter. This crucial step ensures the flour absorbs the moisture, resulting in a smoother and more cohesive texture. Additionally, be gentle when pouring the batter into the taiyaki maker—too much agitation can create pockets of air in your taiyaki, affecting the final product.
Tips for achieving the perfect texture
To achieve that delightful texture, use quality cake flour instead of all-purpose flour; it provides the soft, tender crumb that makes taiyaki special. Be mindful not to overmix your batter; a gentle hand will keep it light and fluffy. Finally, ensure your taiyaki maker is preheated properly—this helps get that gorgeous golden-brown finish everyone loves!
Serving Suggestions for Homemade Taiyaki
Best Ways to Enjoy Your Taiyaki Warm
The best way to savor homemade taiyaki is to enjoy them warm, right out of the maker. They're delightful as a snack or dessert, especially when filled with sweet red bean paste, Nutella, or custard. For an extra touch, you can dust them with powdered sugar or drizzle with chocolate sauce for a unique flavor experience. Pair your taiyaki with fresh fruit or a scoop of ice cream for a refreshing contrast that complements the warm, flaky pastry.
Creative Plating Ideas
Elevate your homemade taiyaki presentation with simple but creative plating:
- Stack ‘em High: Layer taiyaki on a slate or wooden board for a rustic look.
- Color Pop: Serve on a bright plate with berries or kiwi slices for a vibrant display.
- Personal Touch: Use parchment paper or a cute cake stand to add a personal touch to your setup.
These ideas not only enhance the visual appeal but also make your taiyaki experience more enjoyable! For more creative inspiration, check out this plating guide for expert tips.
Time Breakdown for Homemade Taiyaki
Preparation time:
Getting started on your homemade taiyaki is quick and easy! You’ll need about 15 minutes to gather your ingredients and whip up the batter.
Cooking time:
Cooking each batch of taiyaki takes roughly 5 minutes, but don’t forget that you'll need to preheat your maker first, which can add a couple more minutes.
Total time:
Including resting time for the batter, the entire process takes about 1 hour 20 minutes. This ensures each delicious piece is perfectly cooked and deliciously satisfying!
For more tips on perfecting your taiyaki technique, check out this guide.
Nutritional Facts for Homemade Taiyaki
Calories per Serving
Homemade taiyaki offers a delicious treat with about 232 calories per serving. This makes it a satisfying dessert without overindulging.
Key Nutrients
Packed with flavor and essential nutrients, each serving of homemade taiyaki contains:
- Carbohydrates: 41g
- Protein: 7g
- Fat: 5g
- Fiber: 2g
This well-rounded snack can keep your energy up while satisfying your sweet cravings! For more in-depth nutritional information, check out resources like the USDA FoodData Central.
FAQs about Homemade Taiyaki
How do I make taiyaki without a taiyaki maker?
No taiyaki maker? No problem! You can use a regular frying pan instead. Simply pour some batter into the hot pan, creating a thin pancake. Add your favorite filling, and then cover it with more batter. Once it's golden brown on one side, carefully flip it over to cook the other side. While it won’t have the classic fish shape, it will still taste just as delicious!
Can I freeze taiyaki for later use?
Absolutely! Homemade taiyaki freezes beautifully. Just let them cool completely, then place the taiyaki in an airtight container or a freezer bag. They can be frozen for up to a month. When you’re ready to enjoy them again, simply pop them in a toaster oven or regular oven until they’re warm and crispy.
What are some popular taiyaki fillings?
Traditionally, taiyaki is filled with sweet red bean paste (anko), but feel free to get creative! Some popular alternatives include:
- Nutella
- Custard
- Chocolate ganache
- Matcha cream
Mix and match to find your favorite combination!
Conclusion on Homemade Taiyaki
Creating homemade taiyaki is truly an enjoyable experience. You've transformed simple ingredients into delightful, crispy fish-shaped treats that are perfect for sharing. Whether you prefer classic red bean filling or something more adventurous, the joy of crafting these delicious snacks is unmatched. Dive into your own taiyaki journey today!

Taiyaki
Equipment
- Taiyaki maker
Ingredients
- 1.25 cups cake flour or make homemade cake flour
- 1 teaspoon baking powder
- 1 teaspoon baking soda
- 3 tablespoon sugar
- 1 large egg (50 g each w/o shell)
- 0.75 cups whole milk (adjust the amount depending on egg size)
- 8 tablespoon sweet red bean paste (anko) or other filling like Nutella, custard, etc.
- 1 tablespoon neutral oil for greasing the grill
Instructions
Before You Start
- Note that the batter requires a resting time of 1 hour.
- Gather all the ingredients, including a taiyaki maker.
To Make the Batter
- Sift cake flour, baking powder, and baking soda into a large bowl.
- Add sugar and whisk well to combine.
- In a medium bowl, whisk the egg and then add whole milk. Combine well.
- Pour wet ingredients into dry ingredients and whisk well. Rest in the refrigerator for at least one hour.
- Pour the batter into a measuring cup or jug.
To Cook the Taiyaki
- Preheat the taiyaki maker over medium-low heat and grease with neutral oil.
- Fill the taiyaki pan mold about 60% full of batter.
- Add sweet red bean paste in the center and cover it with more batter.
- Close the lid, flip and cook for 2 to 2½ minutes on each side.
- Check if the taiyaki is golden brown, remove from the pan, and cool on a wire rack.
To Serve
- Serve warm. Toast in the toaster oven or oven if cold.
To Store
- Keep in an airtight container in the refrigerator for up to 2 days or in the freezer for up to a month.


Leave a Reply