
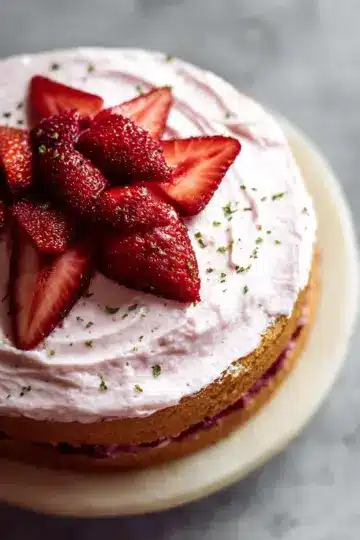
Introduction to Pumpkin Oreo Balls
Are you ready to indulge in a fall favorite that’s easy to make and impossible to resist? Pumpkin Oreo Balls combine the classic flavors of pumpkin and cream cheese with the rich, chocolaty goodness of Oreo cookies. These bite-sized treats are not only adorable with their pumpkin-like appearance but are also the perfect sweet addition to any gathering or festive celebration.
Why Pumpkin Oreo Balls are the Perfect Treat
One of the best things about Pumpkin Oreo Balls is how simple they are to whip up! With just a handful of ingredients, you can create a crowd-pleaser that embodies the essence of autumn. Did you know that pumpkin is a nutritional powerhouse, packed with vitamins and fiber? Pair that with the delightfully creamy texture of cream cheese and the nostalgic taste of Oreos, and you’ve got a treat that satisfies both the sweet tooth and the body!
Whether you’re hosting a Halloween party, attending a potluck, or just craving a delicious snack, these treats are versatile and fun to make. You can customize them further with your favorite toppings or presentation styles. Serve them chilled for a refreshing bite, or let them sit out a bit for a softer texture. Curious about similar recipes? Check out this pumpkin pie recipe or learn how to make homemade cream cheese frosting here.
Get ready to impress your friends and family with these delightful Pumpkin Oreo Balls!
Ingredients for Pumpkin Oreo Balls
Are you ready to whip up a delightful treat that perfectly combines the flavors of fall and indulgence? Let's dive into the ingredients you'll need for these Pumpkin Oreo Balls! Whether you’re planning a cozy gathering or simply want a sweet treat, this recipe is a must-try.
-
36 Oreo cookies: You can’t go wrong with classic Oreos! These will provide the perfect chocolatey base for your balls.
-
8 oz cream cheese, softened: The cream cheese is essential for achieving that rich and creamy texture that elevates these treats. Make sure to let it sit out for a bit to soften—easy mixing is key!
-
12 oz orange candy melts: The colors of autumn come alive with these candy melts, providing a vibrant finish that’s both tasty and visually appealing!
With these simple yet effective ingredients, you'll be on your way to creating mouth-watering Pumpkin Oreo Balls in no time! Remember, you can find more tips and variations on food blogs or even recipe sites to inspire your creativity. Happy baking!
Step-by-Step Preparation of Pumpkin Oreo Balls
Creating delicious Pumpkin Oreo Balls is not only a fun activity, but it’s also a fantastic way to impress your friends and family during the fall season. With just a handful of ingredients and straightforward steps, you'll be able to whip these up in no time! Let's get started.
Crumble the Oreos
First things first—grab your 36 Oreo cookies and pulverize them! Using a food processor is the easiest way to achieve a fine crumble. If you don’t have one, you can place them in a resealable plastic bag and crush them with a rolling pin. Just be careful not to leave any big chunks, as you want a nice, even texture for your Pumpkin Oreo Balls.
Combine with Cream Cheese
Once your Oreos are finely crumbled, it's time to add the star ingredient: 8 oz of softened cream cheese. Combine the cream cheese and crumbled Oreos in a mixing bowl. I recommend using a spatula or your hands for a thorough mix. The goal here is to blend the two until they create a cohesive, cookie-dough-like mixture. This step not only binds everything together but adds that creamy richness we crave.
Form into Balls
Now comes the fun part—scooping the mixture! Using a tablespoon or a small cookie scoop, portion out the mixture and roll it into 1-inch balls. It helps to keep your hands slightly damp to prevent sticking. After forming the balls, place them on a parchment-covered baking sheet. This makes for easy transferring later on.
Refrigerate Before Dipping
Once your Pumpkin Oreo Balls are all shaped, pop them in the fridge for about 15 minutes. Chilling helps the balls firm up, making them easier to dip later. This brief waiting period is a great time to clean up the kitchen or get your decorations ready!
Melt the Candy Coating
For that delightful orange hue that screams fall, you will use 12 oz of orange candy melts. Melt these using a double boiler or simply pop them in the microwave, following the instructions on the package. Make sure to stir every 30 seconds if you go the microwave route to avoid any burning.
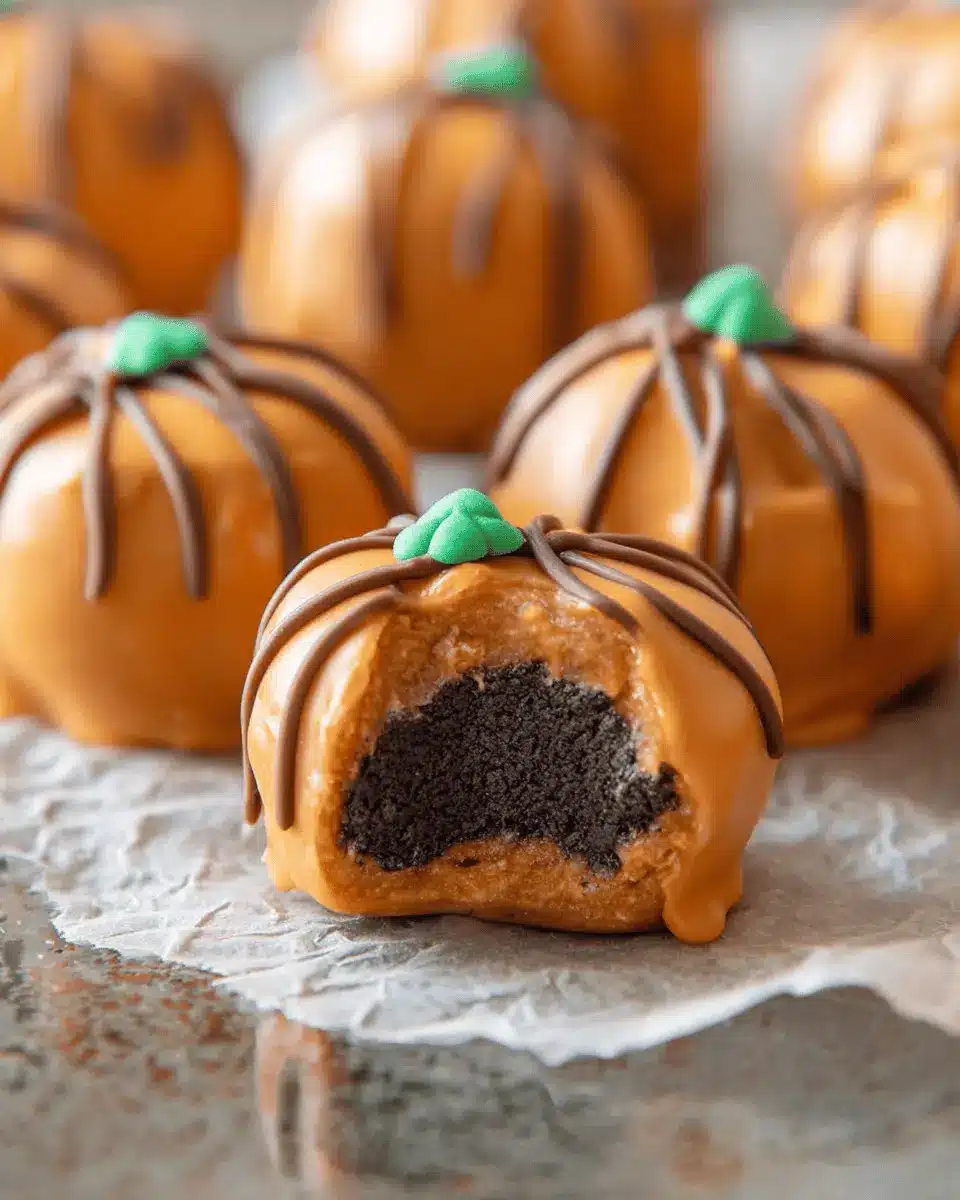
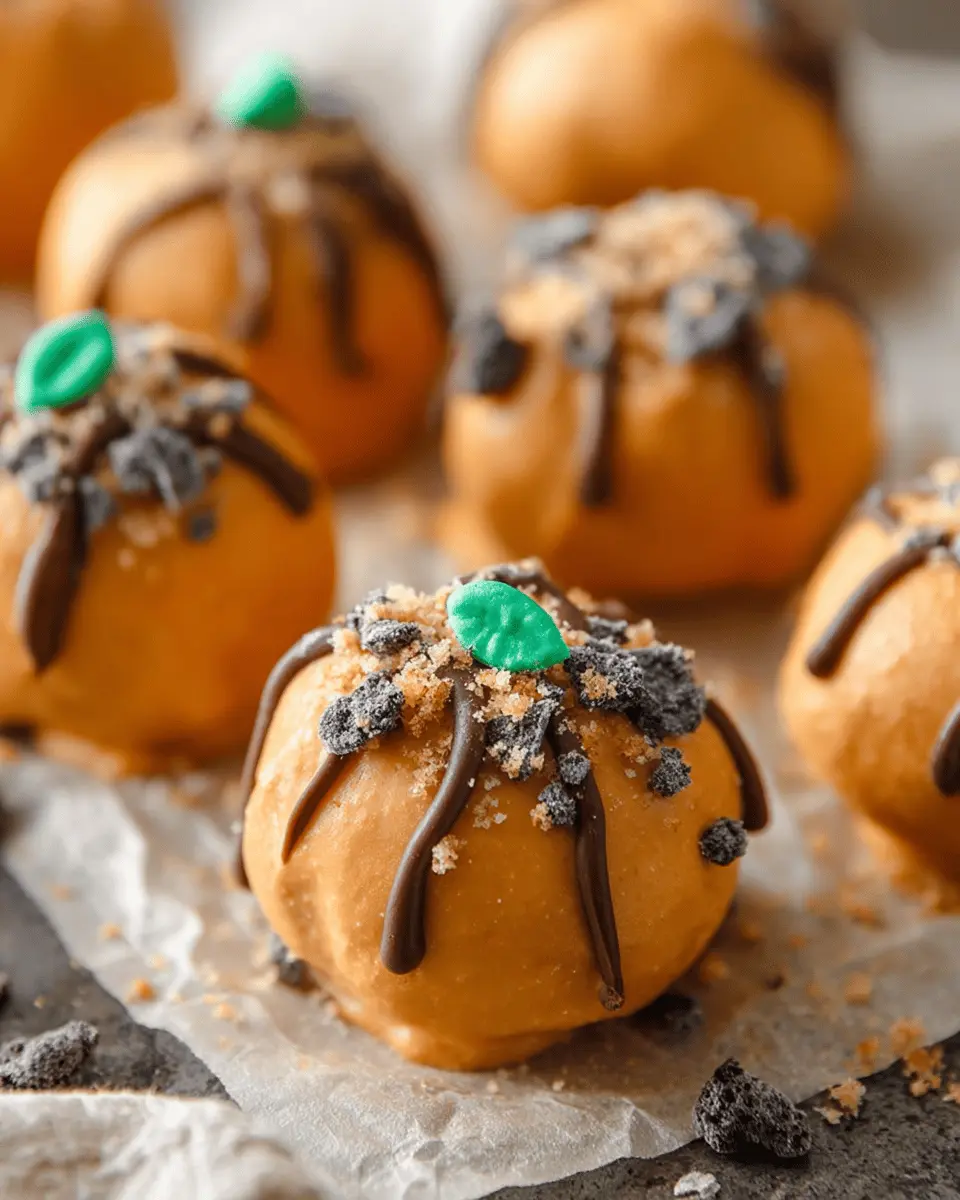
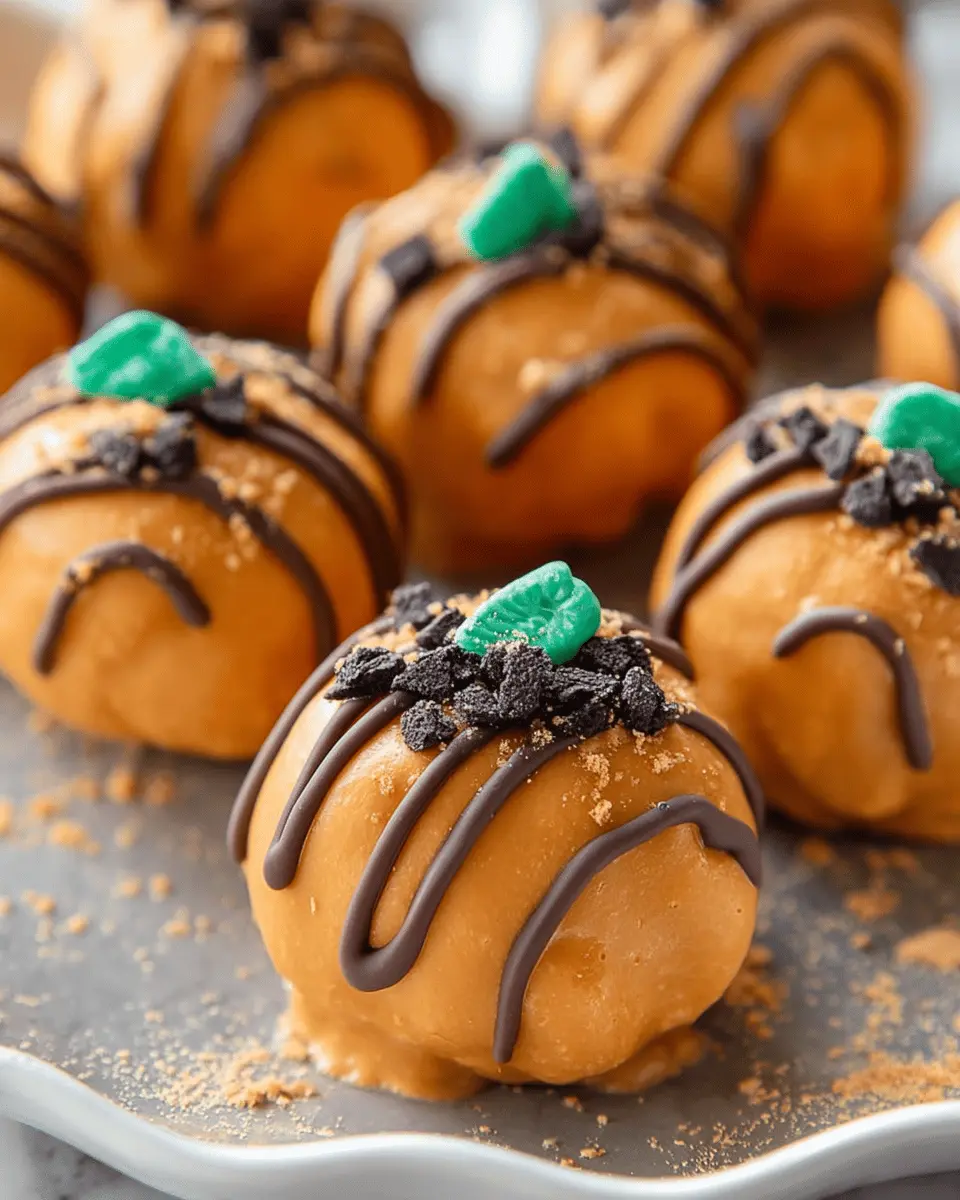
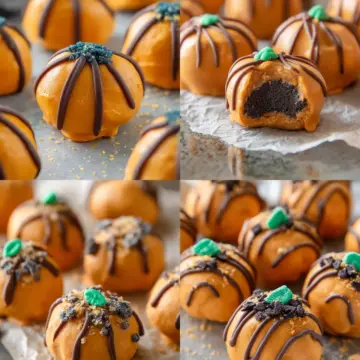
Dip and Decorate
Now it’s time to bring your Pumpkin Oreo Balls to life! Using a fork or toothpick, dip each ball into the melted candy coating, allowing any excess to drip off. Return them to the lined baking sheet. Immediately after dipping, you can stick a small pretzel into the top to resemble the pumpkin stem, and a bit of icing can be added for leaves.
Once decorated, refrigerate until they're set, and you're ready to share these scrumptious treats with everyone. Enjoy your fall-themed indulgence!
Creative Variations of Pumpkin Oreo Balls
Spice it up: Add Pumpkin Spice
Want to elevate your Pumpkin Oreo Balls? A sprinkle of pumpkin spice in the cream cheese mixture adds warmth and flavor that perfectly complements the Oreo base. Just a teaspoon or two will do! This simple twist not only enhances the taste but also gives your treats that classic fall flavor everyone loves.
Fun Colors: Try Different Candy Melts
Who says your Pumpkin Oreo Balls have to be orange? Experimenting with different colors of candy melts can really make your treats pop! Think green for a festive twist or even a purple hue for Halloween. The vibrant colors attract attention and make them perfect for parties or gatherings. Don’t be shy—get creative, and let your Pumpkin Oreo Balls reflect your personality!
These variations not only bring flavor diversity but also invite fun to your baking experience! Try mixing and matching to find your favorite combination.
Cooking Tips and Notes for Pumpkin Oreo Balls
Storage Instructions
To keep your Pumpkin Oreo Balls fresh, store them in an airtight container in the fridge. They can last up to a week, but trust us, they probably won’t last that long! If you want to make them ahead of time, feel free to freeze them for up to three months. Just ensure they are well-wrapped or placed in a freezer-safe container to maintain their delicious flavor.
How to Achieve the Perfect Coating
Achieving that smooth, vibrant coating for your Pumpkin Oreo Balls is key to their appeal. When melting the orange candy melts, do it slowly and in small increments to avoid burning. Consider using a deep bowl so you can fully submerge your balls. If the coating seems thick, adding a teaspoon of coconut oil can help achieve a silky finish. Don't rush—let the excess chocolate drip off before placing them on a lined baking sheet. This will give you a lovely finish that's perfect for any fall gathering!
For more tips, check out this helpful candy coating guide from the experts at Candy.com!
Serving Suggestions for Pumpkin Oreo Balls
Movie Night Treats
Elevate your next movie night with these Pumpkin Oreo Balls! They're the perfect finger food—sweet, creamy, and oh-so-easy to pop in your mouth while binge-watching. Pair them with a warm apple cider or a cozy hot chocolate for the ultimate autumn vibes. Just imagine sinking into your couch with a plate of these delicious bites while your favorite film unfolds; it’s truly a slice of seasonal paradise.
Halloween Party Favorites
What’s a Halloween gathering without some festive sweets? Your friends will love the creativity of these Pumpkin Oreo Balls. Arrange them on a spooky-themed platter alongside other treats, like ghost-shaped cookies or caramel apples. For extra fun, get your guests involved by setting up a decorating station with edible decorations and let them customize their own pumpkin treats. Not only does it taste good, but it also adds an interactive element that everyone loves!
These serving suggestions not only highlight the deliciousness of the Pumpkin Oreo Balls but also enhance the overall experience of any gathering you’re hosting. Whether you're keeping it simple for a cozy night in or going all out for Halloween, these treats make every occasion feel special. Happy celebrating!
Time Breakdown for Pumpkin Oreo Balls
Preparation Time
The delightful journey of making Pumpkin Oreo Balls starts with a quick preparation time of just 15 minutes. This includes crumbling those delicious Oreos and mixing in the cream cheese, ensuring a perfectly sweet and creamy filling.
Chilling Time
Once your balls are formed, they need a little time to chill. Pop them in the fridge for about 25 minutes—this step helps them firm up nicely, so they hold their shape when you dip them in that vibrant orange candy melt.
Total Time
In total, you’ll spend about 40 minutes crafting these festive treats. So gather your ingredients, put on your favorite playlist, and enjoy the process of creating these deliciously fun Pumpkin Oreo Balls. Perfect for parties, they’ll wow your friends and family!
For more pumpkin-themed treats, check out this link for ideas that will spice up your fall gatherings!
Nutritional Facts for Pumpkin Oreo Balls
If you're considering indulging in these delicious Pumpkin Oreo Balls, here's a quick glance at their nutritional profile:
Calories
Each Pumpkin Oreo Ball contains approximately 120 calories, making them a sweet treat that can fit into any dessert lineup without tipping the scales too much.
Fat
These bite-sized delights have about 7 grams of fat per ball, primarily from the cream cheese and candy melts. They deliver that satisfying richness, but moderation is key!
Sugar
With around 12 grams of sugar, Pumpkin Oreo Balls offer a delightful sweetness that pairs perfectly with the seasonal flavors of pumpkin and spice. Just be mindful that their charm lies in their indulgence!
For a deeper dive into nutrition, check out the USDA's dietary guidelines. It's always helpful to balance treats with nutrient-dense foods!
FAQs about Pumpkin Oreo Balls
Can I make these ahead of time?
Absolutely! You can prepare your Pumpkin Oreo Balls up to a week in advance. Just make sure to store them in an airtight container in the fridge. This not only saves time before gatherings but also allows the flavors to meld together even more deliciously.
What are some good substitutes for cream cheese?
If you're looking for alternatives to cream cheese in your Pumpkin Oreo Balls, here are a few options:
- Mascarpone cheese: A richer, buttery flavor that complements the Oreos well.
- Greek yogurt: For a tangy twist and a lighter feel, just make sure to choose the full-fat variety for the best consistency.
- Vegan cream cheese: If you’re aiming for a dairy-free version, this is a fantastic substitute that holds up well.
Are Pumpkin Oreo Balls suitable for vegetarians?
Yes, Pumpkin Oreo Balls are suitable for vegetarians! They primarily consist of Oreos, cream cheese, and candy melts, all of which contain no meat products. Just double-check the specific brands of ingredients you use to confirm they meet your dietary preferences.
Conclusion on Pumpkin Oreo Balls
In conclusion, Pumpkin Oreo Balls are a delightful fusion of flavors that perfectly capture the essence of autumn. They’re easy to make and offer a fun, festive treat for any gathering. Whether serving at a party or indulging solo, your taste buds will thank you! For more sweet inspiration, check out recipes for no-bake desserts or seasonal treats.
Pumpkin Oreo Balls
Equipment
- food processor
- baking sheet
- double boiler
Ingredients
- 36 cookies Oreo cookies finely crumbled
- 8 oz cream cheese softened
- 12 oz orange candy melts
Instructions
- Pulse Oreo cookies in a food processor until finely crumbled.
- Mix in cream cheese until well combined.
- Scoop into 1-inch balls. Refrigerate on a parchment-covered baking sheet for 15 minutes.
- Use a toothpick to score lines into the Oreo balls to resemble pumpkins. Place back into the refrigerator for 10 minutes.
- In the meantime, melt orange candy wafers over a double boiler or in the microwave according to package directions.
- Dip pumpkin oreo balls into melted chocolate, shake off excess, and place back on lined baking sheet. Immediately decorate with a small pretzel stick and leaf icing decoration.
- Refrigerate until ready to serve.


Leave a Reply