
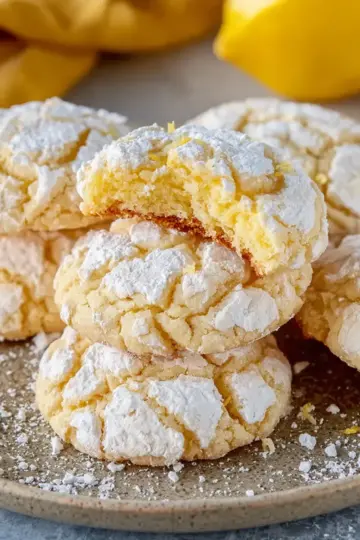
Introduction to Oreo Bats
If you’re searching for a fun and quick treat that impresses without requiring hours in the kitchen, look no further than Oreo Bats. These charming little snacks are not only a delight to create but also to share. Perfect for office parties, casual gatherings, or just a sweet pick-me-up after a hectic day, Oreo Bats offer a touch of whimsy and nostalgia in each bite.
Why Oreo Bats are the Perfect Treat for Young Professionals
In today's fast-paced world, young professionals often juggle long hours and demanding schedules, leaving little time to craft elaborate desserts. This is where Oreo Bats shine—they're incredibly easy to whip up, taking minimal time to prepare. Imagine impressing your colleagues with a delightful treat that evokes childhood memories! Each bat only requires a few simple ingredients: Oreo cookies, mini chocolate chips, and decorative gel, which you might already have on hand.
Not to mention, Oreo Bats are a fantastic conversation starter, sparking smiles and laughter in any setting. Whether paired with hot chocolate or served at a potluck, they add a festive flair without the fuss. Plus, their adorable appearance makes them an Instagram-worthy snack! With their combination of simplicity and creativity, Oreo Bats truly make the perfect treat for young professionals who appreciate fun and tasty desserts. For additional tips on quick dessert ideas, check out this helpful guide.
Ingredients for Oreo Bats
Creating Oreo Bats is a delightful way to bring a touch of fun to your kitchen. With minimal ingredients, you’ll be surprised at how easy it is to whip up these treats. Let’s gather what you need!
-
12 Oreo Cookies: These classic cookies are the star of the show. Choose the original variety for the best taste!
-
24 mini chocolate chips: These tiny chips will serve as the eyes for your bats. If you’re feeling adventurous, consider using colored candy melts for a fun twist.
-
Black or white decorating gel: This will help you create those iconic bat smiles and attach your googly eyes. You can find it in most baking aisles or make your own if you're feeling crafty.
With just these simple items, you're well on your way to creating a spooky yet delicious treat for any occasion! For a full guide on how to craft these adorable dessert creatures, check out the detailed instructions below.
Preparing Oreo Bats
Creating Oreo Bats is a delightful way to bring a bit of festive fun to your kitchen. These charming treats are perfect for Halloween gatherings or simply as a fun family project! Let’s dive into how to make these adorable little critters.
Gather Your Ingredients
Before you embark on this fun kitchen adventure, it’s essential to have all your ingredients on hand. For this adorable recipe, you’ll need:
- 12 Oreo Cookies
- 24 mini chocolate chips
- Black or white decorating gel
Having everything ready makes the process smooth and enjoyable. Plus, who doesn’t love the fun of unwrapping Oreos?
Twist the Oreos and Prepare the Eyes
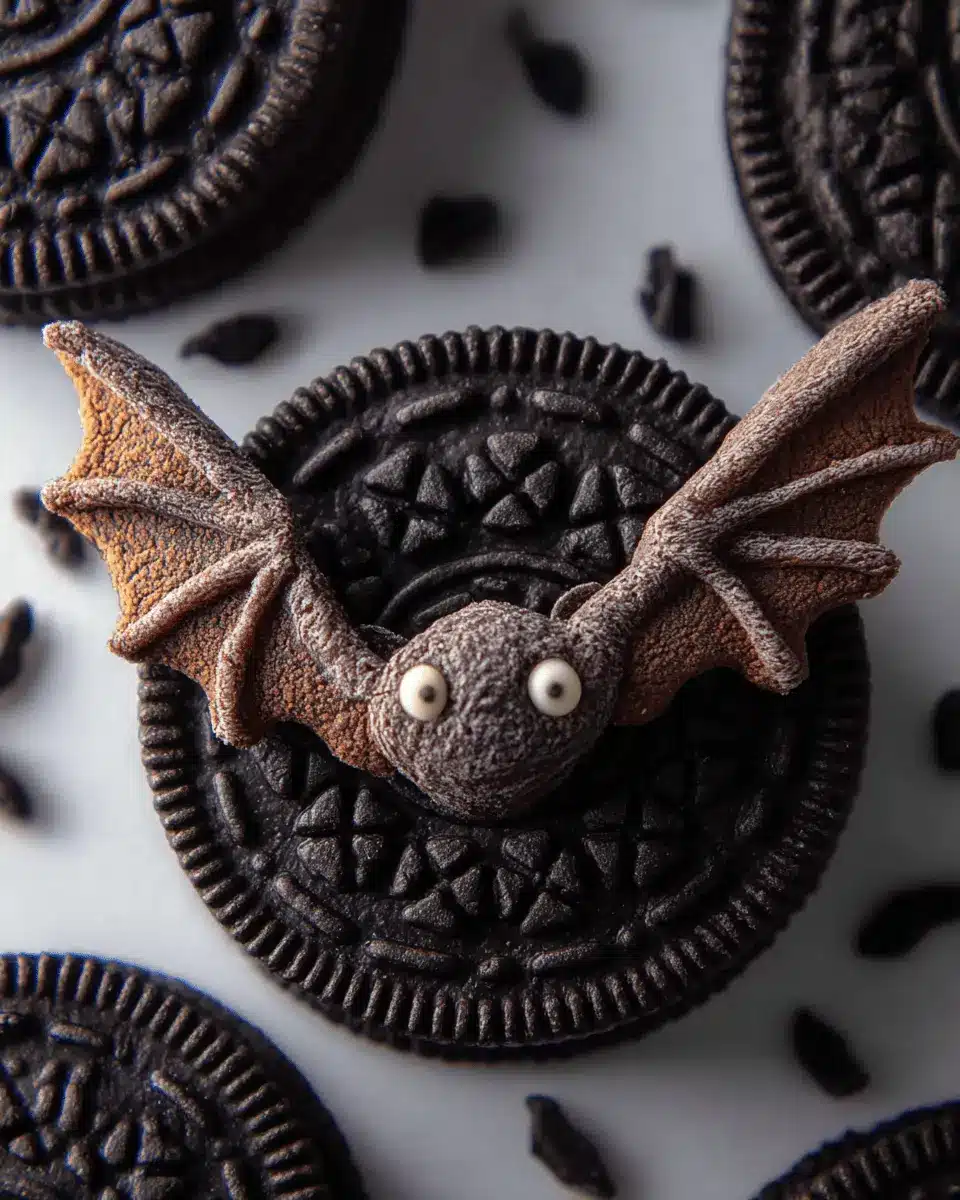
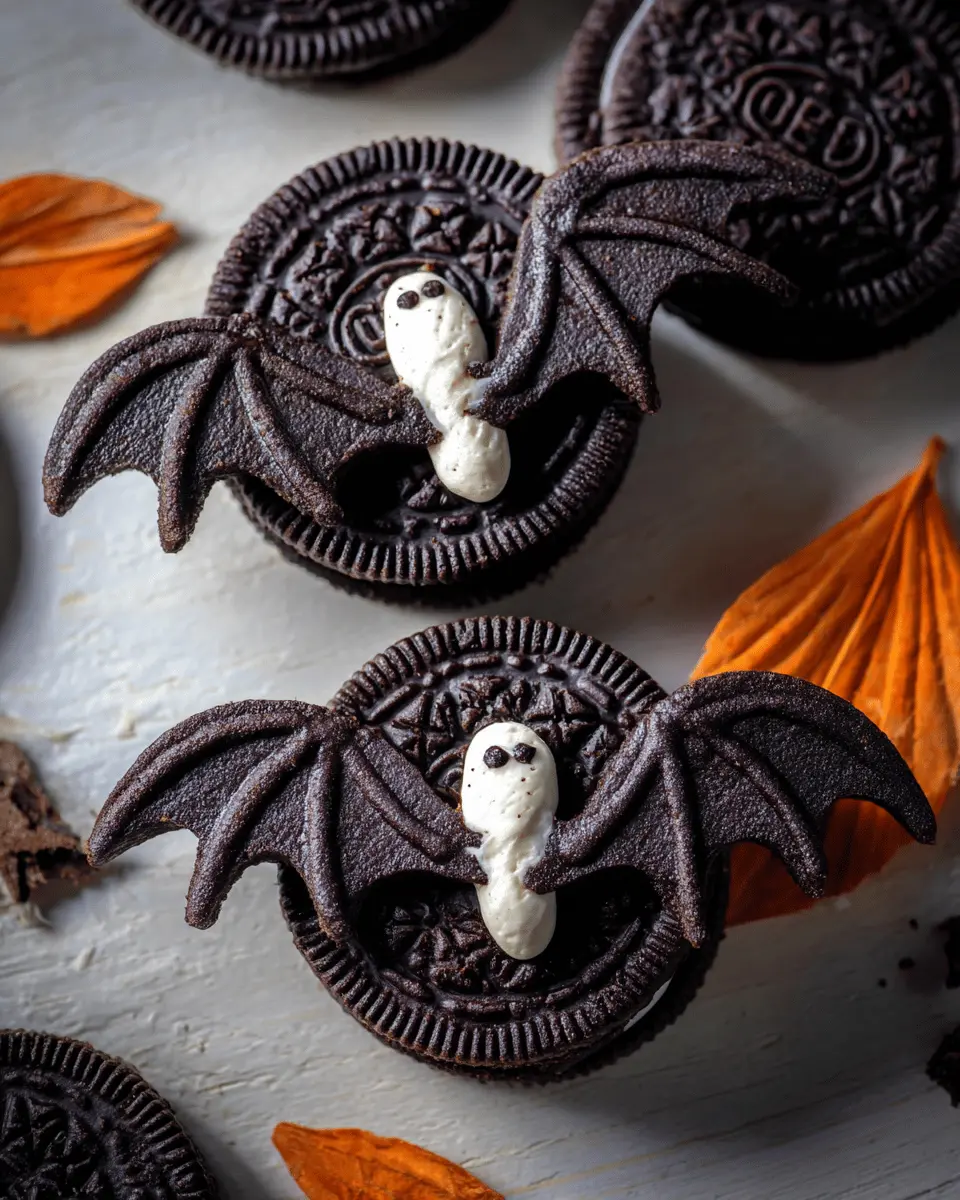
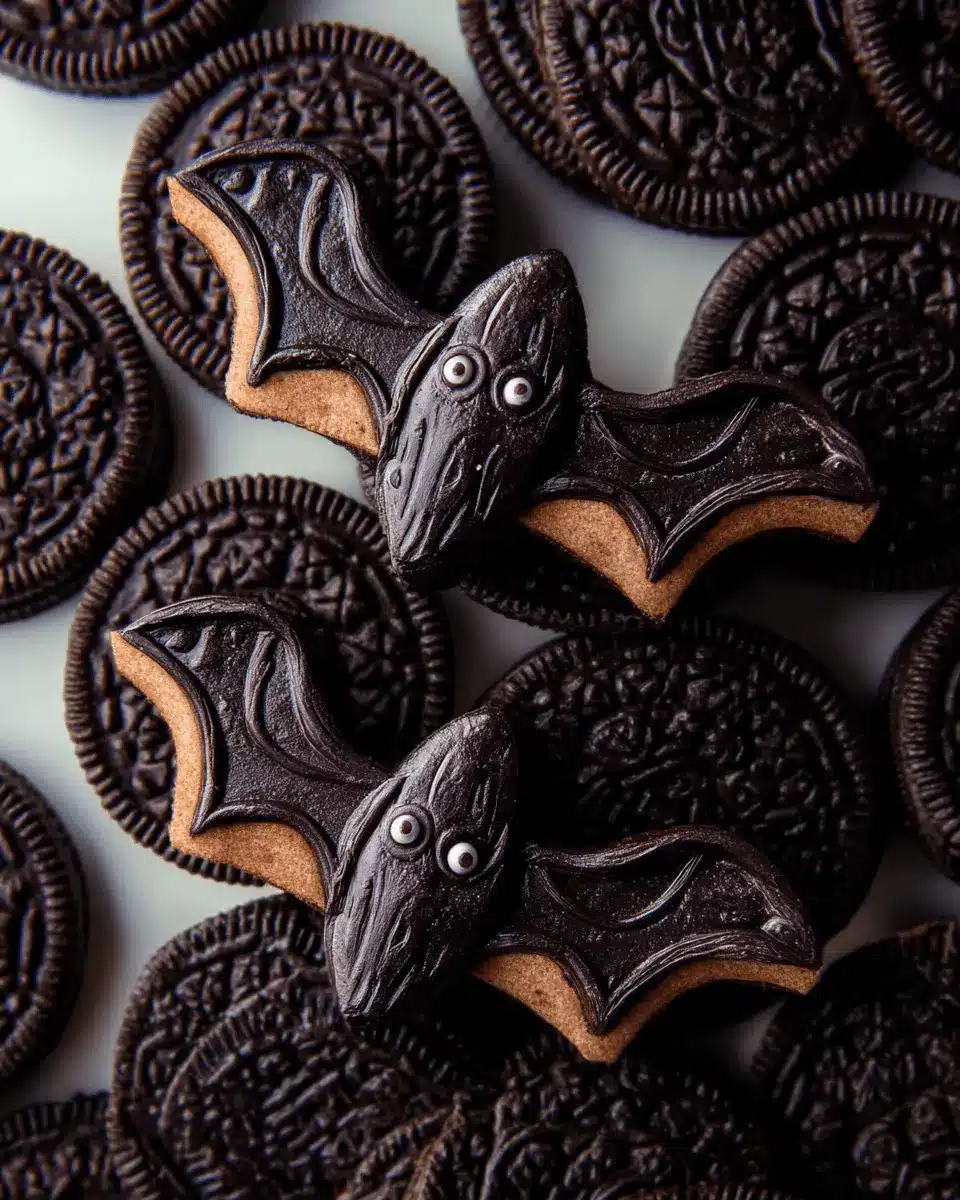
The first step is as easy as it sounds! Start by twisting each Oreo cookie to separate the chocolate wafer halves. One side will usually have more cream than the other. Using a butter knife, carefully scrape half of the cream off from one half of each cookie. You can roll this cream into two small balls for the eyes—flatten them gently with your fingers to create the perfect canvas for your Google eyes. Finish this part by placing a mini chocolate chip in the center of these white rounds. Voilà! You’ve got your eyes ready to go.
Create Bat Wings
Now comes the fun part: assembling your bat wings! Take the side of the cookie that has no cream and carefully break it in half. It’s okay if it doesn’t break perfectly—just try to get it as even as possible. If the edges are jagged, a little scraping with the butter knife can help even them out. These wing pieces will give your Oreo Bats their signature shape.
Assemble Your Oreo Bats
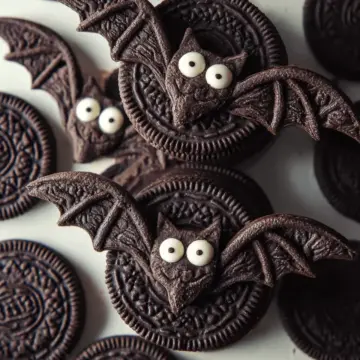
With your components ready, it’s time for assembly! Take the chocolate cookie without cream as the body of your bat and apply black decorating gel to mimic a smile. Place the Google eyes you prepared earlier centrally on the body. With a bit of the leftover cream acting as glue, gently press the broken cookie pieces onto either side, forming the wings. Keep them slightly angled upwards to catch that bat feel!
Decorate and Serve
Finish off your Oreo Bats with a touch more decorating gel—paint on a few extra details if you’d like! Once they’re all set, arrange your bats on a platter, and you’re ready to serve. Watching your friends and family enjoy these whimsical treats will surely add joy and laughter to your gathering.
So gather your loved ones and let the bat-making begin—it’s a spooky good time! If you want a deeper dive into baking techniques or more festive ideas, check out resources like Martha Stewart for inspiration.
Variations on Oreo Bats
Using Different Cookie Types
While traditional Oreo Bats call for classic Oreo cookies, don’t hesitate to experiment! You can swap them for Golden Oreos for a lighter flavor or even use gluten-free chocolate sandwich cookies if dietary preferences demand it. Each variation brings a unique taste twist that can pleasantly surprise your guests.
Flavorful Fillings and Add-Ins
Why stop at the basic recipe? Enhance your Oreo Bats by incorporating flavored fillings or add-ins. Consider using peanut butter or cream cheese frosting in place of the original cream for a rich, decadent spin. Chopped nuts or sprinkles can also lend interesting textures and flavors. The sky's the limit—let your creativity guide you!
Baking notes for Oreo Bats
Creating delightful Oreo Bats can be a fun and rewarding experience, especially when you follow these handy tips!
-
Wing Tips: For even bat wings, cradle the cookie in your hands as you attempt to snap it. This simple trick usually ensures a more symmetrical break.
-
Creamy Glue: Make sure to leave some cream on the underside of the unbroken cookie; this acts as a glue to hold the wings in place.
-
Keep it Sticky: If you prefer using store-bought candy googly eyes, remember that decorating gel works wonders for making them stick.
These little adjustments can help you create perfect Oreo Bats that are not only cute but also a hit at parties! Happy baking!
Serving Suggestions for Oreo Bats
When it comes to serving your delightful Oreo Bats, presentation matters! Here are a few fun suggestions to elevate your dessert game:
- Spooky Plate: Arrange the Oreo Bats on a black platter surrounded by faux spider webs for a Halloween-themed treat.
- Pair with Snacks: Consider serving them alongside sweet or savory snacks like popcorn or turkey bacon bites. The contrast will keep your guests reaching for more!
- Drink Ideas: Complement your bats with a chilled glass of milk or a fun fruity punch. These drinks not only pair well but also add a festive touch.
Feel free to get creative with your presentation; it's all about having fun!
Tips for Making Perfect Oreo Bats
Creating Oreo Bats can be a fun and easy activity! Here are some tips to ensure your bats turn out delightful:
-
Wing Perfection: To achieve even bat wings, center your hands around the cookie while breaking it. This technique often yields a better break, perfect for resembling bat wings.
-
Cream Utilization: Make sure to leave enough cream on the underside of each cookie, as this will help securely attach the wings.
-
Adhesion Aid: If you decide to use store-bought candy googly eyes, a dab of decorating gel on the back can help them stick better.
By following these simple tips, your Oreo Bats will not only look adorable but taste delicious too!
Time details for Oreo Bats
Preparation time
Getting started on your Oreo Bats is a breeze! You'll need about 10 minutes to gather all your ingredients and prepare the cookies for their spooky transformation.
Assembly time
Once you’ve laid the groundwork, piecing everything together should only take an additional 10 minutes. Before you know it, you’ll have a platter of adorable foodie bats ready to take flight!
Total time
In total, you’re looking at 20 minutes from start to finish for these delightful Oreo Bats. Perfect for a quick treat before your gathering or as a fun activity with the kids! Whether it's Halloween or any day that could use a little whimsy, these bats will surely bring a smile.
Nutritional Information for Oreo Bats
When you're indulging in these delightful Oreo Bats, knowing their nutritional value can help you enjoy with a clearer conscience! Each bat packs about 66 calories, bringing a fun treat to your Halloween festivities without derailing your diet.
Calories:
- 66 calories
Protein:
- 1 gram
Sodium:
- 57 mg
These tasty creations are not just cute—they're surprisingly manageable on the nutritional scale! For a well-rounded diet, don't forget to balance the sweetness of these little bats with nutrient-dense foods throughout your day. Curious to learn more about how to sneak in nutrition while you indulge? Check out this resource from the Mayo Clinic for helpful tips!
FAQs about Oreo Bats
How can I make Oreo Bats healthier?
Looking to lighten up your Oreo Bats? Consider using reduced-fat Oreo cookies, or even try substituting with dark chocolate Oreos for a richer flavor. You can also swap out the decorating gel for a homemade yogurt-based icing or simply skip it! Adding some colorful sprinkles can also make them fun without too much added sugar.
Can I make Oreo Bats ahead of time?
Absolutely! You can prepare the components of your Oreo Bats a day in advance. Store the cookie parts and assembled eyes in an airtight container in the fridge. Just be sure to assemble them on the day you plan to serve, as they taste best fresh.
What can I use instead of regular Oreos?
If you're looking to explore, try using gluten-free Oreos or even sandwich cookies from other brands that capture the same taste. Vanilla sandwich cookies can also make an interesting twist for a lighter version. They may not have that classic chocolate flavor, but they can still be a fun treat!
Conclusion on Oreo Bats
In summary, Oreo Bats are a delightful treat perfect for Halloween or any festive occasion. Not only are they fun to make, but they also add a whimsical touch to any gathering. So gather your ingredients and create these adorable snacks with family and friends. Enjoy!
Oreo Bats: Easy Halloween Treats Your Family Will Love
Equipment
- Butter Knife
Ingredients
- 12 cookies Oreo Cookies
- 24 pieces mini chocolate chips
- black or white decorating gel
Instructions
- Twist the cookie so that the two chocolate cookies are separated. The cream will usually stick mostly to one side.
- With a butter knife, scrape half of the cream off of the cookie. Divide that cream into two, and roll into two small balls. Gently flatten with your finger. These two rounds will become the white of the google eyes.
- Place a mini chocolate chip in the center of the two white rounds. Now you have two google eyes!
- With the chocolate cookie that doesn't have any cream, carefully break in half. This can be a bit tricky to get the perfect break. If it's not quite the perfect break halfway down use the butter knife to scrape a little cookie off the center to try to even them out.
- With the decorating gel draw a smile and two dots where you will place the eyes.
- Press the google eyes on the center of the unbroken cookie. Using the cream on the other side of the cookie as glue press the broken cookie on either side to create the wings, rounded end up.


Leave a Reply