
Introduction to No-Bake Tiramisu Cheesecake
Imagine diving into a creamy, decadent dessert that beautifully combines the classic flavors of tiramisu with the velvety texture of cheesecake. That’s exactly what a no-bake tiramisu cheesecake offers! This delightful treat is perfect for coffee lovers and will impress at any gathering without the need for an oven.
Why Choose a No-Bake Cheesecake?
Opting for a no-bake cheesecake not only saves you time but also requires minimal cooking skills. Here are a few reasons why it’s a fantastic choice:
-
Quick and Easy: With just a few steps involved, you can create an indulgent dessert without spending hours in the kitchen. All you need is some mixing and chilling!
-
No Oven Needed: Perfect for hot summer days when you want dessert but don’t want to heat your kitchen. Simply whip, layer, and chill.
-
Customizable: This recipe serves as a wonderful base, allowing you to play around with flavors, from classic espresso to vibrant fruit options.
If you’re looking for a deliciously simple dessert to wow friends and family, this no-bake tiramisu cheesecake is the answer. Plus, you can find tips on enhancing its flavors at sources like The Spruce Eats and Serious Eats. Get ready to indulge in a dessert experience like no other!
Ingredients for No-Bake Tiramisu Cheesecake
Essential ingredients for a rich flavor
To create a truly irresistible no-bake tiramisu cheesecake, you’ll need just a handful of high-quality ingredients. Here’s what you should have on hand:
- Mascarpone Cheese: This creamy Italian cheese adds that distinct richness.
- Cream Cheese: Softened for easy blending, it provides a wonderful texture.
- Instant Espresso Coffee Powder: The star player for that bold coffee flavor.
- Coffee Liqueur: Enhances the coffee notes, but you can replace it with a strong coffee if you prefer.
- Ladyfingers: These light, airy cookies soak up the delicious coffee mixture beautifully.
- Whipping Cream: Lightens the filling for that luxurious texture.
- Powdered Sugar: Adds the sweetness that balances the coffee's bitterness.
Optional add-ins for personalization
Personalizing your no-bake tiramisu cheesecake can be fun. Consider these options:
- Nuts: Toasted sliced almonds for a delightful crunch.
- Cocoa Powder: A dusting on top for extra richness.
- Chocolate Covered Espresso Beans: For a sweet, crunchy garnish.
Feel free to experiment! Mix your favorite flavors into this easy recipe to suit your taste buds. Looking for tips on choosing the perfect mascarpone? Check out this guide for more insights!
Preparing No-Bake Tiramisu Cheesecake
Creating a no-bake tiramisu cheesecake is an exciting culinary journey that brings a delightful twist to a classic dessert. With its rich flavors and creamy texture, this cheesecake is perfect for any gathering. Let’s dive into the steps to prepare this luscious treat!
Gather and Prepare the Ingredients
Before you start, it’s essential to gather all your ingredients. Here’s what you’ll need:
- 1 cup boiling water
- 2 tablespoons instant espresso coffee powder
- 6 tablespoons coffee liqueur alternatives (like coffee extract or a non-alcoholic coffee syrup)
- 2 (8-ounce packages) mascarpone cheese, softened
- 2 (8-ounce packages) cream cheese, softened
- 1 cup powdered sugar
- ¼ teaspoon salt
- 1 tablespoon vanilla extract
- 1 (7-ounce) package crisp Italian ladyfingers
- 1 cup sliced almonds, toasted
- 2 tablespoons white sugar
- ⅓ cup butter, melted
- 2 cups whipping cream
- Unsweetened cocoa powder for dusting
- Optional: 12 chocolate-covered espresso beans for garnishing
Make sure everything is at room temperature for an easy mixing experience.
Create the Coffee Soaking Mixture
In a small bowl, pour hot water, and stir in 1 tablespoon of instant espresso coffee powder until completely dissolved. Allow this mixture to cool for about 30 minutes, then add in your coffee liqueur substitute. This aromatic soaking mixture will infuse your ladyfingers with an irresistible coffee flavor.
Mix the Filling Ingredients
While you're waiting for the coffee mixture to cool, grab a large mixing bowl and beat your softened mascarpone and cream cheese with an electric mixer on medium speed. Mix until smooth and creamy—this is where the magic starts to happen! Gradually add in the powdered sugar, the remaining espresso powder, and salt. Once this is well blended, stir in the vanilla extract and your coffee liqueur alternative. Cover and chill this creamy filling in the refrigerator for about 30 minutes.
Make the Crust from Ladyfingers and Almonds
For a crunchy crust, combine 12 ladyfingers, toasted almonds, and white sugar in a food processor. Pulse everything until it resembles fine crumbs. Transfer the mixture to a bowl and mix in melted butter until everything is moistened. Press this mixture evenly into the bottom of a 9-inch springform pan, then pop it in the freezer for about 15 minutes to set.
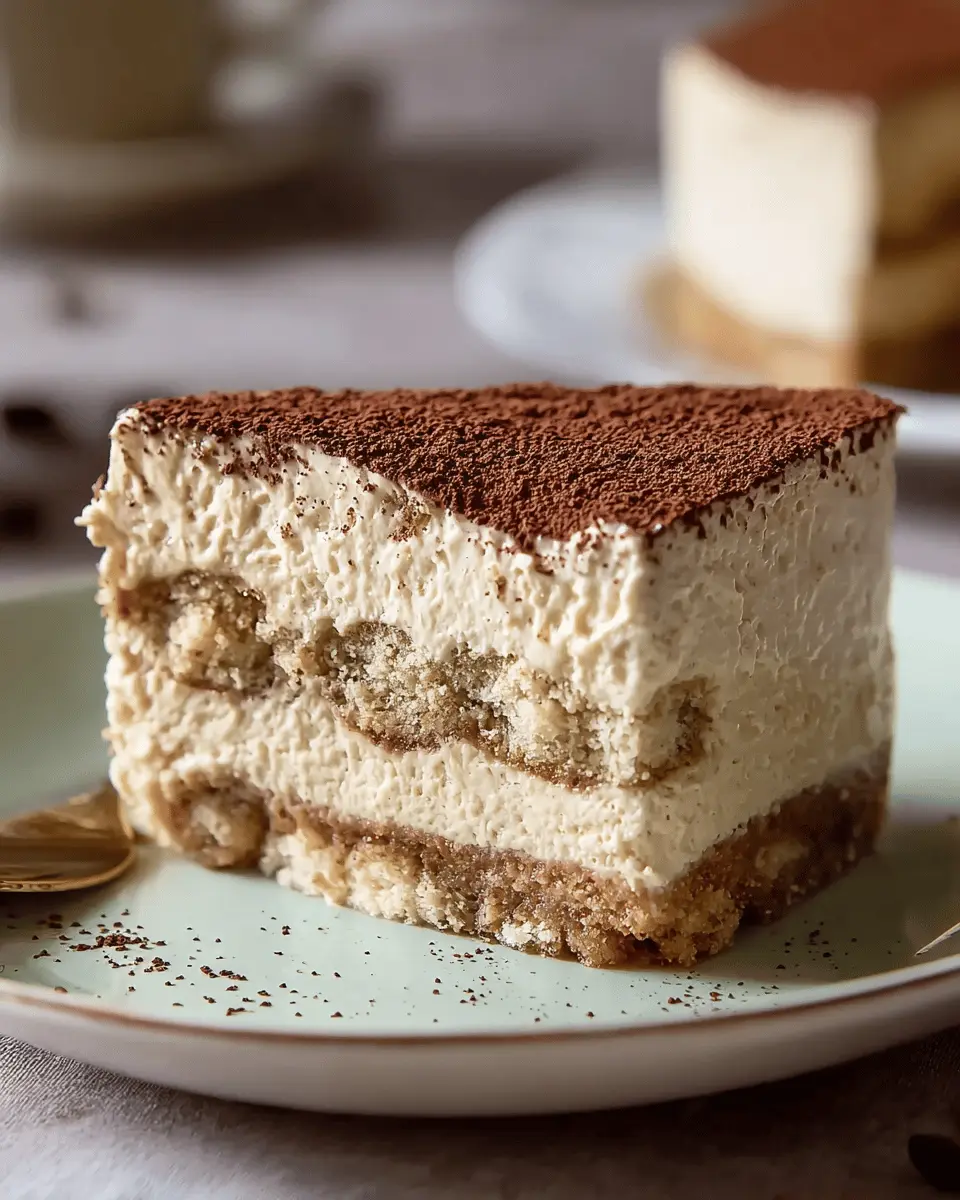
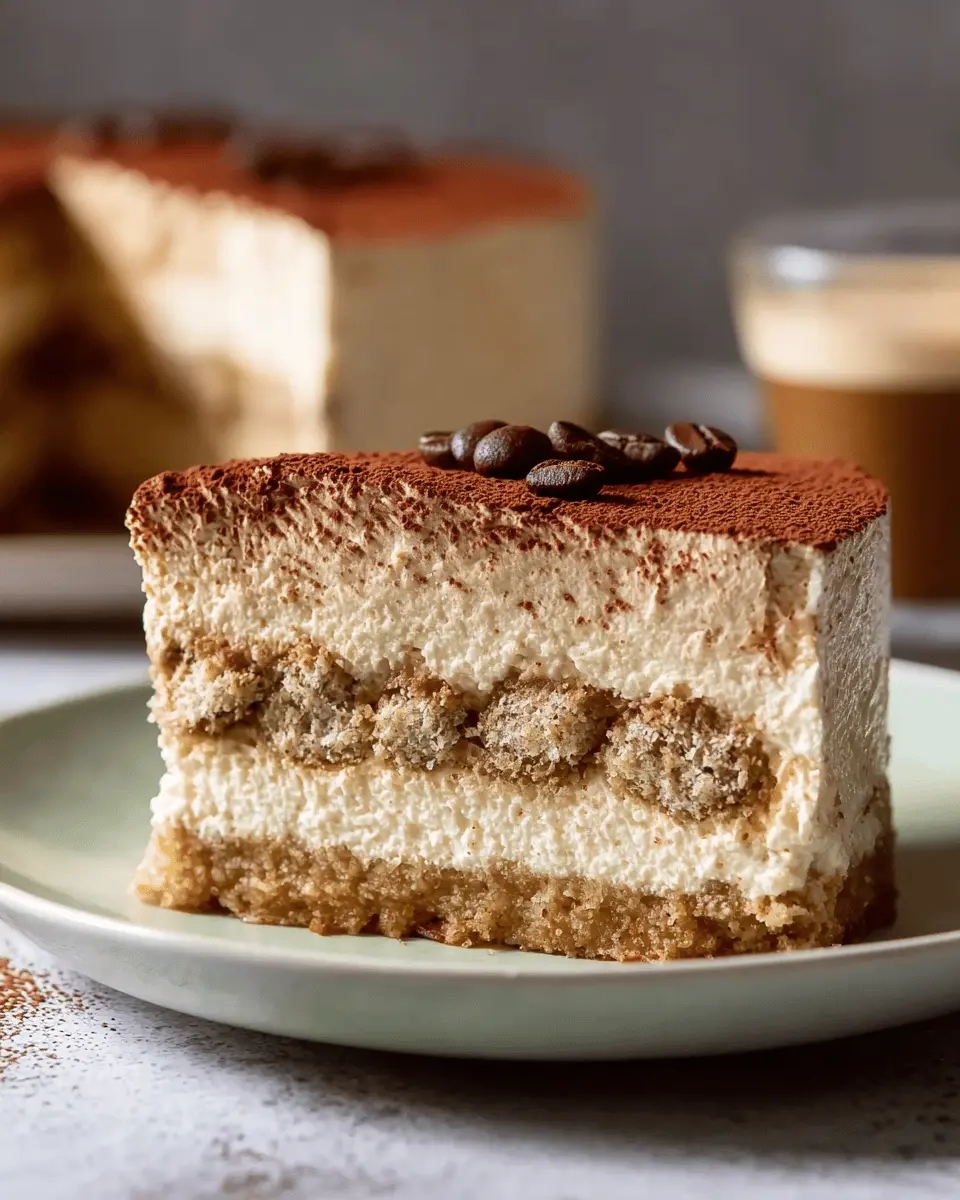
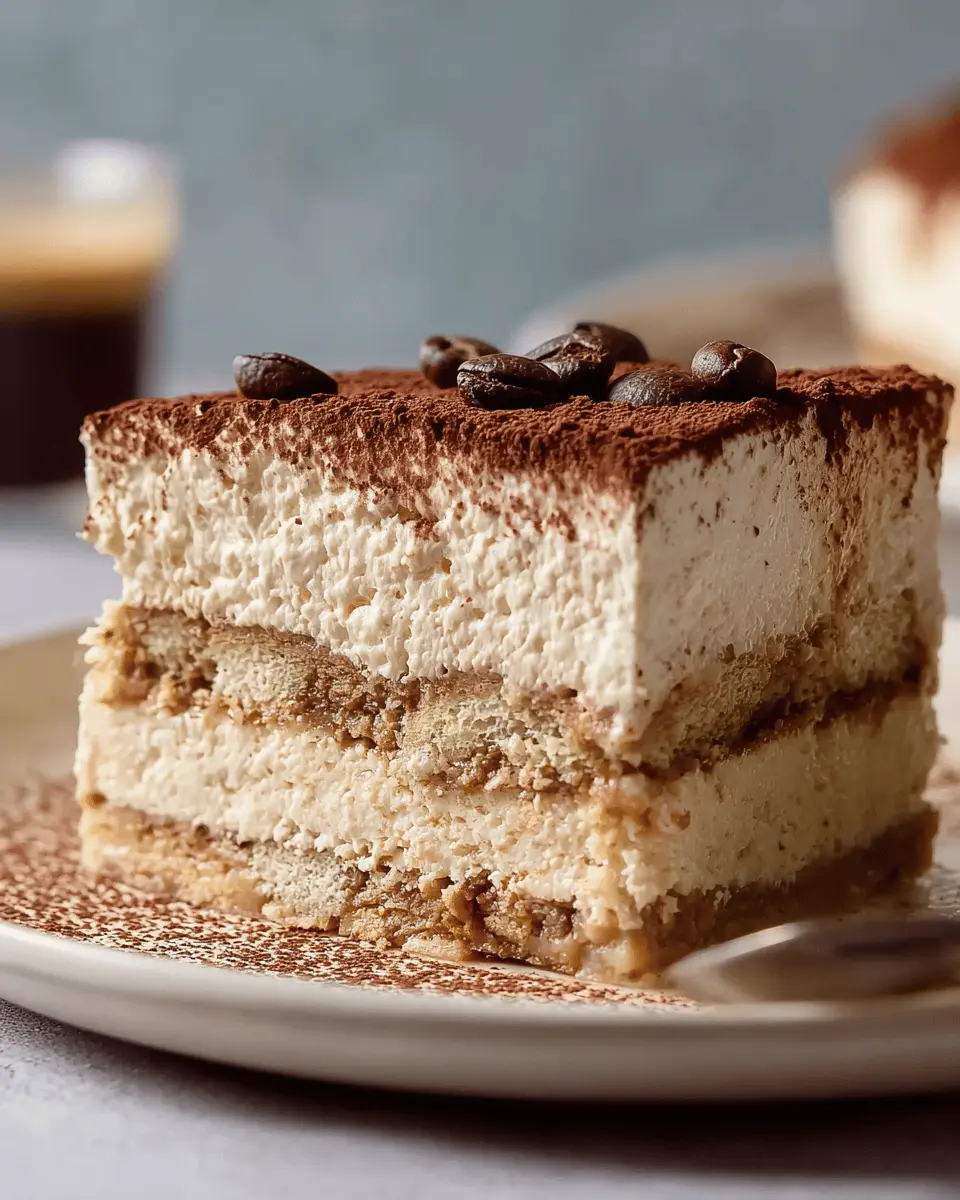
Assemble the Cheesecake Layers
After the crust has set, the fun part begins! For a no-bake tiramisu cheesecake, start by beating the whipping cream until it forms stiff peaks. Take a fourth of this whipped cream and stir it into the filling to lighten it. Gently fold in the rest of the whipped cream, being careful not to deflate it. Spread half of this delightful filling over your crust, then dip the remaining ladyfingers in the coffee mixture. Layer these on top, breaking them as needed. Finish by spreading the remaining filling over the ladyfingers.
Chill and Let Flavors Meld
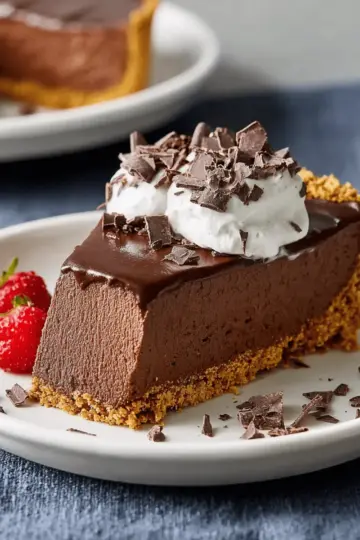
Once assembled, cover your cheesecake and let it chill in the refrigerator for at least 6 hours or overnight if possible. This allows all those flavors to meld beautifully. When you’re ready to serve, dust cocoa powder generously over the top and garnish each slice with a chocolate-covered espresso bean.
And voilà! You have a stunning no-bake tiramisu cheesecake ready to impress your friends and family. Enjoy!
Variations on No-Bake Tiramisu Cheesecake
Tiramisu Cheesecake with Fruit Layers
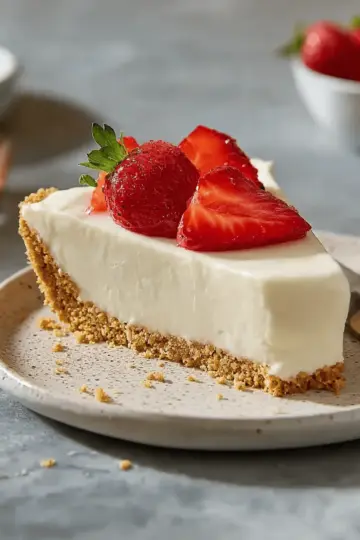
For a refreshing twist on your classic no-bake tiramisu cheesecake, consider adding fruit layers! Think strawberries, raspberries, or mango slices tucked between the layers of creamy filling and delicate ladyfingers. This addition not only brightens up the dessert visually but also complements the richness of the mascarpone and cream cheese. Slicing into the cheesecake will reveal vibrant colors and flavors, making it perfect for gatherings or occasions.
Vegan-Friendly Tiramisu Cheesecake
If you’re looking for a plant-based alternative, creating a vegan-friendly version of this no-bake tiramisu cheesecake is simpler than you think! Substitute the mascarpone and cream cheese with coconut cream and soaked cashews blended into a creamy consistency. For sweetness, a little maple syrup or agave can replace powdered sugar. Use vegan ladyfingers or gluten-free options if desired. This version is not just kind to the planet but also deliciously satisfying!
For more innovative recipes, don't overlook options on popular food sites like Minimalist Baker or Forks Over Knives for plant-based delights!
Baking Notes for No-Bake Tiramisu Cheesecake
Tips for Achieving the Perfect Texture
Creating a velvety no-bake tiramisu cheesecake is all about texture. Here are some helpful tips:
-
Use Softened Cheeses: Ensure your mascarpone and cream cheese are at room temperature before mixing to avoid lumps. This helps the filling become creamy and smooth.
-
Whip the Cream Properly: Beat the whipping cream until it forms stiff peaks but don’t overmix, or it will turn grainy. Perfectly whipped cream adds a delightful lightness to your cheesecake.
-
Chill Time is Crucial: Allow your cheesecake to chill for at least six hours—overnight is even better. This helps all the flavors meld and sets the cheesecake properly.
For more expert tips on achieving perfect cheesecake results, check out this guide. Enjoy your baking adventure!
Serving suggestions for No-Bake Tiramisu Cheesecake
Ideal accompaniments for your cheesecake
Enhance your no-bake tiramisu cheesecake experience by serving it with a delightful assortment of accompaniments. Consider pairing it with:
-
Fresh Berries: Raspberries or strawberries add a vibrant contrast and a hint of acidity that balances the richness of the cheesecake.
-
Espresso: A shot of warm espresso complements the coffee flavors within the cheesecake, creating a harmonious blend for coffee lovers.
-
Whipped Cream: A dollop of lightly sweetened whipped cream can elevate the dessert and add an airy texture.
-
Chocolate Shavings: Delicate curls of dark chocolate on top provide a touch of elegance and indulgence.
Each addition not only enhances the visual appeal but also enriches the overall flavor profile. How do you like to enjoy your cheesecake?
Tips for Making Perfect No-Bake Tiramisu Cheesecake
Common Pitfalls to Avoid
Creating a no-bake tiramisu cheesecake might seem straightforward, but a few slip-ups can derail your dessert dreams. Here are some common pitfalls to watch out for:
-
Over-soaking Ladyfingers: Dipping ladyfingers in the coffee mixture too long can make them soggy. Just a quick dip—about one second—is perfect for that balance of flavor without losing structural integrity.
-
Temperature Matters: Ensure that your mascarpone and cream cheese are at room temperature. Cold ingredients may end up lumpy rather than smooth.
-
Time and Patience: Chilling is key! Don’t rush the chilling time; letting the cheesecake sit overnight enhances flavor and texture.
For more tips, consider checking out resources like The Kitchn for more dessert-making advice!
Time details for No-Bake Tiramisu Cheesecake
Preparation time
Get your no-bake tiramisu cheesecake started with just 20 minutes of prep work. This is the perfect time to set the mood with some coffee or your favorite playlist!
Total chilling time
Once you've assembled your decadent layers, it’s crucial to chill the cheesecake for at least 6 hours. This helps to firm up the cheesecake, allowing those delicious flavors to meld beautifully. Don’t rush it—this is the secret to achieving that creamy texture!
For more tips on creating the perfect cheesecake, check out this cheesecake baking guide.
Nutritional Information for No-Bake Tiramisu Cheesecake
Calories per serving
Each serving of this decadent no-bake tiramisu cheesecake packs about 651 calories. While it’s a generous treat, it’s most suitable for those special occasions when you want to indulge.
Key nutrients to consider
Beyond the deliciousness, this cheesecake offers:
- Total Fat: 56g (of which 31g is saturated fat)
- Cholesterol: 165mg
- Sodium: 392mg
- Total Carbohydrates: 27g
- Dietary Fiber: 2g
- Protein: 8g
For a richer understanding of nutrition, you might want to explore resources like the USDA FoodData Central for detailed insights on dietary needs. With its creamy textures and coffee flavors, this no-bake tiramisu cheesecake is not just a dessert; it's a delightful balance of flavors and nutrition on your special table. Enjoy it guilt-free!
FAQs about No-Bake Tiramisu Cheesecake
Can I make this cheesecake ahead of time?
Absolutely! The no-bake tiramisu cheesecake is perfect for prepping a day or two in advance. In fact, it often tastes even better after chilling in the refrigerator overnight, allowing the flavors to meld together beautifully. Just make sure to keep it covered to lock in that creamy goodness.
What can I substitute for mascarpone cheese?
If mascarpone isn't available, you can create a substitute by mixing equal parts cream cheese and heavy cream. This combination will achieve a similar creaminess, perfect for your no-bake tiramisu cheesecake. Alternatively, you could try ricotta cheese blended with a bit of cream for a lighter option.
How should I store leftovers?
Store any leftovers in an airtight container in the refrigerator. It should keep well for about 3 to 4 days. Be sure to dust some cocoa powder on top before serving again, as this adds a delightful touch to every slice. Enjoy your delicious dessert!
Conclusion on No-Bake Tiramisu Cheesecake
In conclusion, this no-bake tiramisu cheesecake is a delightful treat that combines rich flavors with an effortless preparation method. Perfect for gatherings or a cozy night in, it’s sure to impress. So gather your ingredients, pour that coffee, and enjoy every luscious bite of this indulgent dessert!
No-Bake Tiramisu Cheesecake
Equipment
- Electric Mixer
- food processor
- 9-inch springform pan
Ingredients
Coffee Mixture
- 1 cup boiling water
- 2 tablespoons instant espresso coffee powder divided
- 6 tablespoons coffee liqueur such as Mr. Black, divided
Filling
- 2 8-ounce packages mascarpone cheese softened
- 2 8-ounce packages cream cheese softened
- 1 cup powdered sugar
- ¼ teaspoon salt
- 1 tablespoon vanilla extract
Ladyfinger Crust
- 1 7-ounce package crisp Italian ladyfingers divided
- 1 cup sliced almonds toasted
- 2 tablespoons white sugar
- ⅓ cup butter melted
Topping
- unsweetened cocoa powder for dusting, as needed
- 12 chocolate covered espresso beans for garnish
- 2 cups whipping cream
Instructions
Preparation
- Gather all ingredients.
- Pour boiling water into a small bowl and stir in 1 tablespoon instant espresso coffee powder until dissolved. Set aside and allow to cool to room temperature, 30 minutes. When cool, add 2 tablespoons coffee liqueur.
- Meanwhile, for the filling beat mascarpone and cream cheese in a large bowl with an electric mixer on medium until smooth. Beat in powdered sugar, remaining 1 tablespoon instant espresso coffee powder, and salt until well combined. Beat in vanilla and remaining 4 tablespoons coffee liqueur. Cover bowl, and chill in the refrigerator for 30 minutes.
- For crust, combine 12 ladyfingers, almonds, and white sugar in a food processor. Pulse to fine crumbs. Remove mixture from food processor. Stir in butter until mixture is moistened.
- Pat crumb mixture evenly into the bottom of a 9-inch springform pan. Place pan in the freezer until set, 15 minutes.
- Beat cream in a large bowl with an electric mixer until it forms stiff peaks.
- Stir one fourth of the whipped cream into the filling mixture to lighten. Fold remaining whipped cream into the filling mixture until combined.
- Spread half of the filling over the crust.
- Dip remaining 12 ladyfingers, one at a time, into coffee mixture to coat, about 1 second. Place atop the filling, breaking to fit as needed. Spread remaining filling evenly over the ladyfingers.
- Cover and chill in the refrigerator 6 hours to overnight.
- Dust cocoa powder generously over top of the cheesecake. Loosen sides of pan with a thin spatula. Remove sides of pan.
- Garnish each slice with a chocolate covered espresso bean.
Leave a Reply