
Introduction to Homemade Ciabatta Bread
What is Ciabatta Bread and Why Should You Make It at Home?
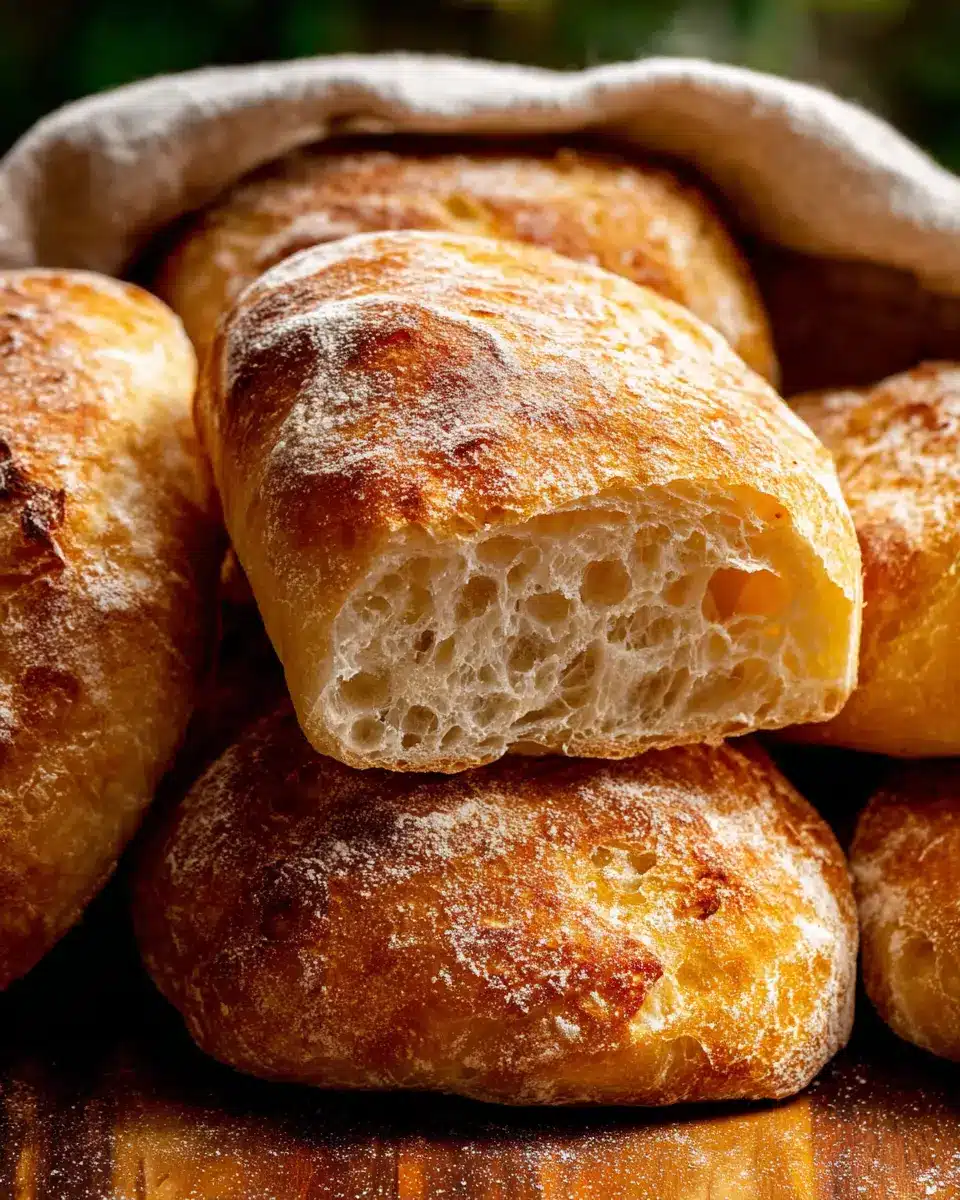
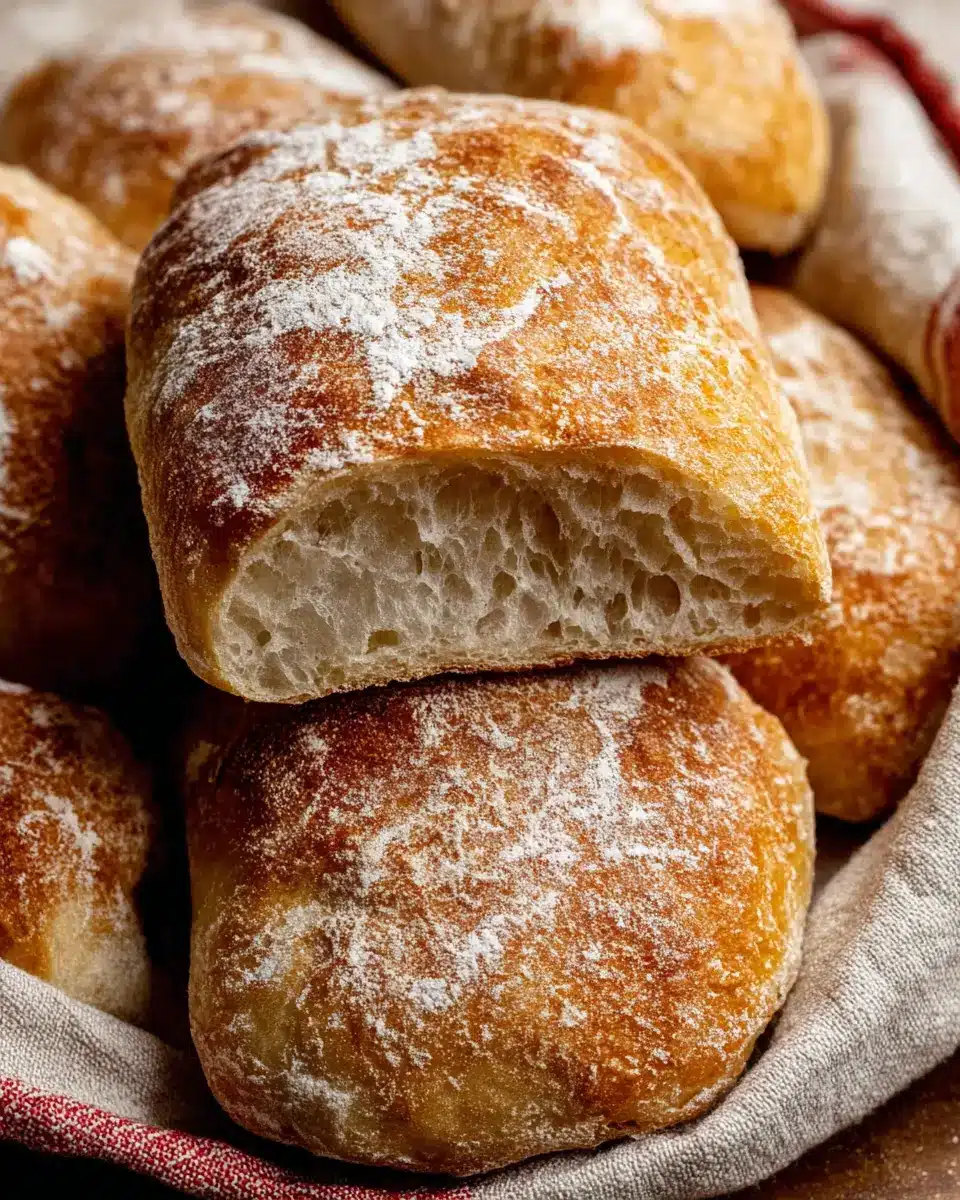
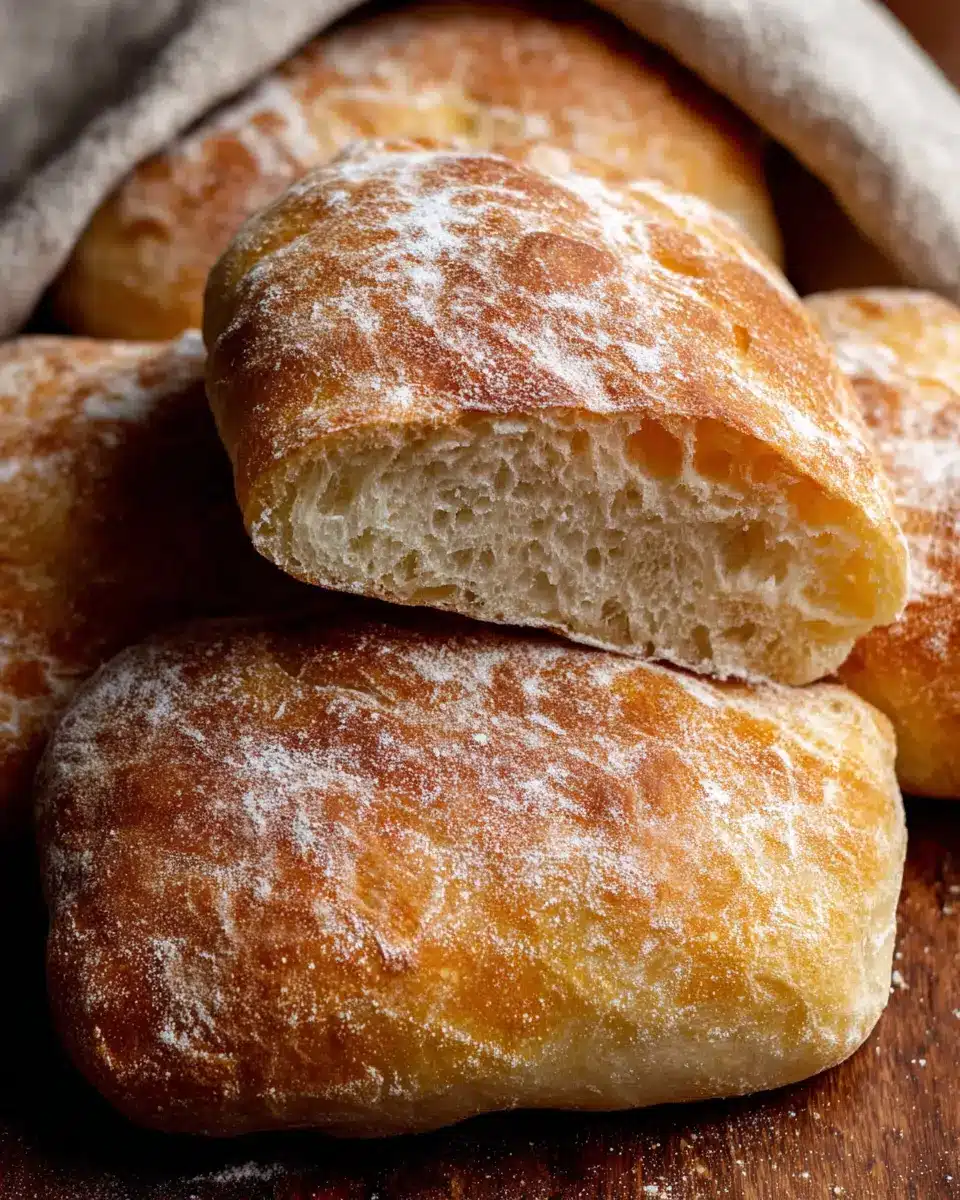
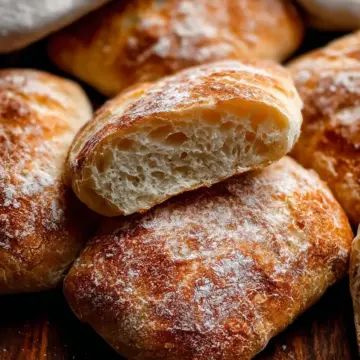
Ciabatta bread is a classic Italian loaf known for its rustic appearance and airy, open crumb. The delightful combination of a crusty exterior and a soft, chewy interior makes it a versatile option for sandwiches, toasts, or just enjoying with a drizzle of olive oil. But what makes homemade ciabatta bread truly special?
Making ciabatta at home allows you to experience the magic of bread-making firsthand. You can control the ingredients, ensuring freshness and quality. Plus, there’s something incredibly rewarding about transforming simple ingredients into a beautiful loaf! As you embark on this journey, you'll discover the simple joy of kneading dough, watching it rise, and savoring the warmth of freshly baked bread wafting through your kitchen.
Many bakers swear by the technique of using a preferment, or biga, which enhances the flavor and texture. It’s an excellent way to develop the complex flavors that define traditional ciabatta. Whether you're an experienced baker or just starting, this recipe is approachable and fun. So why not roll up your sleeves and immerse yourself in the art of baking bread? It’s an adventure you won’t regret!
Ready to dive into the steps for crafting your own homemade ciabatta bread? Let's get started!
Ingredients for Homemade Ciabatta Bread
Biga/Preferment
Creating the biga or preferment is a crucial step in crafting your homemade ciabatta bread, as it enhances the flavor and texture. You’ll need:
- 1 cup (130g) bread flour (I highly recommend using bread flour for the best results)
- ⅛ teaspoon active-dry or instant yeast
- ½ cup (120g/ml) room-temperature water (around 70°F or 21°C)
Mix these ingredients together in a bowl, cover it tightly, and let it sit for a good 8 to 24 hours. This waiting period allows for that rich, complex flavor to develop!
Ciabatta Rolls
Once you have your biga, it's time to come together with the remaining dough ingredients to create your ciabatta rolls:
- 1 teaspoon (3g) active-dry or instant yeast
- 1 cup (240g/ml) warm water (about 100–110°F, or 38°–43°C)
- 2 and ½ cups (325g) bread flour
- 1 and ½ teaspoons (8g) table salt
- Olive oil for coating hands and spatula
These ingredients will come together to create the perfect mix for light and airy ciabatta. Isn't it amazing how simple components can yield such delicious results?
Preparing Homemade Ciabatta Bread
Making homemade ciabatta bread is an exciting journey that can elevate your baking skills and add the heavenly aroma of fresh bread to your home. This two-day process, involving a biga and some gentle stretching techniques, will be a rewarding experience.
Day 1: Making the Biga/Preferment
On the first day, you’ll prepare the biga, a preferment that helps enhance the flavor and texture of your ciabatta. In a large mixing bowl, whisk together 1 cup of bread flour and ⅛ teaspoon of yeast. Add in ½ cup of room-temperature water and stir until combined. Cover the bowl tightly with plastic wrap and let it rest at room temperature for 8 to 24 hours. You’ll notice its distinct aroma when you come back—this means you’re on the right track!
Day 2: Mixing the Dough
Once the biga is ready, it’s time to mix your dough. In a separate bowl, whisk together 1 teaspoon of yeast and 1 cup of warm water (around 100–110°F, or 38°–43°C). Let it sit for about 5 to 10 minutes for the yeast to dissolve. Then, add the prepared biga, 2 and ½ cups of bread flour, and 1 and ½ teaspoons of table salt. Mix everything until combined. Your dough will be wet and sticky, but that’s completely normal!
First Rest and Stretch-and-Fold Technique
After mixing, cover the bowl and let the dough rest for 30 minutes. This is crucial for gluten development. Next, it’s time for the stretch-and-fold technique. Imagine a clock over your dough. With an olive oil-greased spatula, stretch the dough at the 12 o’clock mark and fold it down to the 6 o’clock mark. Rotate the bowl and repeat this process at 3 o’clock and 9 o’clock, making a total of 8 folds. Cover the bowl and rest again for another 30 minutes.
Remaining Stretch-and-Folds
You’ll want to repeat the stretch-and-fold for a total of four times, resting for 30 minutes in between. After the final fold, cover the dough and let it sit in the refrigerator for at least 1 hour and up to 24 hours. This cold fermentation adds even more flavor to your homemade ciabatta bread.
Shaping the Rolls/Bread
When you’re ready to shape, generously flour your work surface. Using lightly oiled hands or a spatula, gently scrape the sticky dough out onto the floured surface. Shape it into a rough rectangle (about 10x7 inches). For 8 rolls, cut the dough into pieces around 2.5x3.5 inches. For 2 loaves, go for two rectangles measuring 5x7 inches each.
Carefully transfer the shaped pieces onto a floured parchment paper and let them proof for about 1 hour. You’re almost there! Enjoy the process; the crispy outside and soft inside of your homemade ciabatta will be well worth the effort. For an extra guide on bread shaping, consider checking out resources like King Arthur Baking. Happy baking!
Variations on Homemade Ciabatta Bread
Herb-Infused Ciabatta
Elevate your homemade ciabatta bread by adding savory herbs! Fresh or dried herbs like rosemary, thyme, or oregano can be mixed into the dough during preparation. Simply incorporate a tablespoon of your chosen herbs into the flour in step 2. The result? Irresistibly aromatic loaves that pair beautifully with soups and salads. For an extra kick, consider adding minced garlic, which complements the herb flavors wonderfully. If you're curious about other flavor profiles, check out this Kitchen Herb Guide for some inspiration.
Sweet Ciabatta with Dried Fruits
For a delightful twist, try a sweet version of your homemade ciabatta bread! Mix in chopped dried fruits like cranberries, apricots, or even chocolate chips into the dough just before shaping it (step 6). This fruity addition is perfect for breakfast or as a unique side to your favorite cheeses. It can turn an ordinary loaf into a gourmet experience, making it a fantastic option for special occasions or a cozy weekend brunch. Just imagine slicing into a warm, sweet roll filled with bursts of flavor. Curious about more sweet bread recipes? Check out this Sweet Bread Recipe Collection.
These variations not only add a personal touch but also enhance the versatility of your ciabatta creation, catering to both savory and sweet cravings!
Baking Notes for Homemade Ciabatta Bread
Importance of Flour Type
When it comes to homemade ciabatta bread, the type of flour you choose can make a world of difference. Using bread flour is essential because it has a higher protein content, which contributes to a delightful chewiness and structure. While you can substitute with all-purpose flour, keep in mind that the texture may not be as robust, affecting your final result. For an in-depth look at flour types, check out King Arthur Baking.
Tips for Using Yeast Effectively
For the best rise and flavor in your ciabatta, understanding your yeast is key. Whether you opt for active dry or instant yeast, make sure to check the expiration date—expired yeast can lead to a dense loaf. If using active dry yeast, allow it to dissolve in warm water for about 5-10 minutes before mixing with the other ingredients. This helps activate the yeast and ensures your dough rises beautifully. For more expert tips on yeast, refer to my guide on baking with yeast.
Serving Suggestions for Homemade Ciabatta Bread
Pairing with Dips and Spreads
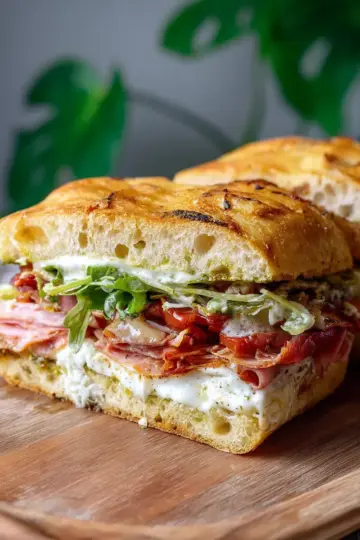
Homemade ciabatta bread is perfect for indulging in delicious dips and spreads. Try it with creamy hummus, rich pesto, or a zesty olive tapenade. You can also spread it with herbed butter or a tangy cream cheese spread for a delightful appetizer. For something heartier, layer it with Turkey bacon or Chicken ham along with sliced avocado and a drizzle of balsamic reduction. These combinations not only enhance the flavor but also bring a festive atmosphere to your gatherings.
Serving with Soups and Salads
One of the best ways to enjoy homemade ciabatta bread is by serving it alongside warm soups and fresh salads. Its crusty exterior and chewy interior make it the ideal companion for hearty minestrone or a classic tomato bisque. Alternatively, slice it into fair pieces to top your favorite Mediterranean salad, pairing with feta cheese and olives. Not only does the ciabatta add texture, but it also soaks up those delightful flavors. Don’t forget to make use of a beautiful bread basket on your dinner table—it’s a visual and culinary treat!
Feel inspired to elevate your meal experience with these serving ideas!
Tips for Making Perfect Homemade Ciabatta Bread
Managing Dough Stickiness
When creating homemade ciabatta bread, expect a wet and sticky dough. This stickiness is essential for achieving that delightful open crumb! To manage it:
- Use generously floured surfaces: Dust your counter and dough liberally to avoid sticking during shaping.
- Olive oil your hands and tools: A light coating on your hands or spatula prevents sticking without altering the dough’s hydration.
Creating Steam in the Oven
A crispy crust is a hallmark of great ciabatta. To achieve that, steam is your best friend:
- Use a tray of ice cubes: Placing ice cubes in a hot, shallow pan creates steam, enhancing crust formation.
- Preheat your baking surface: Ensure your baking sheet or stone is hot, helping the bread rise quickly and evenly.
With these tips, your ciabatta will impress family and friends alike!
Time Details for Homemade Ciabatta Bread
Preparation Time
Plan for about 8 to 24 hours to make the biga (preferment), as this enhances the flavor and texture of your ciabatta. The dough preparation takes an additional 1 hour of active work.
Baking Time
When you’re ready to enjoy your delicious homemade ciabatta bread, the baking process takes approximately 20 to 25 minutes. Keep an eye on that golden crust!
Total Time
From start to finish, expect this delightful homemade ciabatta bread to take around 9 to 25 hours, factoring in the biga preparation and baking time. It's worth every minute for that fresh-from-the-oven aroma!
For more insightful techniques and tips, check out King Arthur Baking for expert advice on bread making!
Nutritional Information for Homemade Ciabatta Bread
Calories
Each serving of this delightful homemade ciabatta bread contains approximately 233 calories. This makes it a delicious addition to your meals without excessive caloric load.
Protein
If you're keeping an eye on your protein intake, you'll find that one roll provides about 7.4 grams of protein. This helps boost your energy levels and keeps you fuller for longer!
Sodium
For those monitoring their sodium consumption, it’s good to note that each roll has around 437.5 mg of sodium. Consider pairing your ciabatta with fresh ingredients to keep the overall meal nutritious and delicious.
If you're interested in the nutritional benefits of homemade bread, feel free to check out sources like the USDA FoodData Central for more detailed information!
FAQs about Homemade Ciabatta Bread
Can I make ciabatta without a stand mixer?
Absolutely! Making homemade ciabatta bread without a stand mixer is not only possible but can also be quite rewarding. You can mix and knead the dough by hand using a large mixing bowl and a sturdy spatula. Just remember to use olive oil on your hands to manage the sticky texture during the kneading process!
How do I know when my ciabatta is done baking?
To tell if your ciabatta is perfectly baked, gently tap the bottom of the loaf. If it sounds hollow, it’s a good sign! For a more accurate check, use an instant-read thermometer; the ideal internal temperature is between 205°F (96°C) and 210°F (99°C).
Can I freeze leftover ciabatta bread?
Yes, you can freeze your delicious homemade ciabatta bread! Wrap it tightly in plastic wrap, then place it in a resealable freezer bag. This keeps the bread fresh for up to three months. Be sure to thaw it at room temperature for the best taste when you're ready to enjoy it again.
If you have any more questions or need further guidance, don’t hesitate to reach out!
Conclusion on Homemade Ciabatta Bread
Baking homemade ciabatta bread is an enriching experience, blending patience and passion to create delightful, airy rolls. Freshly baked, this bread offers a crispy crust and soft, chewy interior that elevate any meal. So, roll up your sleeves and enjoy the journey—your taste buds will thank you!
Homemade Ciabatta Bread
Equipment
- mixing bowl
- silicone spatula
- bench scraper
- baking sheet
- stand mixer
- Instant-Read Thermometer
Ingredients
Biga/Preferment
- 1 cup bread flour [spooned & leveled]
- ⅛ teaspoon active-dry or instant yeast
- ½ cup room-temperature water (about 70°F (21°C))
Ciabatta Rolls
- 1 teaspoon active-dry or instant yeast
- 1 cup warm water (about 100–110°F (38°–43°C))
- 2.5 cups bread flour [spooned & leveled], plus more as needed
- 1.5 teaspoons table salt
- olive oil as needed for coating hands and spatula
Instructions
Preparation
- Day 1: Make the biga/preferment by whisking together the bread flour and yeast. Add water, mix, cover, and let rest at room temperature for 8–24 hours.
- Day 2: Uncover the biga. In a separate bowl, whisk together the yeast and warm water. Let sit for 5-10 minutes, then add biga, flour, and salt, mixing until uniform.
- Cover the bowl and let the dough rest for 30 minutes at room temperature.
- Perform the 1st stretch-and-fold by folding the dough at the 12 o'clock mark and turning the bowl for a total of 8 folds. Rest 30 minutes.
- Repeat the stretch-and-fold process three more times with 30-minute rests in between. After the last stretch-and-fold, refrigerate the dough for at least 1 hour.
- Lightly flour your work surface, scrape the dough onto it, and shape into a rough rectangle. Cut into 8 rolls or 2 loaves.
- Transfer the rolls to floured parchment paper, ensuring they are at least 2 inches apart. Cover and let rest for 1 hour.
- Preheat the oven to 450°F (232°C), positioning racks and heating a baking sheet.
- Scatter ice cubes in a metal roasting pan and uncover the rolls. Optionally spray with water. Transfer the proofed dough to the preheated baking sheet and bake.
- Bake for 20–25 minutes until golden brown and hollow-sounding when tapped. Let cool for at least 45 minutes before slicing.


Leave a Reply