
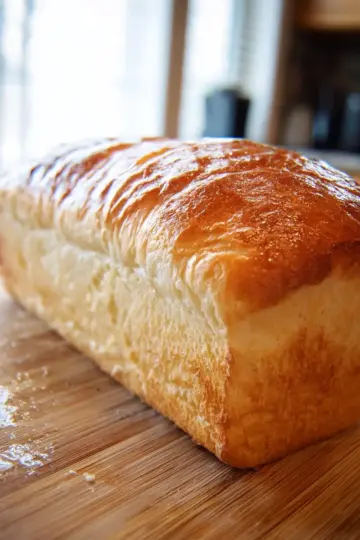
Introduction to Easy Milk Bread Loaf
In our fast-paced world, finding time to prepare healthy and delightful meals can be a challenge, especially for busy professionals. Enter the easy milk bread loaf—a simple yet satisfying solution to your homemade bread cravings. Not only does preparing your own bread allow you to control the ingredients, but it also fills your kitchen with an irresistible aroma, turning your home into a cozy haven.
Homemade bread is not just about taste; it’s also about nutrition. Unlike store-bought options filled with preservatives, your easy milk bread loaf offers a fresh, wholesome alternative. A study from the Whole Grains Council shows that homemade bread can help you reduce added sugars and unhealthy fats often found in commercial varieties. By knowing exactly what goes into your loaf, you can customize it to suit your dietary needs or preferences, whether you’re avoiding gluten or looking for ways to incorporate more whole grains into your diet.
Additionally, baking bread can be surprisingly therapeutic. Taking just a little time each week to make your own can be a rewarding break from the daily grind. So, why not roll up your sleeves and give it a try? You might just discover a new favorite hobby!
Ingredients for Easy Milk Bread Loaf
Essential ingredients for a fluffy loaf
Creating the perfect easy milk bread loaf requires a few staple ingredients to ensure a soft, tender texture that keeps you coming back for more. Here’s what you’ll need:
- 500 g bread flour - This is the backbone of your bread, giving it structure and chewiness.
- 40 g sugar - A little sweetness not only enhances flavor but helps the yeast activate, giving your loaf a nice rise.
- 1½ tsps instant yeast - The magic ingredient that makes your bread fluffy and light.
- 225 g cold water - Hydration is key in bread-making, and cold water helps control temperature during kneading.
- 115 g cold milk - Milk adds richness and flavor, contributing to that signature softness.
- 9 g sea salt - Essential for flavor and controlling yeast activity.
- 25 g unsalted butter - This adds layers of flavor and moisture.
Optional ingredients for added flavor
Want to elevate your easy milk bread loaf? Consider adding one or more of the following ingredients for a delightful twist:
- Herbs or spices - A teaspoon of dried rosemary or garlic powder can bring a savory note to your loaf.
- Honey or maple syrup - Substitute sugar with liquid sweeteners for a touch of natural sweetness and unique flavor.
- Cheese - Incorporate grated cheese like cheddar for a savory take on your bread.
- Seeds or nuts - Adding sunflower seeds or walnuts can introduce a delightful crunch and additional nutritional elements.
Experiment with these extras and discover your favorite flavor combinations! Dive deeper into baking techniques with tips from resources like King Arthur Baking for more inspiration.
Step-by-step preparation of Easy Milk Bread Loaf
Gather and measure the ingredients
The foundation of any great bread begins with quality ingredients, and your easy milk bread loaf is no exception. Start by gathering the following items:
- 500 g bread flour (3¾ cup)
- 40 g sugar (3 tablespoons)
- 1½ teaspoons instant yeast
- 225 g cold water (a little less than 1 cup)
- 115 g cold milk (½ cup)
- 9 g sea salt (1½ teaspoons)
- 25 g unsalted butter (1¾ tablespoons)
Make sure to measure your ingredients using a kitchen scale for the best results! Accurate measurements are crucial, especially for flour and liquids. If you’re curious, professional bakers frequently emphasize the importance of precision in baking.
Mix the dough for perfect consistency
Once you have everything ready, it’s time to mix the dough. In a stand mixer, combine the bread flour, sugar, instant yeast, cold water, and cold milk.
- Begin kneading at low speed until the dough starts to take form.
- Cover the mixing bowl and allow it to rest for 30 minutes. This step helps to relax the gluten, making your dough more manageable later.
Don’t forget to bring out the butter from the fridge and let it soften while you wait. After the resting period, add the sea salt and continue kneading for about 1 minute.
Let the dough rest and rise
Next, it's time for the magical rising phase. Shape the dough into a ball (it may be a bit sticky) and place it in a lightly greased bowl. Cover this with a cloth and let it rise in a warm environment (the ideal temperature is between 82°F and 90°F) for about 1 hour, or until it nearly doubles in size. This fermentation process is essential for developing flavor and texture.
Shape the dough into a loaf
After your dough has risen beautifully, transfer it to a floured surface. Using a bench scraper, cut the dough into three even pieces, shaping each into a ball. Cover them with a damp dish towel for around 15 minutes to let them relax further.
Now for the fun part: rolling! Roll each ball out into an oval shape and then roll it up into a log. You’ll repeat this with the other two pieces. Afterward, place these logs into a greased 10 x 5 loaf pan, cover them, and let them rise again until they fill 80-90% of the pan—this takes about 1 to 1.5 hours.
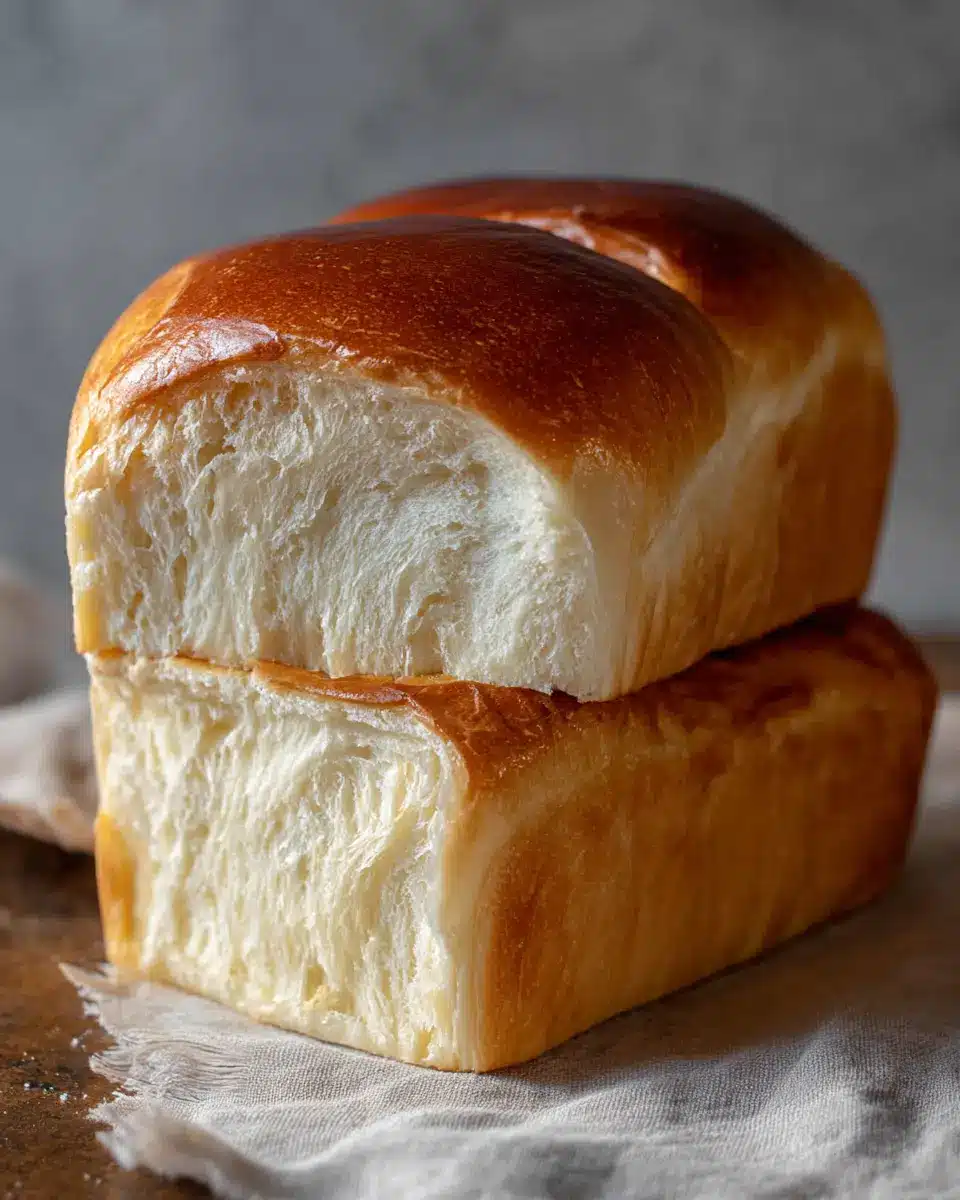
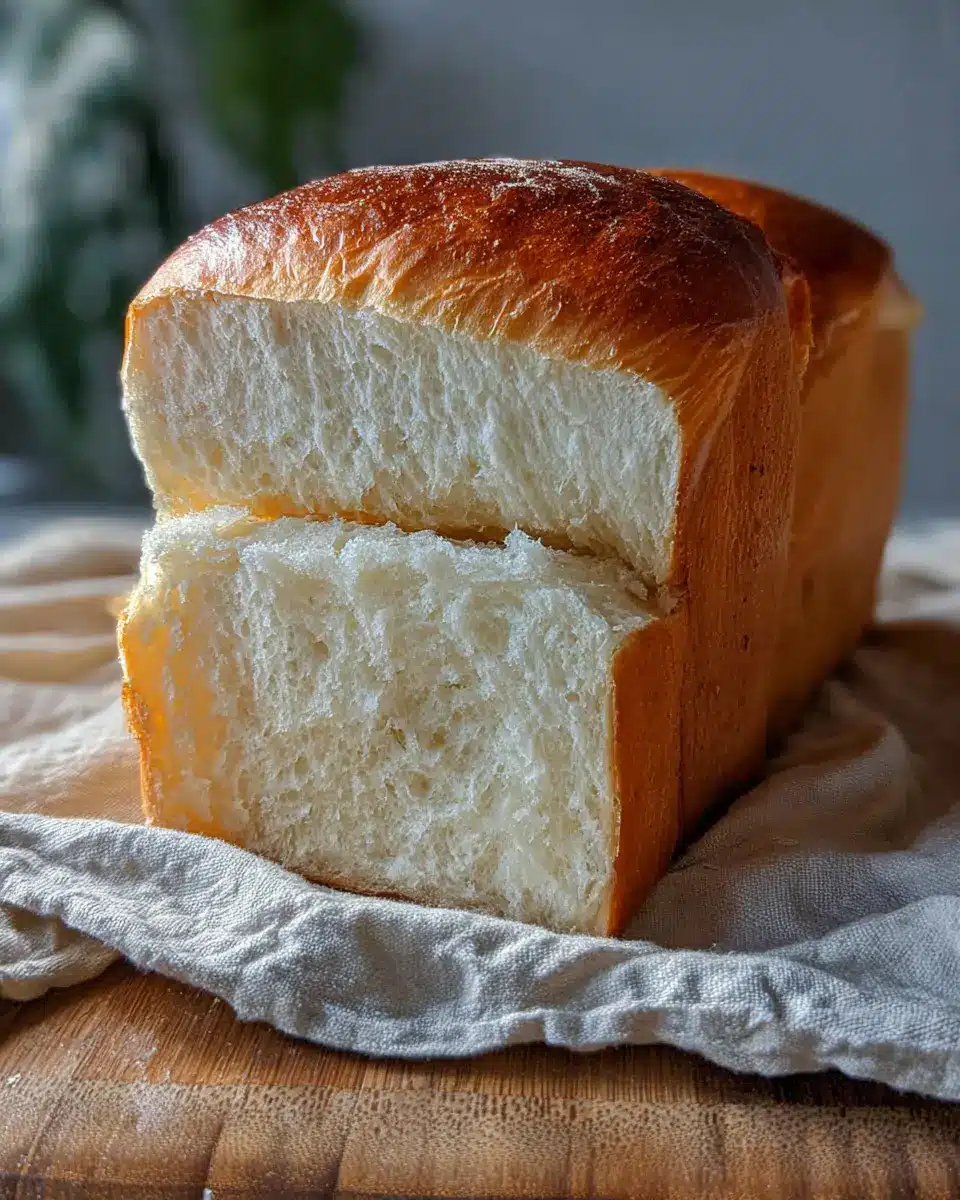
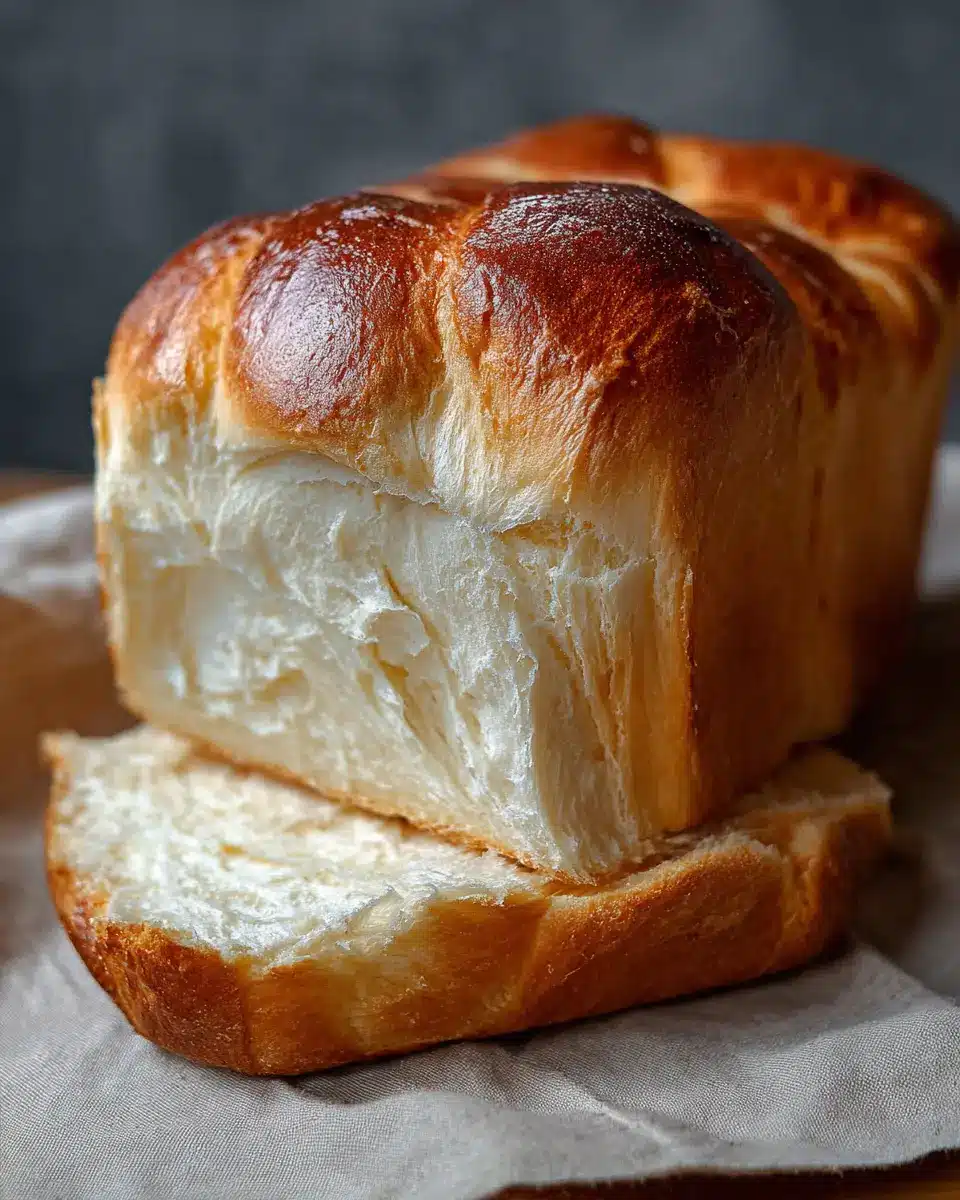
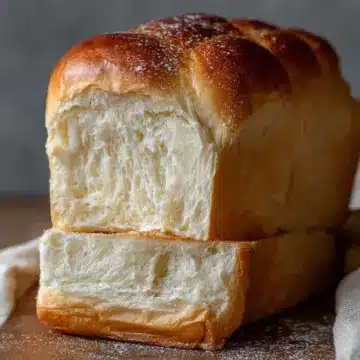
Bake your bread to golden perfection
Preheating the oven to 375°F in the last 20 minutes of proofing ensures that your bread will achieve that gorgeous golden hue. Bake your easy milk bread loaf for 30-35 minutes, covering it loosely with foil after 15 minutes to prevent over-browning.
Once done, let the bread cool on a rack after dropping the pan from a slight height onto the counter. This technique helps prevent shrinking! Finally, brush the top with melted butter for that final touch before you slice and enjoy.
Try these steps, and your homemade milk bread will not only taste incredible but also fill your home with delightful aromas—there’s nothing quite like the smell of freshly baked bread!
Variations on Easy Milk Bread Loaf
Adding Herbs or Spices for Flavor
Elevate your easy milk bread loaf by introducing fresh herbs or aromatic spices. A tablespoon of dried oregano or rosemary can lend an earthy note, while a sprinkle of cinnamon adds subtle warmth. You might even consider trying a dash of garlic powder for an inviting savory twist. Experimenting with flavor can turn an everyday loaf into a gourmet treat, perfect for sandwiches or alongside a warm bowl of soup.
Incorporating Seeds or Nuts
For extra texture and nutrition, incorporate your favorite seeds or nuts into the dough. Sunflower seeds, sesame seeds, or even chopped walnuts can provide delightful crunch and wholesome benefits. Simply add about half a cup to your dough during the mixing stage. Not only do they enhance the flavor profile, but they add visual appeal. Don't be afraid to get creative—substituting can often make an already great recipe even better! For more ideas on flavor enhancements, check out this herb and spice guide.
Cooking Tips and Notes for Easy Milk Bread Loaf
Importance of Room Temperature Ingredients
Using room temperature ingredients is vital when making easy milk bread loaf. Cold components can hinder yeast activation, slowing down the dough's rise. Allow your butter, milk, and any other ingredients to sit out for a bit before mixing. This tiny step promotes better integration and a fluffier final product. Did you know that room temperature ingredients can also enhance the dough's flavor development? For more baking tips, check out this guide on ingredient temperatures.
Tips for Perfect Dough Consistency
Achieving the right dough consistency is key for an easy milk bread loaf. When kneading, pay attention to how sticky or dry the dough feels. It should be slightly tacky but not overly sticky. If your dough is too dry, incorporate small amounts of water until the texture is just right. If it’s too sticky, dust with a bit of flour. Also, don’t skip the windowpane test—this ensures that your gluten has developed properly, creating a light and airy loaf. Your patience will be rewarded with soft, delicious bread!
Serving suggestions for Easy Milk Bread Loaf
Pairing with spreads and toppings
The Easy Milk Bread Loaf is versatile and pairs beautifully with an array of spreads and toppings. For breakfast or a cozy brunch, slather on some creamy butter or a thin layer of your favorite jam. Consider trying:
- Nut butters: Almond or peanut butter adds a delightful nutty flavor.
- Avocado: Mash it up for a creamy, satisfying topping.
- Cream cheese: Spread it on thick, and sprinkle with fresh herbs for a savory delight.
- Turkey bacon or chicken ham: Layer it for a protein-packed sandwich that’s both delicious and satisfying.
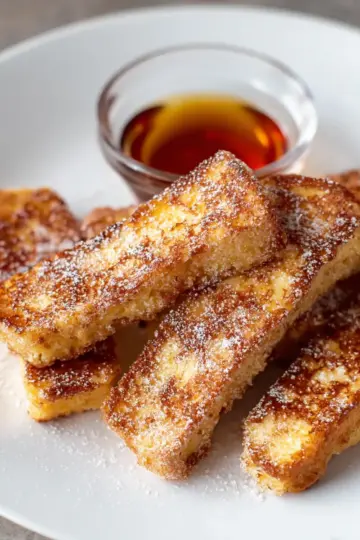
Creative uses for leftover loaf
If you're lucky enough to have some of the Easy Milk Bread Loaf left over, fear not! There are plenty of ways to make use of it:
- French toast: Custard-soaked slices make for a delicious breakfast treat.
- Bread crumbs: Transform stale bread into crumbs for toppings or binding in meatballs or casseroles.
- Grilled cheese: Use it for a gourmet twist on the classic sandwich.
- Bread pudding: Give this traditional dessert a modern spin with your loaf.
For more ideas and inspiration, check out sites like Food Network for creative recipe suggestions!
Time breakdown for Easy Milk Bread Loaf
Preparation time
Getting started on your easy milk bread loaf is quick! You’ll need about 10 minutes to gather and mix your ingredients. This includes measuring out the flour, sugar, and liquids and getting everything prepped for that perfect dough.
Rising time
The dough needs a little TLC with an initial rise of about 1 hour, allowing it to nearly double in size. After shaping, it will need another rise of approximately 1 to 1.5 hours in the loaf pan. In total, you're looking at about 2 to 2.5 hours of rising time.
Baking time
Once your dough has risen beautifully, it’s time to bake! Preheat your oven to 375°F and bake for 30-35 minutes. To achieve that golden crust, be sure to loosely cover it with foil halfway through to prevent over-browning.
The entire process, including baking, will take you around 3 to 4 hours, but trust me, the delicious aroma and fluffy texture that await you make it all worth it! Want to explore more about bread baking? Check out this detailed guide on bread science for tips and tricks.
Nutritional Facts for Easy Milk Bread Loaf
When indulging in your Easy Milk Bread Loaf, it's helpful to know what you're putting into your body. Here’s a quick nutritional breakdown for you:
Calories
With approximately 189 kcal per slice, this loaf is a satisfying yet manageable treat, allowing you to enjoy it without the guilt.
Carbohydrates
Each serving packs in about 35g of carbohydrates, providing a good source of energy to fuel your busy day.
Protein
You’ll find roughly 6g of protein in each loaf slice, making it a great addition to your breakfast or snack options.
Whether you enjoy it plain or with your favorite toppings, knowing these nutritional facts can help you make informed choices. Happy baking! For more expert tips on baking and nutrition, you might want to check out resources like the Nutrition Data or MyFitnessPal.
FAQs about Easy Milk Bread Loaf
What is the best way to store homemade bread?
To keep your easy milk bread loaf fresh, store it in an airtight container at room temperature for up to three days. If you notice it starting to harden, you can refresh it by briefly reheating it in the oven. If you prefer a longer shelf life, consider slicing the bread and wrapping it tightly in plastic wrap or foil before placing it in a freezer bag.
Can I freeze the milk bread loaf?
Absolutely! Freezing is a great way to preserve your easy milk bread loaf. Just make sure it's completely cool, then slice it if you'd like individual servings. Wrap it tightly in plastic wrap and foil to prevent freezer burn. It should last for up to three months. When you're ready to enjoy, let it thaw at room temperature or pop it in the toaster for a quick warm-up.
What can I use instead of instant yeast?
If you don’t have instant yeast on hand, don't worry! You can substitute it with active dry yeast. Just keep in mind to activate it in warm water (around 110°F) with a bit of sugar for about 5-10 minutes before mixing it into your ingredients. This step ensures that your bread rises beautifully! For a deeper dive into yeast substitutions, check out this helpful resource.
Conclusion on Easy Milk Bread Loaf
In summary, this easy milk bread loaf recipe is a delightful way to introduce fresh bread into your home. Its soft texture and comforting flavor make it perfect for sandwiches or as a side to your favorite meal. Embrace baking as a stress-relief activity, and enjoy the fruits of your labor!
Easy Milk Bread Loaf
Equipment
- stand mixer
- 10 x 5 loaf pan
- Rolling Pin
Ingredients
Flour Mixture
- 500 g bread flour approximately 3¾ cups
- 40 g sugar approximately 3 tablespoons
- 1.5 tsps instant yeast
- 225 g cold water a little bit less than 1 cup
- 115 g cold milk approximately ½ cup
- 9 g sea salt approximately 1½ tsps
- 25 g unsalted butter approximately 1¾ tablespoons
Other ingredients
- butter for coating the pan and brushing the bread
- flour for coating the pan
Instructions
Making Bread Dough
- Mix bread flour, sugar, yeast, water and milk in a stand mixer, kneading on low speed until the dough is formed.
- Cover the mixing bowl and let it rest for 30 minutes. Meanwhile, bring the butter out from the fridge, cut it into 4 pieces and leave it on the counter to soften a little.
- Add salt and continue to knead the dough for 1 minute.
- Add butter cubes and knead until the dough passes the windowpane test.
- Form the dough into a ball and put it in a lightly greased bowl. Cover and let it rise for 1 hour until it almost doubles in size.
Shaping
- Transfer the dough onto a working surface and cut it into 3 even pieces. Form each piece into a ball and let them rest for 15 minutes.
- Roll the dough out with a rolling pin to an oval shape and then roll it up to a log. Repeat for the other two pieces, then let them rest for another 15 minutes.
- For each log, rotate the dough 90 degrees before rolling them out again into long rectangles and rolling each rectangle back up.
- Grease a 10 x 5 loaf pan and coat with flour. Place the rolled up dough into the pan, cover and let it rise until it fills 80-90% of the pan.
Baking
- Preheat the oven to 375°F in the last 20 minutes of proofing.
- Bake for 30-35 minutes, loosely covering with foil after 15 minutes.
- Remove bread from the oven and drop the pan on the counter to prevent it from shrinking, then transfer the bread to a cooling rack and brush with melted butter.


Leave a Reply