
Introduction to Classic Patty Melt
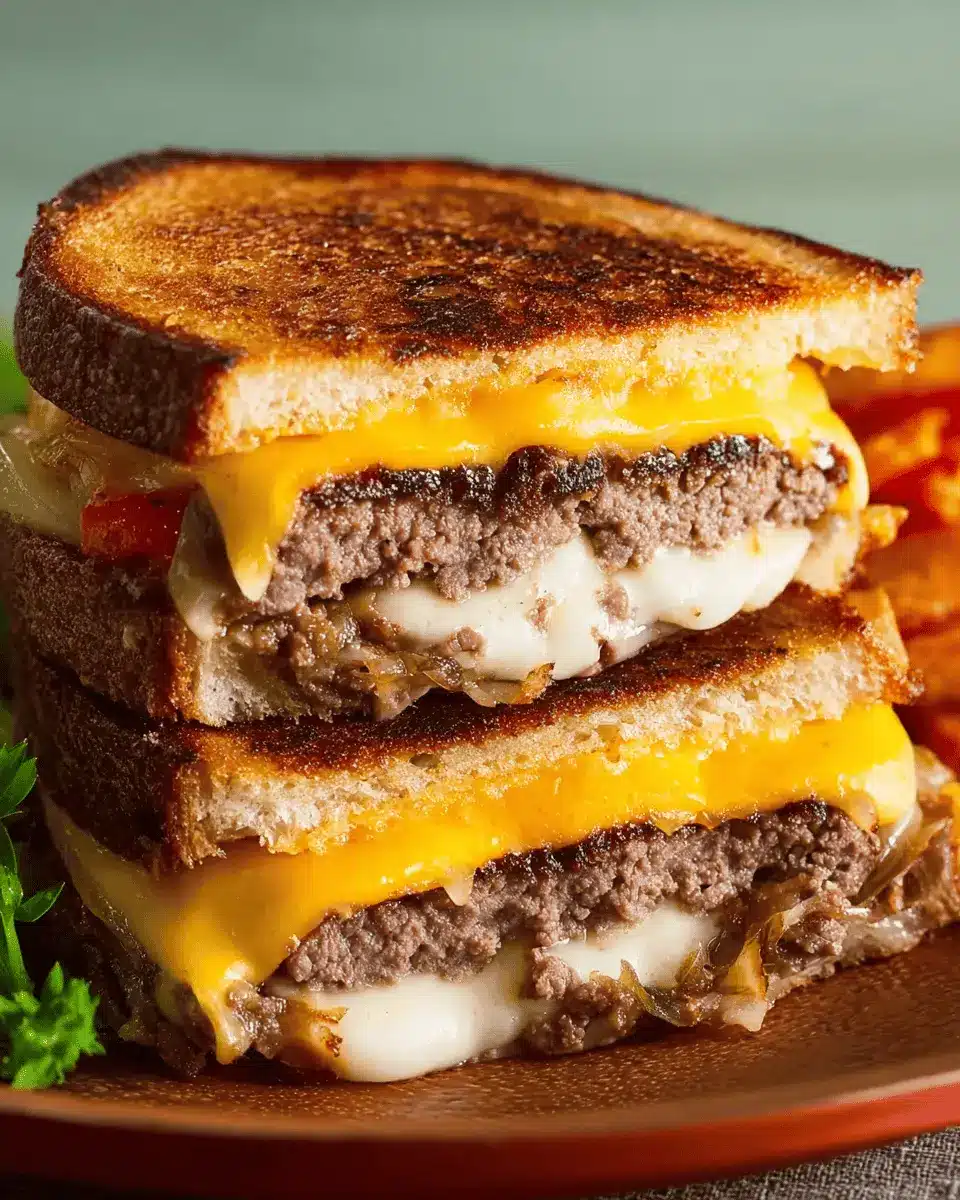
If you haven't yet discovered the classic patty melt, you're in for a delightful treat! Imagine the perfect blend of savory beef, sweet caramelized onions, and rich Swiss cheese, all nestled between slices of buttery, toasted bread. This dish strikes a chord with many for a good reason. It’s a hearty meal that brings comfort and warmth, reminiscent of nostalgic diner visits or casual family gatherings. According to a recent survey, comfort foods like the patty melt are rising in popularity among young professionals who seek meals that evoke familiarity and joy.
The classic patty melt encapsulates that cozy feeling, making it a go-to choice for weeknight dinners or leisurely weekend lunches. Beyond its mouthwatering ingredients, there's something inherently satisfying about combining culinary elements that harmonize so beautifully. Not only is it hard to resist, but it also invites some creativity—you can customize it by adding your favorite toppings, such as mustard or even sautéed mushrooms.
By preparing a classic patty melt at home, you gain control over the quality of the ingredients while enjoying the rewarding experience of cooking. To delve into how to make this scrumptious sandwich, check out the full recipe below and create your own comfort food masterpiece!
Essential Ingredients for an Irresistible Patty Melt
Crafting the perfect classic patty melt is all about selecting quality ingredients that meld together wonderfully. Here’s what you’ll need for this mouthwatering dish:
-
1 sweet yellow onion, thinly sliced: Sweet onions add that rich, caramelized flavor that pairs beautifully with the beef.
-
2 tablespoons butter, divided: Butter is essential for toasting the bread and adding richness to the filling.
-
1 tablespoon apple cider vinegar: This adds a tangy depth to the onions, enhancing their savoriness.
-
8 ounces 90/10 ground beef: Opt for lean ground beef for a lighter yet satisfying texture.
-
¼ teaspoon salt: A necessity for bringing out the natural flavors.
-
¼ teaspoon black pepper: Adds just the right amount of heat.
-
4 slices sandwich bread: Choose your favorite—sourdough or rye works wonderfully.
-
4 slices Swiss cheese: Melty and slightly nutty, Swiss cheese binds every delightful bite together.
-
Mustard, optional: A little kick of mustard can elevate the flavor profile even further!
For more insight into choosing quality ingredients, check out this resource on selecting the best meats for your dishes!
Step-by-Step Preparation of Classic Patty Melt
Making a classic patty melt is a delightful journey that culminates in a delicious, cheesy, and crispy sandwich. Let’s dive into each step to ensure your creation is nothing short of perfection.
Caramelize the Onions
Start by transforming your sweet yellow onion into a rich, caramelized delight.
- In a large cast-iron skillet set over medium to medium-low heat, melt 1 tablespoon of butter.
- Add the thinly sliced onions and stir occasionally. Patience is key here! Cook the onions for about 25 minutes until they develop a beautiful, deep brown color. If you notice some spots burning, adjust your heat down to medium-low.
- Near the end of the cooking process (around the last 5 minutes), add 1 tablespoon of apple cider vinegar. This addition enhances the flavor and balances the sweetness of the onions. Once done, set them aside.
This step not only adds complexity to your classic patty melt but also fills your kitchen with an irresistible aroma.
Shape and Season the Patties
Next, it's time to create the heart of your sandwich—the beef patties.
- With your 8 ounces of 90/10 ground beef, shape two thin patties that are roughly the same size as your bread slices. Thin is key for that even cooking and melt-in-your-mouth texture.
- Season each patty generously with salt and black pepper.
Why not use a bit of smoked paprika or garlic powder for added flavor? It’s all about what brings you joy!
Butter the Bread
Now, let’s prepare the bread for toasting.
- Wipe down your skillet and add the remaining tablespoon of butter. Once melted, place all four slices of sandwich bread into the pan, buttering one side of each slice.
- Carefully remove two slices of bread, leaving the others in the skillet. You can always work one at a time if your skillet is on the smaller side.
The buttered bread will create a golden, crispy crust that holds all those flavors together.
Build the Sandwiches
Time to assemble your classic patty melt!
- On the buttered side of each slice still in the skillet, layer one slice of Swiss cheese, a beef patty, half of your caramelized onions, and then top it off with another slice of Swiss cheese.
- Place your remaining bread slices on top, buttered side up.
This is where the magic happens—a hearty sandwich, ready for toasty goodness!
Cook the Sandwiches to Perfection
Finally, it’s time to bring it all together.
- With the heat set to medium-low, let the sandwiches cook for about 3 to 4 minutes per side. You’re looking for that perfect golden brown and melted cheese.
- Once cooked, slice your sandwiches in half and serve immediately.
You’ll have a classic patty melt that’s not only satisfying but also oozing with flavor. Enjoy this flavorful creation as a comforting meal on a busy week night or a relaxed weekend lunch!
For tips on what to serve with your patty melt, check out this recipe for homemade fries, a perfect pairing that brings out the best in your sandwich.
Variations on Classic Patty Melt
Patty Melt with Turkey Bacon
Elevate your classic patty melt by adding crispy turkey bacon for an extra layer of flavor. Simply cook turkey bacon until it's nice and crunchy, then layer it between the beef patty and Swiss cheese. The smoky, savory notes of the turkey bacon complement the sweet caramelized onions beautifully. This version is perfect if you’re looking for a lighter twist without sacrificing taste!
Patty Melt with Chicken Ham
For a deliciously unique take on the classic patty melt, try swapping out beef for chicken ham. This variation not only reduces calories but also introduces a delightful smokiness that pairs wonderfully with the melted cheese and onions. Just layer sliced chicken ham on top of the patty before adding the cheese, and grill it up to perfection. It’s a great option for anyone craving that hearty comfort food without the heaviness.
These variations keep the essence of a classic patty melt while providing exciting new flavors to explore!
Cooking Tips and Notes for Classic Patty Melt
Best Practices for Caramelizing Onions
To achieve perfectly caramelized onions for your classic patty melt, patience is key. Cook them on medium heat, stirring occasionally to prevent burning. If they’re browning too quickly, lower the heat. Adding a splash of apple cider vinegar at the end enhances their sweetness and balances flavors. Plan for about 25 minutes of cooking time for a deep, golden color; trust me, the aroma is well worth the wait!
For more tips on caramelization, check out Serious Eats.
Tips for Perfectly Cooked Patties
When shaping your patties for the classic patty melt, opt for thin, uniform thickness—about 4 ounces each will do. Season with salt and pepper just before cooking to maintain moisture. Cook them in a hot skillet for about 3 minutes per side, ensuring a lovely sear that locks in flavors. Letting the patties rest for a minute after cooking helps retain their juiciness. And don’t hesitate to experiment with toppings like spicy mustard or even some avocado for a twist!
Want to know more about achieving the perfect burger? Explore The Food Lab for more insights!
Serving Suggestions for Classic Patty Melt
When you whip up a delicious classic patty melt, the right accompaniments can truly elevate your dining experience. Here are a few fantastic side options that pair beautifully with this hearty sandwich:
Accompaniments that Elevate Your Patty Melt Experience
-
Crispy Sweet Potato Fries: These not only add a delightful crunch but also provide a sweet balance to the savory melt. You can bake or fry them for a perfect side.
-
Zesty Pickles: A plate of tangy pickles is a classic addition. Their acidity cuts through the richness of the beef and cheese, refreshing your palate.
-
Mixed Green Salad: A light salad with a vinaigrette dressing complements your classic patty melt perfectly, adding a refreshing crunch and balance.
-
Coleslaw: A creamy or vinegar-based coleslaw brings an extra layer of texture and flavor that pairs wonderfully with the warm, gooey sandwich.
-
Refreshing Lemonade or Iced Tea: To wash down your meal, consider a glass of homemade lemonade or refreshing iced tea. These drinks add a hint of sweetness and brightness to your lunch or dinner.
These suggestions will not only enhance your meal but could also encourage lively conversations at your table. Happy cooking!
Time Breakdown for Classic Patty Melt
Preparation Time
Gathering your ingredients takes about 10 minutes. Slice the onion, measure out the beef, and get everything ready for a smooth cooking experience.
Cooking Time
This classic patty melt takes roughly 30 minutes to cook. You’ll spend about 25 minutes on those delicious caramelized onions and another 5 for the patties and sandwiches.
Total Time
From start to finish, expect to dedicate around 40 minutes. It’s a perfect weeknight meal that delivers hearty comfort with every bite. Who could resist biting into a gooey, melty masterpiece? For more insightful tips on mastering cooking time, check out The Kitchn for handy techniques!
Nutritional Facts for Classic Patty Melt
Calories
A single classic patty melt provides approximately 600 calories, making it a satisfying choice for lunch or dinner. While it packs a flavorful punch, it's a good idea to balance it with lighter sides, like a crisp salad or steamed veggies.
Protein
You'll find around 30 grams of protein in each classic patty melt. This hearty dish is an excellent source of protein, essential for muscle repair and overall health, making it a solid meal option for those with active lifestyles.
Sodium
Be mindful of the sodium content, which can reach about 1000 milligrams per melted masterpiece. While it's delicious, incorporating lower-sodium alternatives or portion control can help keep your day’s intake within recommended levels.
If you're keen on diving deeper into the details of healthy eating, consider checking out resources like the USDA FoodData Central for comprehensive nutritional information. Remember, balance is key! Enjoy your classic patty melt while keeping overall nutrition in mind.
FAQs about Classic Patty Melt
Can I customize my Classic Patty Melt?
Absolutely! One of the joys of a classic patty melt is its versatility. You can swap out Swiss cheese for your favorite melty variety or add turkey bacon for an extra crunch. If you're a veggie lover, consider adding sautéed mushrooms or fresh spinach. The beauty is in your hands—get creative with toppings like jalapeños, avocado, or even a tangy aioli.
What are the best side dishes for a Patty Melt?
Pairing side dishes with your classic patty melt can elevate your meal. A fresh garden salad or crunchy coleslaw provides a nice contrast. Crispy sweet potato fries or onion rings make for a classic diner experience that’s hard to resist. For a lighter option, consider a side of steamed vegetables or a flavorful pickled vegetable medley.
How can I make my Patty Melt healthier?
To lighten your classic patty melt, you can use lean ground beef or even substitute it with ground turkey or chicken. Opting for whole-grain bread instead of white can add fiber, and using less butter for frying can reduce calories. Adding extra veggies not only boosts nutrition but also enhances flavor!
Embracing Homemade Comfort with a Classic Patty Melt
In the busy rhythms of life, nothing beats the joy of crafting a classic patty melt in your own kitchen. It’s not just about the delicious flavor profile created by caramelized onions and Swiss cheese; it's also about the satisfaction that comes with a home-cooked meal. This dish is a nostalgic embrace that invites you to slow down, savor, and enjoy.
So why not treat yourself tonight? With just a handful of ingredients, you can create a comforting classic that everyone will love. Visit The Cooking Lab for more tips on making the perfect sandwich and unlocking the secrets of great home cooking!
The classic patty melt isn’t just a meal; it’s a delightful experience waiting to happen. Enjoy every bite!

Classic Patty Melt
Equipment
- Cast Iron Skillet
Ingredients
- 1 medium sweet yellow onion thinly sliced
- 2 tablespoons butter divided
- 1 tablespoon apple cider vinegar
- 8 ounces 90/10 ground beef
- ¼ teaspoon salt
- ¼ teaspoon black pepper
- 4 slices sandwich bread
- 4 slices Swiss cheese
- Mustard optional
Instructions
- In a large cast-iron skillet set over medium to medium heat, add 1 tablespoon of butter and sliced onions. Cook onions, stirring occasionally, for about 25 minutes until they are a deep brown color. If the onions are burning on spots, you might need to turn your heat down to medium-low. Near the end of cooking (about 5 minutes), add apple cider vinegar and stir to combine. Then remove from the skillet.
- Shape ground beef into two thin 4-ounce patties that are roughly the shape of your bread. Season patties with salt and pepper.
- When onions are done in your skillet, set the heat to medium-high and add the patties. Cook for 3 minutes per side. If your patties are thin, that should be enough time to cook them through. Remove patties when done.
- Wipe your skillet clean and add the last tablespoon of butter to the skillet. Once the butter melts, add all the bread slices to the skillet, so one side of each slice is coated with butter. Remove two of the four pieces of bread and start building your sandwich on the two pieces remaining in the skillet.
- On each slice of bread remaining in the skillet, add a slice of Swiss cheese, a patty, half of the caramelized onions, and top with the second slice of Swiss cheese. Top each sandwich with the slice of bread removed from the skillet earlier, buttered side up.
- Over medium-low heat, cook the sandwiches for 3 to 4 minutes per side until the bread is toasted and the cheese is melted.
- Slice sandwiches in half and serve immediately while warm.


Leave a Reply