
Introduction to Japanese Strawberry Sponge Cake
Japanese Strawberry Sponge Cake, often celebrated for its light and airy texture, holds a special place in the hearts of dessert lovers worldwide. Known as "strawberry shortcake" in Japan, this delightful treat effortlessly combines fluffy sponge cake, whipped cream, and fresh strawberries. But what truly sets it apart?
Why is the Japanese Strawberry Sponge Cake so beloved?
A big reason for its popularity is the perfect balance of sweetness and texture. The sponge cake is not overly sweet, allowing the natural flavors of the strawberries to shine through. This cake is also famous for its aesthetic appeal, often gracing special occasions like birthdays and anniversaries.
Many people also have fond memories attached to this cake, often reminding them of family gatherings and celebrations. Additionally, Japanese culinary techniques ensure that each layer is soft yet sturdy enough to hold generous fillings of whipped cream and strawberries. If you're looking for something that impresses both visually and flavor-wise, you can't go wrong with this classic.
Curious to make this delectable dessert yourself? Let's dive into the recipe and unlock the secrets behind this beloved confection!
Ingredients for Japanese Strawberry Sponge Cake
Essential Ingredients for the Sponge Cake
To create a truly delightful Japanese Strawberry Sponge Cake, you’ll start with these key ingredients:
- All-purpose flour: 125g (sifted three times for that airy texture)
- Sugar: 100g, a touch sweet but perfect for balancing flavors
- Eggs: 4 large eggs, yolks and whites separated (make sure they’re fresh!)
- Butter: 60g, melted, which adds a lovely richness
- Plus, butter and flour for greasing the cake pan
These components work together harmoniously to create that fluffy sponge that’s just irresistible.
Decoration Essentials
Once your sponge cake is baked and cooled, it’s time to make it visually appealing and even more delicious with these decoration essentials:
- Strawberries: 18 mid-sized strawberries, perfectly halved
- Whipping cream: 400ml, light and fluffy, with 10g of sugar for sweetness
This colorful topping not only enhances the cake's visual appeal but also brings a burst of freshness with each bite.
Optional Syrup Ingredients
For a little something extra, consider adding a simple syrup to enhance the flavor and moistness of your cake. Here’s what you’ll need:
- Water: 40ml
- Sugar: 10g
Boiling these together creates a sweet soak that can elevate your Japanese Strawberry Sponge Cake even further. This optional step can be a game changer for keeping your cake moist, especially if you're preparing it in advance. Enjoy baking!
Step-by-step Preparation of Japanese Strawberry Sponge Cake
Prepare Your Baking Environment
Before diving into the world of Japanese Strawberry Sponge Cake, it’s essential to set up your baking space. Start by preheating your oven to 180°C (356°F). Next, grab an 18cm (7-inch) cake tin, and coat it with butter, followed by dusting it with flour. This step is crucial as it ensures the cake releases easily after baking. While you’re at it, gather all your ingredients—flour, eggs, sugar, and butter—to keep the process seamless. It’s a great idea to sift your flour three times—a little extra love here goes a long way in achieving that airy texture we adore in sponge cakes!
Create the Sponge Cake Batter
Now let’s move on to the fun part—making the batter! In a mixing bowl, add your egg yolks and two-thirds of the sugar. Beat them together until the mixture turns a lovely whitish and thick texture. You want to see a nice ribbon when you lift the whisk. Meanwhile, in a separate bowl, beat the egg whites until they double in volume. Slowly add the remaining sugar and whip until you have a beautiful, glossy meringue. Combine the meringue with the yolk mixture carefully, followed by the sifted flour. Finally, fold in the melted butter, and you’ve made a delightful batter that’s ready for baking!
Bake the Sponge Cake to Perfection
Pour the batter into your prepared pan and gently tap it on the counter to eliminate air pockets. Bake in the preheated oven for about 25 minutes. The cake should rise beautifully, but always check for doneness using a skewer. If it comes out clean, congratulations, your cake is ready! Remove the cake from the oven, and don’t forget to drop it gently onto the workbench a few times to help loosen it from the pan. Flip it upside down on a rack and let it cool completely.
Prepare the Whipped Cream and Strawberries
While your Japanese Strawberry Sponge Cake cools, take this time to whip some cream. Add the 400ml of cream into a mixing bowl with 10g of sugar, and whip until soft peaks form. Don’t rush this step; good cream can transform your cake! Meanwhile, prepare your fresh strawberries. Halve about 10 of them, and give them the star treatment. If you’d like, you can make a simple syrup by dissolving sugar in boiling water—this sweet addition keeps the cake moist and adds a touch of extra flavor.
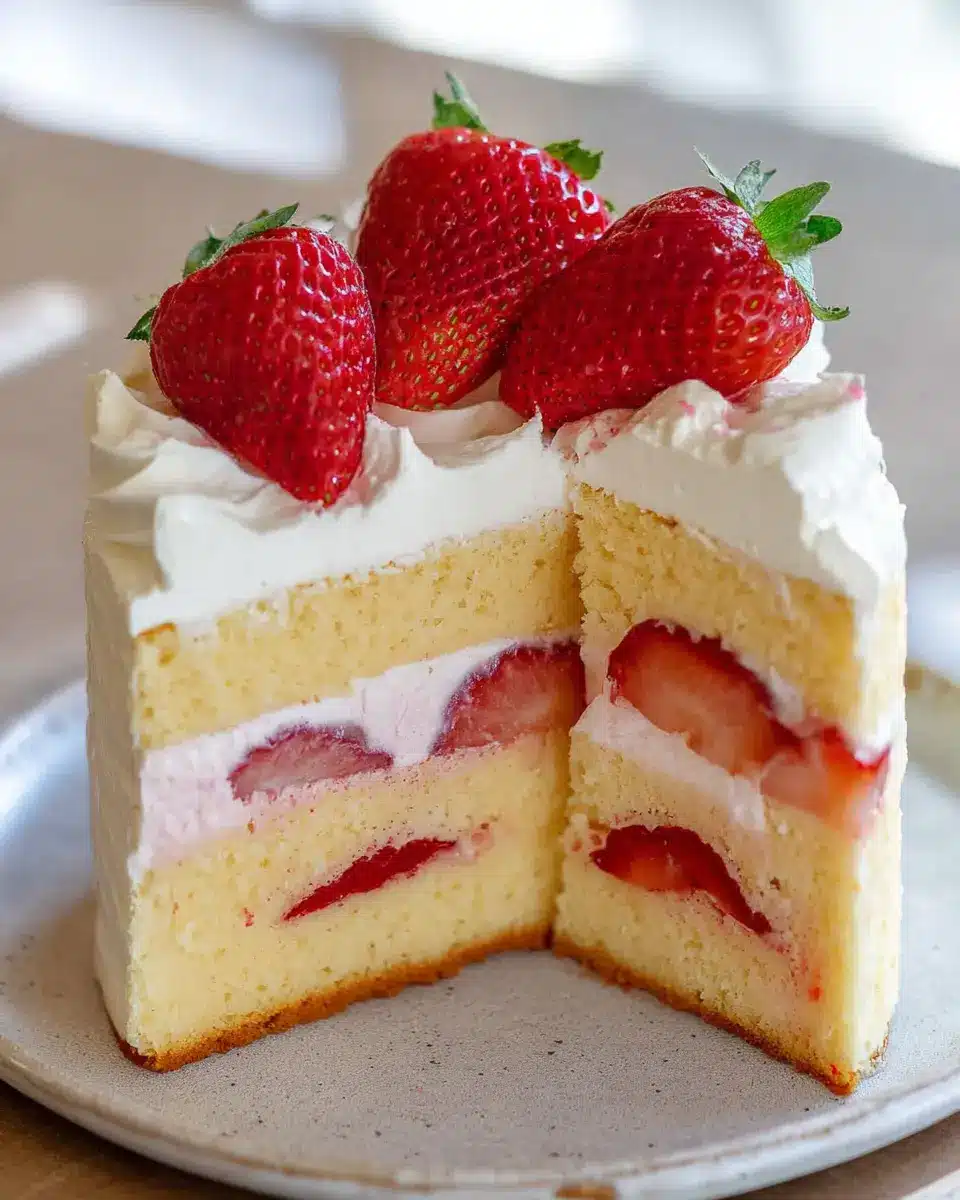
Assemble and Decorate Your Cake
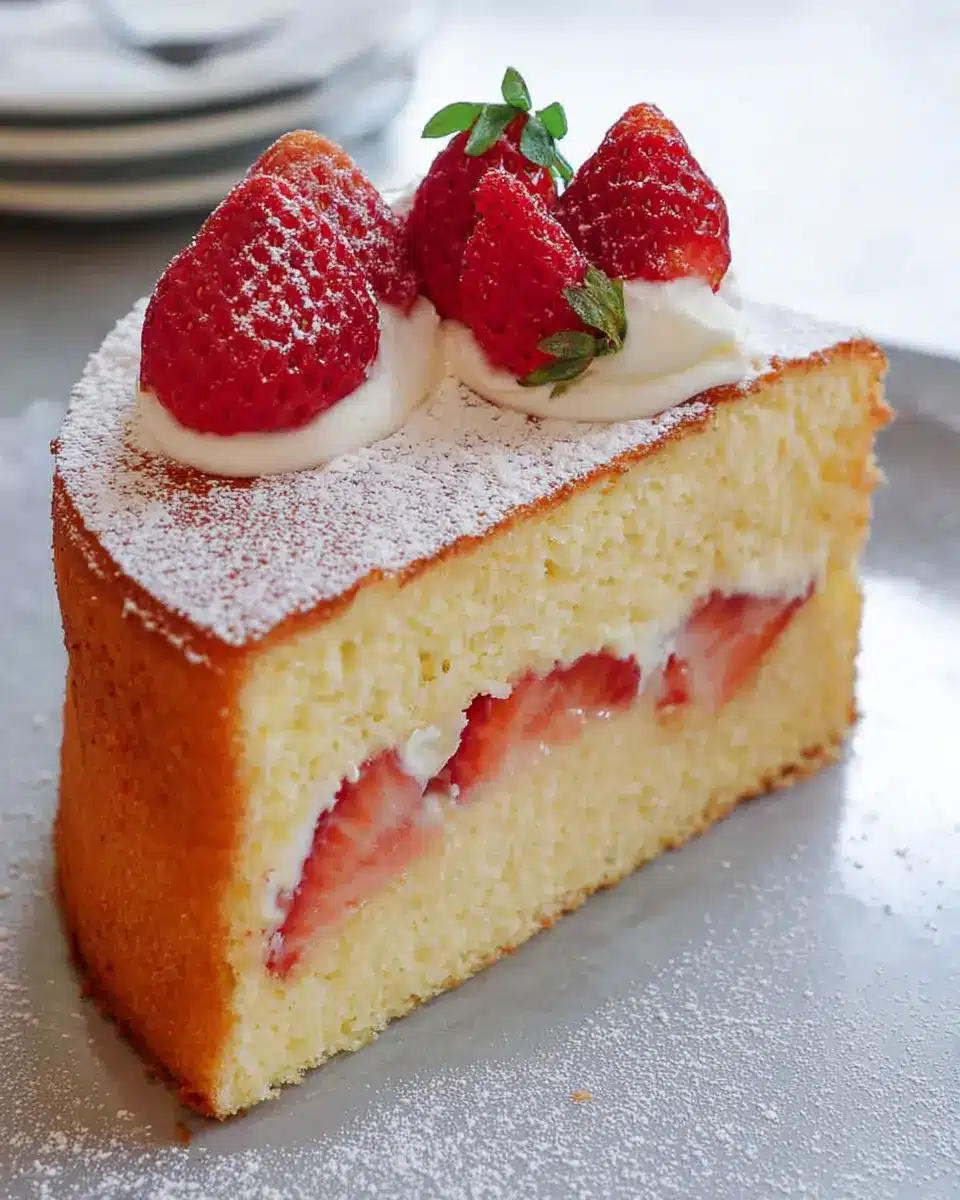
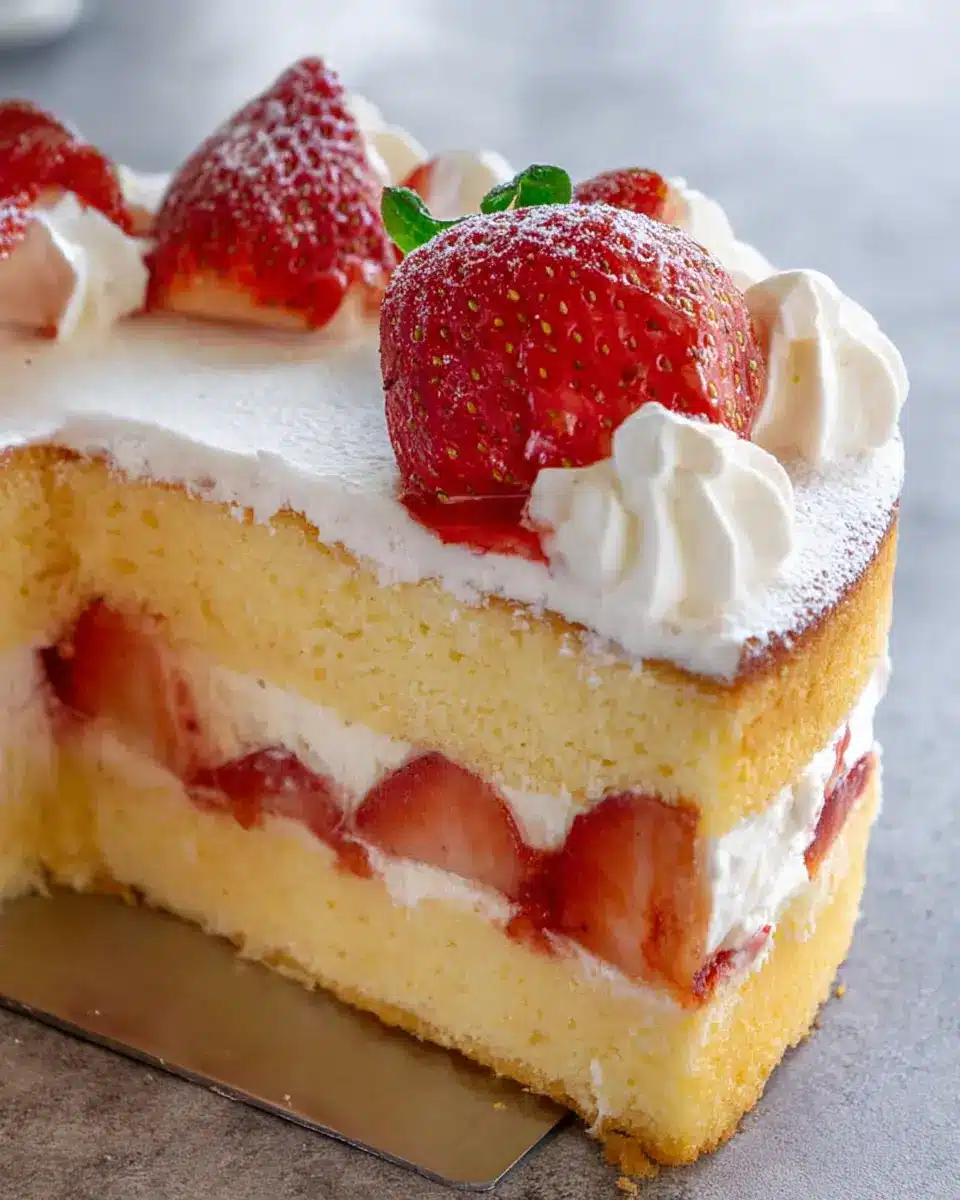
With everything ready, it’s time to bring your masterpiece together. Slice the cooled sponge cake horizontally into two layers. Brush the cut sides with syrup for that additional moisture. Spread a generous layer of whipped cream on the bottom half, and place the strawberry halves—pack them in tightly! Add more whipped cream, then carefully place the top half of the cake back on. For the final touch, coat the outside with the remaining cream, forming beautiful peaks. Garnish with whole strawberries on top.
By now, you should be marveling at your beautiful Japanese Strawberry Sponge Cake! This delightful dessert isn’t just a feast for the eyes; it's a celebration of flavors and textures. Enjoy your creation, and don’t forget to share it with friends and family—after all, food is best enjoyed in good company!
Variations on Japanese Strawberry Sponge Cake
Mixed Berry Shortcake Option
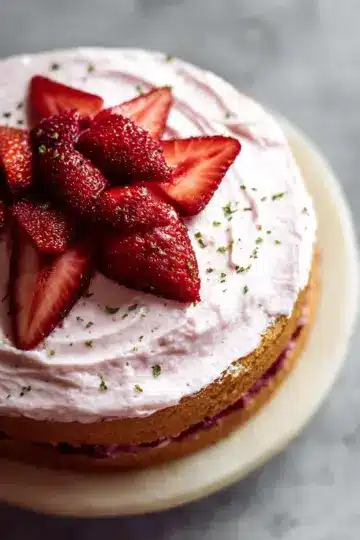
If you're a fan of berries, try swapping out the strawberries for a delightful mix of your favorites! Raspberries, blueberries, and blackberries can create a beautiful, vibrant Japanese Strawberry Sponge Cake that's just as delicious. You can even incorporate a berry compote between the layers for an extra burst of flavor.
Tropical Fruit Variations
Feeling adventurous? Embrace the sunny tropics by adding fruits like mangoes, pineapples, or kiwis. These fruits not only bring a refreshing taste but also make your cake visually stunning. Simply layer your sponge cake with whipped cream and these tropical delights for a fresh twist on the classic Japanese Strawberry Sponge Cake. For more ideas, check out seasonal fruit combinations that could elevate your dessert game!
Cooking Tips and Notes for Japanese Strawberry Sponge Cake
Importance of Fresh Ingredients
When crafting your Japanese Strawberry Sponge Cake, fresh ingredients make a world of difference. Using fresh eggs not only enhances flavor but also helps achieve that essential fluffy texture. Eggs that are too old can create a dense cake, so opt for the freshest ones you can find. Additionally, pick ripe strawberries for maximum sweetness and juiciness; they will elevate your cake from good to extraordinary.
Getting the Right Sponge Texture
The key to a perfect sponge lies in achieving the right texture. Ensure you beat your egg whites until stiff, but be cautious not to over-whip them. You want a light, airy batter that will rise beautifully in the oven. Remember, folding ingredients gently helps keep the air bubbles intact, resulting in that sought-after fluffiness. For a deeper dive into mastering sponge cake techniques, check out this guide.
Serving Suggestions for Japanese Strawberry Sponge Cake
Perfect pairings for your cake
When indulging in a luscious slice of Japanese Strawberry Sponge Cake, consider pairing it with a dollop of freshly whipped cream or a scoop of vanilla ice cream for an irresistible treat. A cup of green tea or matcha latte complements this dessert beautifully, enhancing its delicate flavors. For a fruity twist, serve alongside a refreshing berry compote or a handful of fresh berries to add textural contrast and extra sweetness.
Presentation ideas for special occasions
Elevate your Japanese Strawberry Sponge Cake for special events by adorning it with edible flowers or a sprinkle of mint for a touch of elegance. Place your cake on a decorative cake stand and surround it with fruits or greenery for a delightful centerpiece. For birthdays or anniversaries, drizzle a light glaze on top, or use reserved whipped cream to pipe elegant decorations. Don’t forget to add personalized touches, like themed cake toppers or colored sprinkles, to make it uniquely yours!
For more ideas on cake presentation, check out resources like The Kitchn or Taste of Home.
Time Breakdown for Japanese Strawberry Sponge Cake
Preparation time
Around 30 minutes – This includes gathering your ingredients and prepping your cake pan.
Baking time
25-30 minutes – Perfecting that fluffy sponge is key, so keep an eye on it!
Total time
Approximately 1 hour – In just one hour, you can create a stunning Japanese Strawberry Sponge Cake that will impress your friends and family. For more tips, check out our guide on baking techniques here.
Don't forget, enjoying the process is just as important as the end result! Happy baking!
Nutritional Facts for Japanese Strawberry Sponge Cake
Calories per serving
A delectable serving of Japanese Strawberry Sponge Cake contains about 346 calories. This makes it a delightful yet indulgent treat to enjoy on special occasions or as a sweet surprise.
Sugar and fat content
Within each slice, you'll find 18g of sugar and 22g of fat, including 13g of saturated fat. While this cake is undeniably rich, the delightful blend of flavors makes it worthwhile for a well-deserved dessert.
Key vitamins and minerals
Enjoy essential nutrients too, as a serving provides 40% of your daily Vitamin C needs along with modest amounts of Vitamin A, calcium, and iron. It's a sweet way to bring a little nutrition into your joy!
FAQs about Japanese Strawberry Sponge Cake
How can I achieve a fluffier sponge cake?
To create a fluffy sponge cake, there are a few key techniques to consider. Firstly, beat the egg whites until they form stiff peaks; this adds volume and lightness. Make sure you're using very fresh eggs, as older eggs can lead to a denser cake. Incorporating the flour carefully and gently folding it into the mixture will also help maintain that airy texture. For extra tips, check out this guide to perfecting sponge cakes.
What can I use instead of strawberries?
If strawberries aren't your favorite or if they're out of season, you can easily substitute them! Try using other berries like blueberries, raspberries, or blackberries for a lovely fruit medley. For different flavors, consider peaches, kiwis, or even tropical fruits like pineapples and mangos. Feel free to experiment with your favorite fruits to create a unique twist on the classic Japanese Strawberry Sponge Cake.
How long will the cake last?
The Japanese Strawberry Sponge Cake is best enjoyed fresh, typically within two days for optimal flavor and texture. While the sponge can last longer, the strawberries and whipped cream may start to lose their quality by day three. For tips on storing your cake, be sure to check out this article on cake preservation. Enjoy your baking!
Conclusion on Japanese Strawberry Sponge Cake
Creating a Japanese Strawberry Sponge Cake is a delightful way to showcase your baking skills. With its light, fluffy texture and fresh strawberry filling, this cake is perfect for special occasions or casual gatherings. Enjoy sharing this tasty treat with family and friends for a truly memorable experience!
For more information on cake decoration techniques, check out popular baking resources like Fine Cooking or for tips on mastering sponge cakes, visit Serious Eats.

Japanese Strawberry Sponge Cake
Equipment
- oven
- Cake Tin
- Whisk
- spatula
- Saucepan
- Piping Bag
Ingredients
Sponge Cake
- 125 g all-purpose flour sifted 3 times
- 100 g sugar (note 1)
- 4 large eggs yolks and whites separated
- 60 g butter melted
- Butter and flour to coat inside the cake pan
Decoration
- 18 strawberries (mid-size, note 3)
- 400 ml cream for whipping (note 4)
- 10 g sugar
Syrup (optional)
- 40 ml water
- 10 g sugar
Instructions
Baking A Sponge Cake
- Pre-heat oven to 180°C/356°F.
- Coat the inside of an 18cm/7" cake tin (note 6) with butter, dust with flour, then shake off the excess flour.
- Put the egg yolks in a bowl, add ⅔ of the sugar and beat the egg yolks until they become whitish and thick.
- In a separate bowl, beat the egg whites. When the small bubbles form and the volume of the egg white doubles, add the remaining sugar in 2-3 batches and beat further to make meringue.
- When the meringue becomes firm and it can form a peak when you lift the whisk, it is ready.
- Put the flour through the sifter and add to the beaten egg yolk. Fold the batter with a spatula.
- Transfer ⅓ of the meringue to the batter and mix with a whisk until the batter becomes smooth.
- Add the remaining meringue to the batter in 2-3 batches and fold.
- Pour the melted butter into the batter and fold several times. It's OK even if the butter is not completely mixed.
- Pour the batter into the cake tin. Drop the tin onto the work bench to settle the batter in the tin.
- Cook in the oven at 180°C/356°F for 25 minutes. Insert a thin bamboo skewer in the centre of the cake to see if the skewer comes out dry.
- Take the tin out of the oven and drop the tin onto the workbench a couple of times to detach the cake from the tin. Remove the cake from the tin and place it on a rack, upside down to cool completely.
Decorating the Cake
- If making syrup, put the syrup ingredients in a small saucepan and bring it to a boil. Let it cool.
- Whip the cream until soft peaks form. Wipe the strawberries, remove the stems and halve 10 strawberries.
- Slice the sponge cake horizontally in half, remove the top half and place it next to the bottom half.
- Using a brush, coat the cut surface of the two sponge cakes with the syrup gently.
- Drop about 3 heaped tablespoons of the whipped cream on the bottom half and spread to cover the surface. Fill with halved strawberries.
- Drop about 4 heaped tablespoons of the whipped cream on and spread it to cover the strawberries and the edge.
- Place the top half of the cake on it, syrup side down. Fill the gap with whipped cream.
- (Optional) thinly coat the top and side of the cake with whipped cream. Leave the cake in the fridge for 10 minutes.
- Fully cover the top and side of the cake with remaining whipped cream, leaving some for piping.
- Put the remaining cream in a piping bag with a round nozzle. Squeeze out the cream to make mounds around the edge of the surface and place a strawberry on each mound.


Leave a Reply