
Introduction to Homemade Cake Pops
If you're a young professional on the go, homemade cake pops are the perfect treat to enjoy during your busy workday. With their bite-sized portions and delightful flavor combinations, they offer a sweet escape without the guilt of overindulgence. Imagine having a fun, portable dessert that fits nicely in your lunch bag or is easy to share with colleagues during a quick coffee break.
Cake pops are incredibly versatile too. You can customize the flavor of the cake, the type of frosting, and even the coating. For something extra special, consider experimenting with different toppings or drizzles. They're not just a dish; they're a dessert that can reflect your personality. Plus, making them at home is a fantastic way to unwind after a hectic week.
As you whip up a batch of homemade cake pops, you’ll find that the process is not only therapeutic but also a wonderful creative outlet. And let’s not forget the joy of sharing these treats with friends or colleagues, enhancing both your social connections and your reputation as the go-to dessert maker! Check out this guide on measuring baking ingredients for some essential tips as you begin your cake pop journey.
Ingredients for Homemade Cake Pops
When you're diving into the world of homemade cake pops, understanding the ingredients sets the foundation for sweet success! Let’s break them down into three essential categories: baking, frosting, and coating.
Essential Baking Ingredients
To create the cake base, you'll need:
- All-purpose flour: 1 and ⅔ cups for a fluffy texture.
- Baking powder and baking soda: These ensure your cake rises perfectly.
- Salt: Just a pinch to enhance flavor.
- Unsalted butter: ½ cup, softened to room temperature for a creamy batter.
- Granulated sugar: 1 cup to sweeten things up!
- Egg: 1 large one provides structure.
- Pure vanilla extract: 2 teaspoons add a lovely aroma.
- Whole milk: 1 cup keeps everything moist and delicious.
Frosting Ingredients
A good frosting binds the cake pops together. You’ll need:
- Unsalted butter: 7 tablespoons, softened.
- Confectioners’ sugar: 1 and ¾ cups for smooth sweetness.
- Heavy cream or whole milk: 2–3 teaspoons for consistency.
- Vanilla extract: 1 teaspoon for that classic flavor.
Coating Ingredients
Finally, for that glossy finish and fun decorations, gather:
- Candy melts or white chocolate: 24 ounces will give your pops a delightful coat.
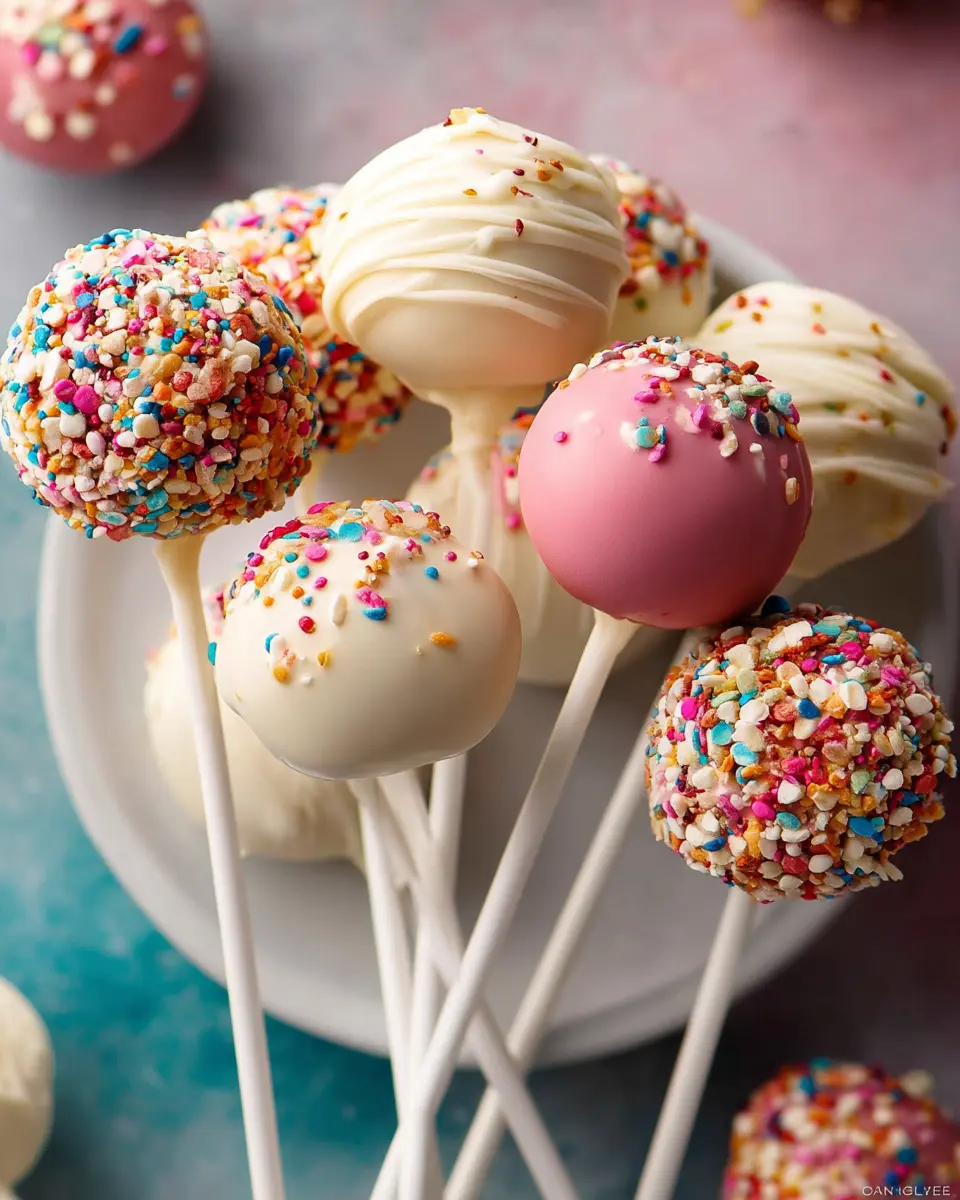
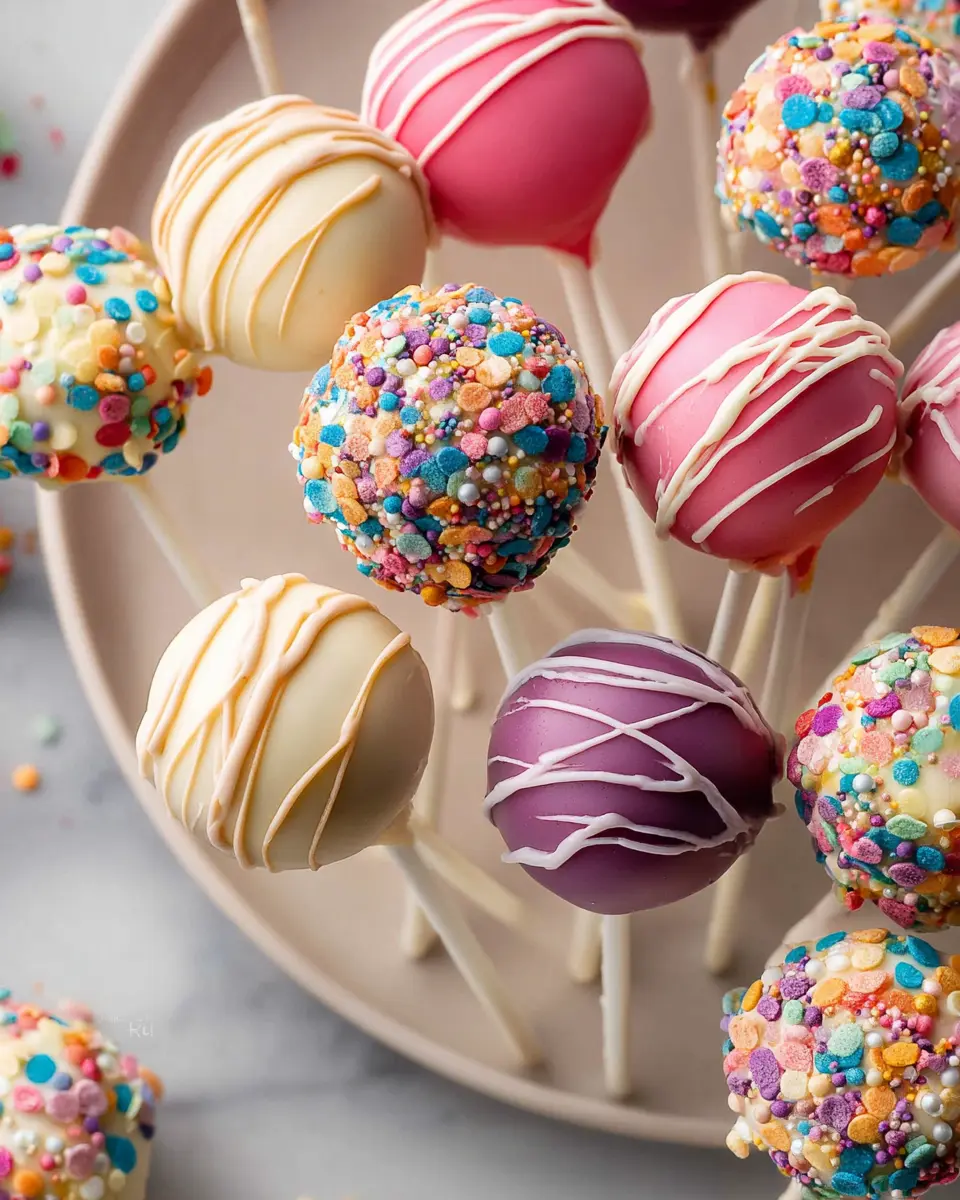
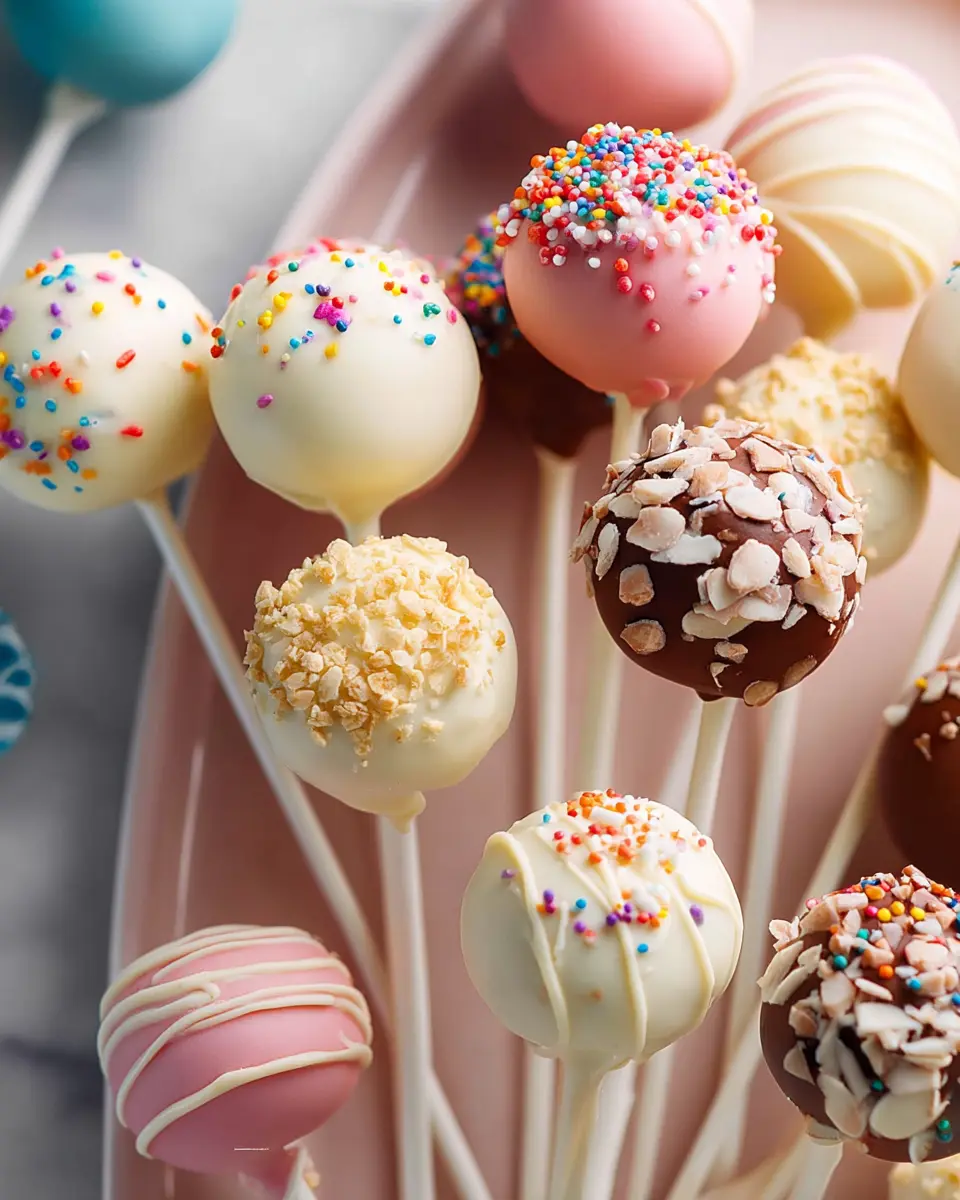
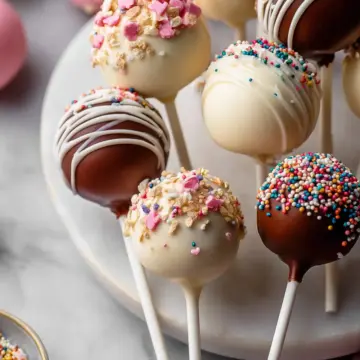
- Sprinkles: Because who doesn’t love a fun sprinkle topping?
With these ingredients on hand, you’re ready to embark on your homemade cake pops adventure! Don't hesitate to explore delightful variations or add flavors. Your cake pops will not only be visually appealing but also a tasty treat for everyone! If you need more help with measuring or specific techniques, check out this helpful guide. Happy baking!
Step-by-Step Preparation of Homemade Cake Pops
Creating those delightful homemade cake pops doesn’t have to feel overwhelming. Each step builds on the last, making the process engaging and fun. Let’s dive into the journey of transforming simple ingredients into vibrant, tasty treats!
Preheat the oven and prepare the pan
Begin by preheating your oven to 350°F (177°C). While it warms up, grab a 9-inch springform pan and grease it well—this helps ensure your cake doesn’t stick and makes for easier removal later. It’s always a good practice to have your pan prepped and the oven ready before you move on to the batter.
Make the cake batter
In a medium bowl, whisk together 1 and ⅔ cups of all-purpose flour, ½ teaspoon of baking powder, ¼ teaspoon of baking soda, and ½ teaspoon of salt. Now, using either a hand mixer or a stand mixer fitted with the paddle attachment, beat together ½ cup of softened unsalted butter with 1 cup of granulated sugar until it’s light and fluffy—about three minutes. Add in 1 egg and 2 teaspoons of vanilla extract, mixing well before incorporating the dry ingredients along with 1 cup of whole milk. Stir everything just until combined to keep the cake light and airy.
Bake the cake and cool
Pour the batter into your prepared pan, smoothing out the top. Bake in the oven for 30–36 minutes, or until a toothpick inserted into the center comes out clean. Once baked, allow the cake to cool completely on a wire rack. Trust us, letting it cool is crucial for the next steps!
Prepare the frosting
Now that your cake is cooling, it’s time to whip up some frosting. Beat 7 tablespoons of softened butter until creamy, then gradually add 1 and ¾ cups of confectioners’ sugar, along with 2-3 teaspoons of heavy cream and 1 teaspoon of vanilla extract. Mix at low speed before increasing to high speed for about three minutes until it’s fluffy and delicious.
Crumble the cake and mix with frosting
Once cooled, crumble your cake into smaller pieces right into the bowl with your frosting. Mix on low speed until you have a dough-like consistency—make sure there are no big lumps hiding in there!
Form the cake balls
Scoop about 1 tablespoon of the mixture and roll it into a ball; repeat this step until you’ve used all the mixture. Place these on a lined baking sheet, ensuring they’re evenly spaced apart.
Chill the cake balls
To ensure a firm shape, refrigerate the cake balls for 2 hours, or freeze them for 1 hour. Chilling is essential for preventing them from falling apart during coating!
Melt the coating
While the cake balls cool, melt your candy melts or white chocolate in a microwave on a low setting, hammering in 20-second intervals until smooth. Make sure to stir in between to ensure even melting—nobody likes burnt chocolate!
Coat the cake pops
Remove a few cake balls from the fridge, dip the end of a lollipop stick into the melted chocolate, and insert it halfway into the cake ball. Then, dip the entire ball into the coating, gently tapping it against the edge of your container to let the excess drip off.
Decorate and set
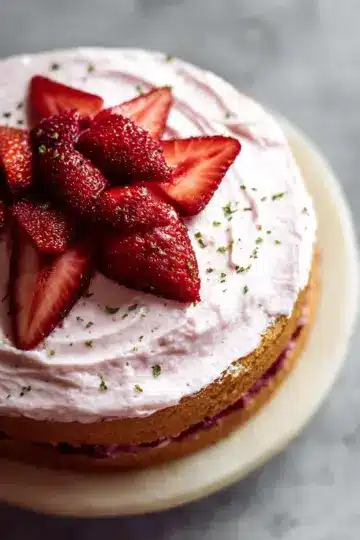
Sprinkle some fun toppings on your pops while the coating is still wet for a pop of color and texture. Place the sticks upright in a block of foam or a box to let them set completely. After about an hour, your homemade cake pops will be ready to enjoy!
By following these steps, you'll have gorgeous cake pops that not only taste fantastic but also look beautiful! Perfect for any occasion or just a sweet treat for yourself. Happy baking!
Variations on Homemade Cake Pops
Chocolate Cake Pops
For chocolate lovers, chocolate cake pops are an indulgent twist. Simply substitute the all-purpose flour in the base recipe with cocoa powder—about ⅔ cup should do the trick. This variation not only enhances the flavor but also gives a rich, decadent experience. Serve these at parties, and watch them disappear!
Red Velvet Cake Pops
Want to impress at your next gathering? Red velvet cake pops are the way to go! Just add cocoa powder and a little red food coloring to the batter until you achieve that beautiful red hue. Topped with cream cheese frosting rather than the traditional buttercream, these pops are as delicious as they are visually stunning.
Gluten-Free Cake Pops
If you’re catering to dietary needs, gluten-free cake pops are a fantastic option. Substitute the all-purpose flour with a 1:1 gluten-free baking mix. Ensure the other ingredients, like cake coating, are gluten-free too. With a bit of adjustment, everyone can enjoy these delightful treats at your next get-together!
For more creative ideas and variations, you can also check out Sally's Baking Addiction for inspiration!
Baking Tips and Notes for Homemade Cake Pops
Common pitfalls to avoid
When making homemade cake pops, one common mistake is overbaking your cake. Keep an eye on it around the 30-minute mark, as even a minute can make a difference! Additionally, ensure your cake balls are chilled before dipping; warm cake pops can lead to cracks in the coating. Lastly, dipping can get messy; don’t overload your stick with coating to avoid drips.
Equipment recommendations
To achieve the best results, having the right tools is key. I recommend using a 9-inch springform pan for even baking and easy removal. A glass measuring cup is perfect for melting chocolate because of its handy spout! For shaping your pops, lollipop sticks are essential, and a cooling rack will help with drying.
Serving Suggestions for Homemade Cake Pops
Ideal occasions for serving
Homemade cake pops are a delightful treat perfect for a variety of occasions! Consider serving them at:
- Birthday parties
- Baby showers or gender reveal parties
- Weddings as fun desserts for guests
- Holiday gatherings or office parties
- Graduation celebrations
These versatile pops are not only tasty but also add a whimsical touch to any event.
Creative presentation ideas
Elevate your cake pops with some creative presentation techniques! Here are a few ideas to impress your guests:
- Colorful displays: Arrange your cake pops in a decorative vase or a cake pop holder for an eye-catching centerpiece.
- Themed decorations: Tailor your pops for the occasion with themed sprinkles or edible glitter.
- Creative labels: Use fun labels on the sticks to identify flavors or add a personal message.
For detailed how-tos on cake pop designs, check out resources like Bakerella. Your guests will appreciate the extra effort!
Time Breakdown for Homemade Cake Pops
Preparation Time
Prepare your ingredients and tools for about 30 minutes. This includes gathering everything you need, preheating the oven, and mixing the batter.
Baking Time
Once your batter is ready, it takes around 30-36 minutes in the oven to achieve a perfect, fluffy cake. Keep an eye on it for that golden-brown hue!
Cooling Time
Don't rush! Let the cake cool completely for about 1 hour before crumbling it for your cake pops.
Total Time
From start to finish, making your delicious homemade cake pops can take about 3 hours, including refrigeration time for shaping and coating. Enjoy the process, and take a moment to appreciate your handiwork!
For detailed instructions, check out our complete recipe for homemade cake pops.
Nutritional Facts for Homemade Cake Pops
When indulging in homemade cake pops, it's good to know what you're treating yourself to. Here’s a brief overview of their nutritional value:
Calories per pop
Each cake pop contains approximately 150 calories, making it a petite yet delightful treat perfect for any occasion.
Sugars
With about 10 grams of sugar per pop, these sweet bites satisfy that craving without going overboard.
Fats
A single cake pop has around 6 grams of fat, mostly from the butter and candy coating, contributing to their rich flavor.
For more detailed insights on nutrition, check out the USDA FoodData Central, a great resource for tracking the nutritional aspects of your favorite ingredients!
FAQs about Homemade Cake Pops
How long do cake pops last?
Homemade cake pops can be stored in the refrigerator for up to one week. Just make sure to keep them in an airtight container to maintain their freshness. If you'd like to enjoy them longer, consider freezing them! Properly wrapped, cake pops can last in the freezer for up to six weeks.
Can I make cake pops ahead of time?
Absolutely! Making homemade cake pops ahead of time is a great idea, especially if you're preparing for an event. You can bake the cake a day prior, allowing it to cool and store it at room temperature. Once you've formed the cake balls, they can be stored in the refrigerator for up to two days or frozen for up to six weeks. Just remember to let them thaw in the fridge before dipping!
What can I use instead of candy melts?
If candy melts aren’t your thing, you have a few tasty alternatives! You can use white chocolate or milk chocolate—just be sure to chop it finely for even melting. Adding a teaspoon of vegetable oil can help thin it out and achieve a smoother coating. Additionally, dark chocolate or even colored chocolate wafers are great options for customizing your homemade cake pops!
For tips on making the perfect cake pops, check out the original recipe above. Happy baking!
Conclusion on Homemade Cake Pops
The joy of making and sharing cake pops
Creating homemade cake pops is a delightful journey filled with creativity and flavor. Whether you're celebrating a birthday, hosting a gathering, or simply indulging yourself, these treats bring a smile to everyone. So grab your ingredients and dive into the fun of making and sharing these delicious delights!
Homemade Cake Pops
Equipment
- 9-inch springform pan
- handheld mixer
- stand mixer
- cooling rack
- baking sheet
- silicone baking mat
- parchment paper
- glass measuring cup
- Lollipop sticks
Ingredients
Cake Ingredients
- 1 and ⅔ cups all-purpose flour spooned & leveled
- ½ teaspoon baking powder
- ¼ teaspoon baking soda
- ½ teaspoon salt
- ½ cup unsalted butter softened to room temperature
- 1 cup granulated sugar
- 1 large egg at room temperature
- 2 teaspoons pure vanilla extract
- 1 cup whole milk (or buttermilk)
Frosting Ingredients
- 7 tablespoons unsalted butter softened to room temperature
- 1 and ¾ cups confectioners’ sugar
- 2–3 teaspoons heavy cream or whole milk
- 1 teaspoon pure vanilla extract
Coating Ingredients
- 24 ounces candy melts (or white chocolate bars)
- sprinkles
Instructions
Cake Preparation
- Preheat oven to 350°F (177°C). Grease a 9-inch springform pan.
- Whisk the flour, baking powder, baking soda, and salt together in a medium bowl. Set aside.
- Using a handheld or stand mixer, beat the butter and sugar together until creamed, about 3 minutes.
- Add the egg and vanilla extract and beat on high speed until combined.
- Add the dry ingredients and milk to the bowl and mix on low speed until combined.
- Pour and spread the batter evenly into the prepared pan. Bake for 30–36 minutes.
- Allow the cake to cool completely in the pan set on a wire rack.
Frosting and Cake Ball Formation
- Beat the butter for the frosting on medium speed until creamy.
- Add confectioners’ sugar, heavy cream, and vanilla extract and mix to combine.
- Crumble the cooled cake into the bowl on top of the frosting.
- Scoop 1 Tablespoon of cake/frosting mixture and roll into a ball. Refrigerate for 2 hours.
Coating the Cake Pops
- Melt the chocolate or candy melts in a measuring cup in the microwave.
- Dip the end of a lollipop stick into the coating, then insert into the center of the cake ball.
- Dip the cake ball into the coating until completely covered. Decorate with sprinkles.
- Coating will set within an hour. Store in the refrigerator for up to 1 week.


Leave a Reply