
Introduction to Authentique Katsu Curry Japonais
When it comes to comfort food, katsu curry japonais is hard to beat! This dish combines crispy, golden-fried chicken with a rich and velvety curry sauce, making it a favorite for many. Imagine coming home after a long day, craving something warm and satisfying; katsu curry delivers that sense of home and happiness in every bite.
Why is it so special? The secret lies in the flavors that meld beautifully together. The tender chicken thigh, enveloped in a crunchy panko crust, contrasts perfectly with the aromatic curry infused with hints of sweetness from grated apple and honey. This harmony creates a satisfying meal that's as delectable as it is comforting. According to a survey by the Japan National Tourism Organization, curry is among the most-loved dishes in Japan, and katsu curry often stands out as a top choice.
Whether you’re entertaining guests or cooking for yourself, the preparation of Authentique Katsu Curry Japonais can transform a simple weeknight dinner into a delightful culinary experience. Let’s dive into this beautiful recipe that’s sure to bring joy to your dining table!
Ingredients for Authentique Katsu Curry Japonais
Essential Ingredients for the Katsu Curry
To create a delicious Authentique Katsu Curry Japonais, you'll need a handful of essential ingredients. Start with two boneless chicken thighs, a great choice for juicy flavor. Season them with salt and pepper before cooking. Don’t forget the oil for deep frying! For the coating, have panko breadcrumbs ready, along with some flour and a beaten egg. Finally, you'll want two servings of cooked sushi rice to serve everything atop, along with a sprinkle of scallions for garnish.
Breakdown of the Sauce Components
The heart of your curry is in the sauce. You’ll need a blend of freshly chopped onions, carrots, and potatoes for texture. Add ginger and garlic for a fragrant kick, plus grated apple for subtle sweetness. The sauce itself combines chicken stock, a hint of honey, light soy sauce, and rice vinegar—these elements harmonize beautifully. Don’t forget the star of the dish: curry roux (either homemade or store-bought) for the rich, creamy texture!
What to Serve Alongside Katsu Curry
When it comes to side dishes, keep it simple! Your beautifully plated Katsu Curry is best complemented with a side of pickled vegetables or a fresh cucumber salad. These refreshing bites will balance the richness of the curry. Pairing your dish with some green tea not only enhances the meal but offers a traditional touch to this Japanese favorite!
Preparing Authentique Katsu Curry Japonais
Creating Authentique Katsu Curry Japonais is a rewarding culinary adventure that brings the delightful flavors of Japan to your kitchen. Let's get started!
Gather and prepare your ingredients
Start by assembling all your ingredients to ensure a smooth cooking experience. You’ll need:
- For the chicken: 2 boneless chicken thighs, salt, pepper, and neutral frying oil.
- For the chaelure: 1 beaten egg, 2 tablespoons of all-purpose flour in one plate, and a shallow plate filled with panko breadcrumbs.
- For the curry: 0.5 carrots, 0.5 onion, 1 potato, 0.25 teaspoon grated ginger, 1 clove garlic, 15g grated apple, a pinch of salt, and a pinch of black pepper.
- For the sauce: 250ml chicken broth, 0.5 tablespoon honey, 0.5 tablespoon light soy sauce, 1 crushed cherry tomato, 0.5 teaspoon sugar, 0.5 teaspoon rice vinegar, and 60g homemade Japanese curry roux or golden curry cubes.
By prepping all your ingredients ahead of time, you'll save yourself some stress and make the cooking process smoother.
Create the flavorful curry base
To craft the heartwarming curry base, heat oil in a large pot over medium heat. Begin by sautéing the onion until it’s translucent and tender, usually around 5 minutes. Then, add the garlic and grated ginger, stirring until fragrant. Pour in the chicken broth (or a mix of broth and water), and toss in your grated apple, honey, soy sauce, sugar, crushed tomato, and rice vinegar.
Add in the chopped carrots and potatoes, ensuring that the broth just covers the vegetables. Let the mixture simmer on low heat for about 15 minutes, stirring occasionally. This step not only melds the flavors together but also gets your home smelling divine!
Bread and fry the chicken to perfection
While your curry simmers, it's time to focus on the chicken. Start by flattening the thighs with a meat mallet—this helps them cook evenly. Season with salt and pepper. Next, dredge each piece in flour, dip it into the beaten egg, and coat it with panko breadcrumbs. For that extra crunch, lightly mist the panko breadcrumbs with water.
Heat a neutral oil in a pan to about 170°C and fry the chicken for 2 minutes on each side. This locks in the flavors and gives you that golden, crispy coating. Rest the chicken for a few minutes after frying—it helps keep the juices in!
Assemble the curry with rice
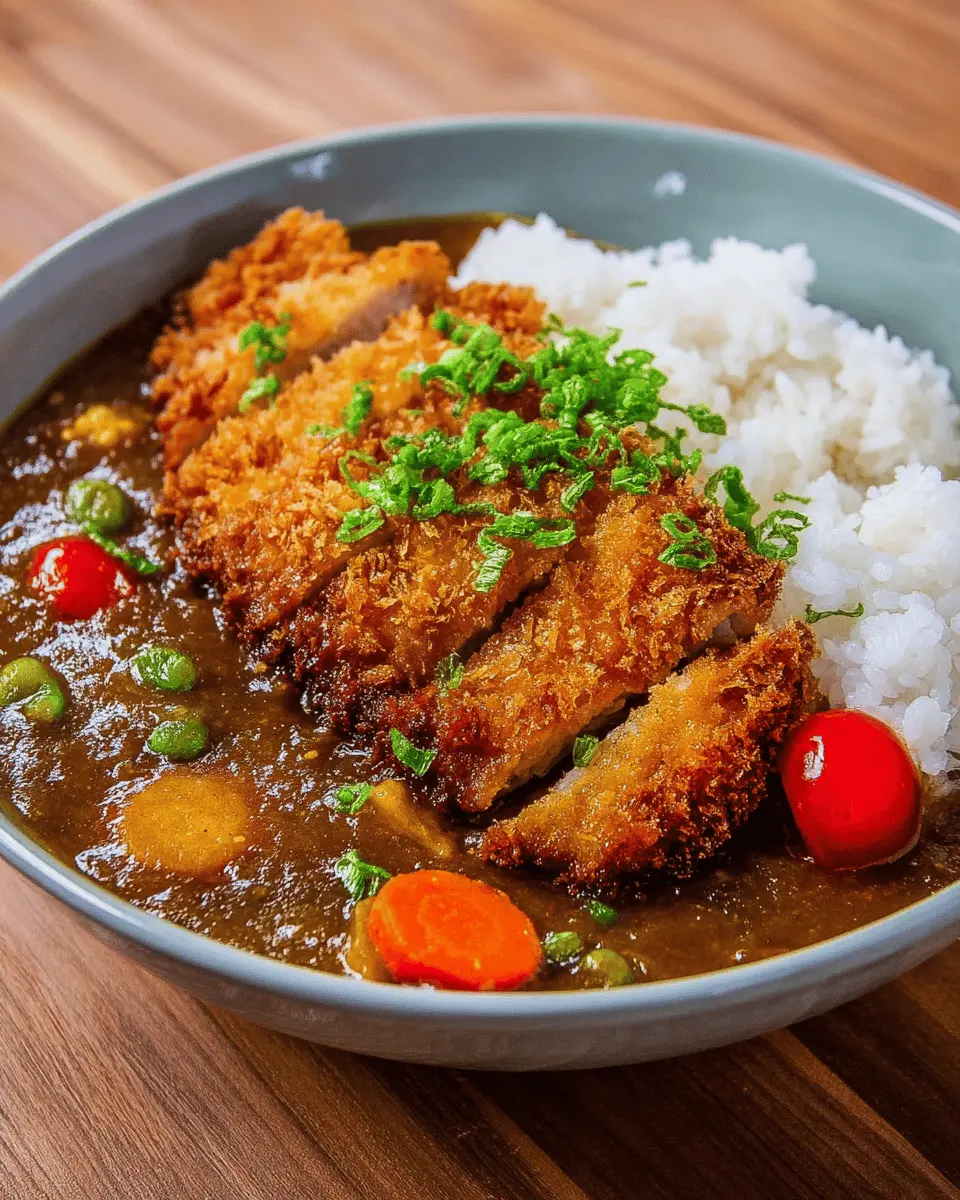
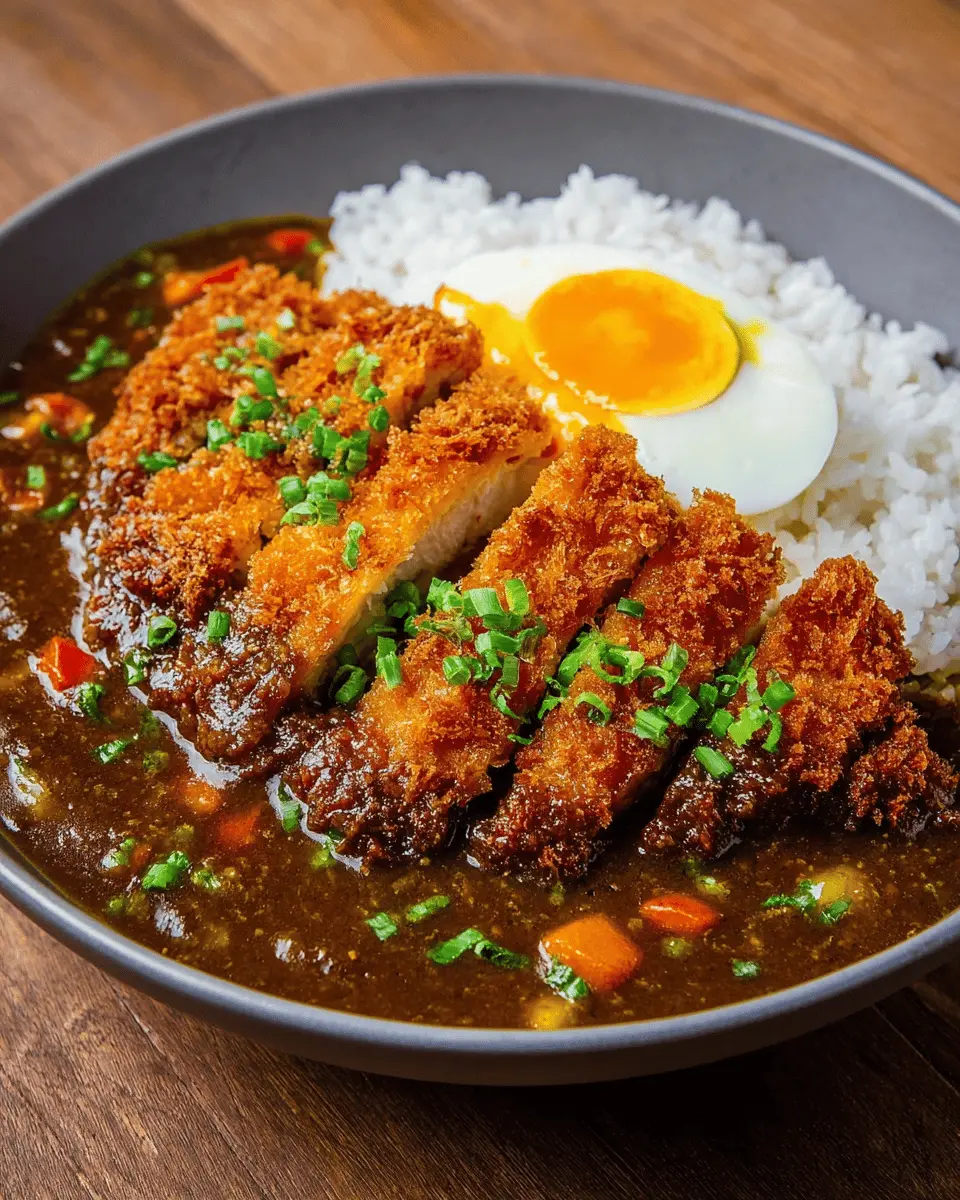
When everything is cooked, it's assembly time! Place a bed of sushi rice in a bowl, ladle a generous serving of your rich curry over the top, allowing some rice to peek through. Now slice your chicken into perfect pieces and lay it on top of the curry, showcasing that crispy crust. Doesn’t it look inviting?
Garnish and Serve
You’re almost there! For a lovely finish, sprinkle some finely chopped young onions on top. This not only adds color but also a fresh burst of flavor to your Authentique Katsu Curry Japonais. Serve immediately, and watch it disappear—this dish is sure to be a hit at any meal. Enjoy your culinary creation!
Incorporate this warm, hearty dish into your rotation, and feel free to share your variations or favorite twists on this classic! If you're curious about the health benefits of the ingredients, check out this Nutrition Guide.
Variations on Authentique Katsu Curry Japonais
Vegetarian Katsu Curry Options
If you’re looking for a delicious vegetarian twist on the traditional Authentique Katsu Curry Japonais, consider using crispy tofu or eggplant as your main “katsu.” Simply slice tofu or eggplant, coat them in the same panko breadcrumbs, and fry until golden brown. You can also add drizzles of soy sauce or miso to enhance the flavors. Pair this with a generous scoop of curry sauce and rice, and you’ll have a hearty meal that satisfies any craving!
Adding Different Proteins to Your Katsu Curry
Why not mix things up with different proteins for your Katsu Curry? In addition to classic chicken, you can try using turkey bacon, lean beef, or even shrimp. Simply prepare as per the original recipe, adjusting cooking times as needed to suit your chosen protein. And don’t forget to explore seasonal veggies like bell peppers or zucchini to add extra depth and flavor to your curry. It's all about making this dish your own!
Cooking tips and notes for Authentique Katsu Curry Japonais
Tips for achieving the perfect crunch on the chicken
To create that irresistible crunch in your Authentique Katsu Curry Japonais, start by pounding the chicken thighs until they're evenly flattened, which ensures uniform cooking. When breading, don’t rush—coat the chicken thoroughly in flour, egg, and finally, the panko breadcrumbs, pressing down gently to ensure adherence. For the best results, slightly mist the panko with water using a spray bottle just before frying; this helps achieve a delightful, crispy texture when fried at the right temperature.
Enhancing the flavor of the curry
To truly elevate the flavor of your curry, consider adding a touch of apple and miso paste for depth. Using a homemade roux or high-quality commercial curry cubes can make all the difference. Don't forget to taste as you go! Adjust the seasoning with a touch of salt or a dash of soy sauce for umami. Adding a splash of rice vinegar at the end can help brighten the dish, giving it that distinctive balance that's characteristic of Japonais cuisine.
Serving suggestions for Authentique Katsu Curry Japonais
Ideal accompaniments for a Katsu Curry meal
When serving Authentique Katsu Curry Japonais, consider pairing it with some delightful accompaniments that enhance the overall experience. A side of pickled vegetables, known as tsukemono, adds a refreshing contrast to the rich curry flavors. Steamed broccoli or green beans bring a touch of color and nutrition to your plate. Additionally, a simple cucumber salad dressed with rice vinegar can help cleanse the palate between bites.
Creative ways to deviate from traditional presentation
To make your Katsu Curry stand out, try placing the curry sauce in a small bowl aside from the rice and meat, allowing guests to pour it over their serving to their taste. You could also add a sprinkle of furikake for an umami boost and a visual appeal. For a fun twist, serve the Katsu over crispy potato wedges instead of rice, combining comfort food elements in an unexpected way!
For more tips on enhancing your Japanese meals, check out resources like Japanese Cooking 101 for inspiration.
Time breakdown for Authentique Katsu Curry Japonais
Preparation time
The prep for Authentique Katsu Curry Japonais takes about 20 minutes. During this time, you’ll chop veggies, prep the chicken, and get everything ready for the curry’s delicious marriage of flavors.
Cooking time
Once you start cooking, allow around 45 minutes. This includes simmering the curry to develop its rich taste and frying the chicken to perfection.
Total time
In total, you’ll spend about 1 hour and 5 minutes from start to finish. It's a worthwhile investment for a homemade meal brimming with warmth and comfort. Enjoy cooking!
Nutritional Facts for Authentique Katsu Curry Japonais
When you're preparing the Authentique Katsu Curry Japonais, understanding its nutritional profile helps you manage your meal planning effectively. Here’s a quick overview of its key nutritional components:
Calories
Each serving contains approximately 409 calories, making it a satisfying meal without being overly heavy.
Protein
With around 25g of protein, this dish is a fantastic source of sustenance, ideal for those looking to maintain or build muscle.
Sodium
Be mindful of the sodium content, which is about 810mg per serving. This amount can vary based on the ingredients you choose, especially when using store-bought sauces. For a healthier twist, consider making your own curry roux.
By being aware of these nutritional facts, you can truly appreciate the Authentique Katsu Curry Japonais while making any necessary adjustments to fit your dietary goals. Enjoy making this dish with a balance of flavors and nutrients!
FAQs about Authentique Katsu Curry Japonais
Can I make Katsu Curry in advance?
Absolutely! The Authentique Katsu Curry Japonais can be prepared in advance, and it often tastes even better the next day as the flavors meld together. Just cook the curry and store it in an airtight container in the refrigerator. Reheat gently on the stove before serving.
What are some common mistakes to avoid when making Katsu Curry?
To get that perfect outcome, be cautious of these common pitfalls:
- Overcooking the vegetables: Ensure your veggies are tender but still hold their shape.
- Skipping the resting time for the chicken: Letting the fried chicken rest helps it stay crispy!
- Neglecting to season: Taste your curry as it cooks to adjust salt or sweetness levels.
Can I substitute any ingredients in the recipe?
Certainly! If you're missing some ingredients, you can swap them out. For example, panko breadcrumbs can be replaced with regular breadcrumbs, and if ginger isn't available, you might use a bit of ground ginger instead. Just be mindful that substitutions can change the flavor profile somewhat, but experimentation is part of the fun!
For further inspiration, check out this guide on Japanese curry to explore variations and tips!
Conclusion on Authentique Katsu Curry Japonais
Trying your hand at making Authentique Katsu Curry Japonais at home is a rewarding experience. Not only can you customize flavors to suit your palate, but you also get to enjoy an aromatic dish that is both comforting and satisfying. Plus, nothing beats the satisfaction of creating a delicious meal from scratch!
Why You Should Try Making Katsu Curry at Home
Making Katsu Curry at home offers several advantages that you simply can't overlook:
-
Personal Touch: By preparing this dish yourself, you can control every aspect, from the flavor profile to the presentation. Feel free to experiment with the ingredients to make it truly yours.
-
Healthier Ingredients: Cooking at home allows you to choose high-quality ingredients, making your Katsu Curry not just delicious but also a bit healthier. You can opt for leaner cuts of chicken or even go vegetarian by using tofu or vegetables.
-
Cost-Effective: Dining out can be pricey, especially for a popular dish like Katsu Curry. Preparing it at home saves you money while delivering authentic flavors.
-
Culinary Skills: This recipe is a fantastic way to sharpen your culinary skills. You’ll learn valuable techniques such as frying, simmering, and seasoning that will serve you well in other dishes.
-
Social Experience: Cooking can be a fun bonding activity. Invite friends or family to join in; sharing the process makes it all the more enjoyable!
So gather your ingredients and embark on the journey to create your own Authentique Katsu Curry Japonais! Don’t forget to share your experience and tips in the comments below!

Authentique Katsu Curry Japonais
Equipment
- Large pot
- Frying Pan
- Cutting board
- Knife
- mixing bowl
Ingredients
Chicken
- 2 pieces boneless chicken thighs
- Salt
- Pepper
- Neutral oil for frying
Breading
- 1 beaten egg egg
- 2 tablespoons wheat flour for coating
- 1 plate panko breadcrumbs
Curry
- 1 pinch salt
- 1 pinch black pepper
- 0.5 pieces carrot peeled and cut
- 0.5 pieces onion peeled and cut
- 1 piece potato peeled and cut
- 0.25 teaspoon grated ginger
- 1 clove garlic minced
- 15 grams grated apple
- 1 tablespoon neutral cooking oil
Sauce
- 250 ml chicken broth
- 0.5 tablespoon honey
- 0.5 tablespoon light soy sauce
- 1 piece crushed cherry tomato
- 0.5 teaspoon sugar
- 0.5 teaspoon rice vinegar
- 60 grams homemade Japanese curry roux or golden curry cubes
Garnish
- 2 portions cooked sushi rice
- green onions for garnish
Instructions
Preparation
- Cut the onions into quarters or slice them for quicker disintegration in the sauce.
- Peel the carrots and cut them into rolled quarters for better flavor absorption and faster cooking.
- Peel the potatoes, cut them into quarters, and soak in water for 15 minutes to remove excess starch.
- Grate the ginger and mince the garlic.
- Cut the apple into quarters, remove the core, peel the skin, and grate the apple.
Cooking the Curry
- Heat oil in a large pot over medium heat and add the onions. Sauté until translucent and tender, about 5 minutes.
- Add minced garlic and grated ginger, stir well.
- Add chicken broth, or a mix of half broth and water with glutamate.
- Add the grated apple, honey, soy sauce, sugar, crushed tomato, and vinegar.
- Add carrots and potatoes, ensuring the broth barely covers the ingredients.
- Simmer covered over medium-low heat for 15 minutes, stirring occasionally.
- Skim off any foam from the surface of the broth once it reaches a boil.
- Continue cooking covered until a wooden skewer goes through the carrots and potatoes easily.
- Turn off the heat and add the curry roux, dissolved in a ladle of cooking liquid, then mix with the remaining curry.
- Let it simmer uncovered over medium-low heat, stirring frequently until the curry thickens, about 5 to 10 minutes. Adjust salt to taste.
Preparing the Chicken
- Flatten the chicken thighs, seasoning well with salt and pepper. Trim off any excess fat.
- Dredge in flour, pressing well and shaking off excess.
- Dip in the beaten egg.
- Coat in panko breadcrumbs, pressing firmly and shaking off excess.
- Fry for 2 minutes on each side at 170 degrees Celsius.
- Let rest for 5 minutes, then fry again for 1 minute on each side.
- Let rest for 2 minutes before slicing.
Plating
- On a cutting board, slice the chicken while keeping its shape intact.
- Place rice in a bowl, generously drench with sauce leaving some rice visible.
- Place sliced chicken on top, ensuring each piece maintains its shape.
- Garnish the bowl with a few green onions for visual appeal.


Leave a Reply