
Introduction to Mini Cannoli Cups
A delightful twist on a classic dessert
If you’re a fan of Italian desserts, you've probably experienced the joy of a traditional cannoli. But what if you could enjoy that same rich, creamy filling with a fun twist? Enter Mini Cannoli Cups—a delightful and bite-sized version of the classic treat that’s perfect for any gathering or simply indulging yourself at home.
These little cups combine crispy pie crusts with a luscious ricotta filling, making them not just a dessert, but a playful experience for your taste buds. Imagine serving these at your next dinner party or enjoying them during a cozy movie night. Each bite delivers a satisfying crunch followed by the sweet, zesty flavors that are sure to impress.
For those interested in the health aspects, you might find that making Mini Cannoli Cups is simpler than you think. With just a handful of high-quality ingredients, you can whip up a delicious dessert that’s not overly complicated. Plus, consider pairing these with a delightful coffee for an elevated experience—after all, dessert is best enjoyed when shared, don’t you think?
Get ready to dive into the recipe, and let’s bring a taste of Italy directly to your table!
Ingredients for Mini Cannoli Cups
Creating delightful mini cannoli cups is easier than you might think! Let’s break down the essential components to make your little dessert dreams come true.
Essential Filling Components
The heart of your mini cannoli cups lies in the creamy filling. For a rich and satisfying mixture, you'll need:
- Whole-milk ricotta cheese: 15 oz., drained well for the perfect texture.
- Powdered sugar: ½ cup, to add a touch of sweetness.
- Granulated sugar: 2 tablespoons, enhancing the filling’s flavor.
- Zest of orange or lemon: 1 teaspoon, for a refreshing zing.
- Vanilla extract: ½ teaspoon to tie all the flavors together beautifully.
Cannoli Cup Ingredients
The crunchy base is just as important! Gather the following for your cannoli cups:
- Refrigerated pie crusts: One box (2 count), softened as per instructions for easy handling.
- Turbinado sugar (or raw sugar): 3 tablespoons for a rustic sweetness.
- Ground cinnamon: 1 teaspoon, adding warmth and spice.
Garnish for the Finishing Touch
Finally, don’t forget the garnish that elevates your dessert:
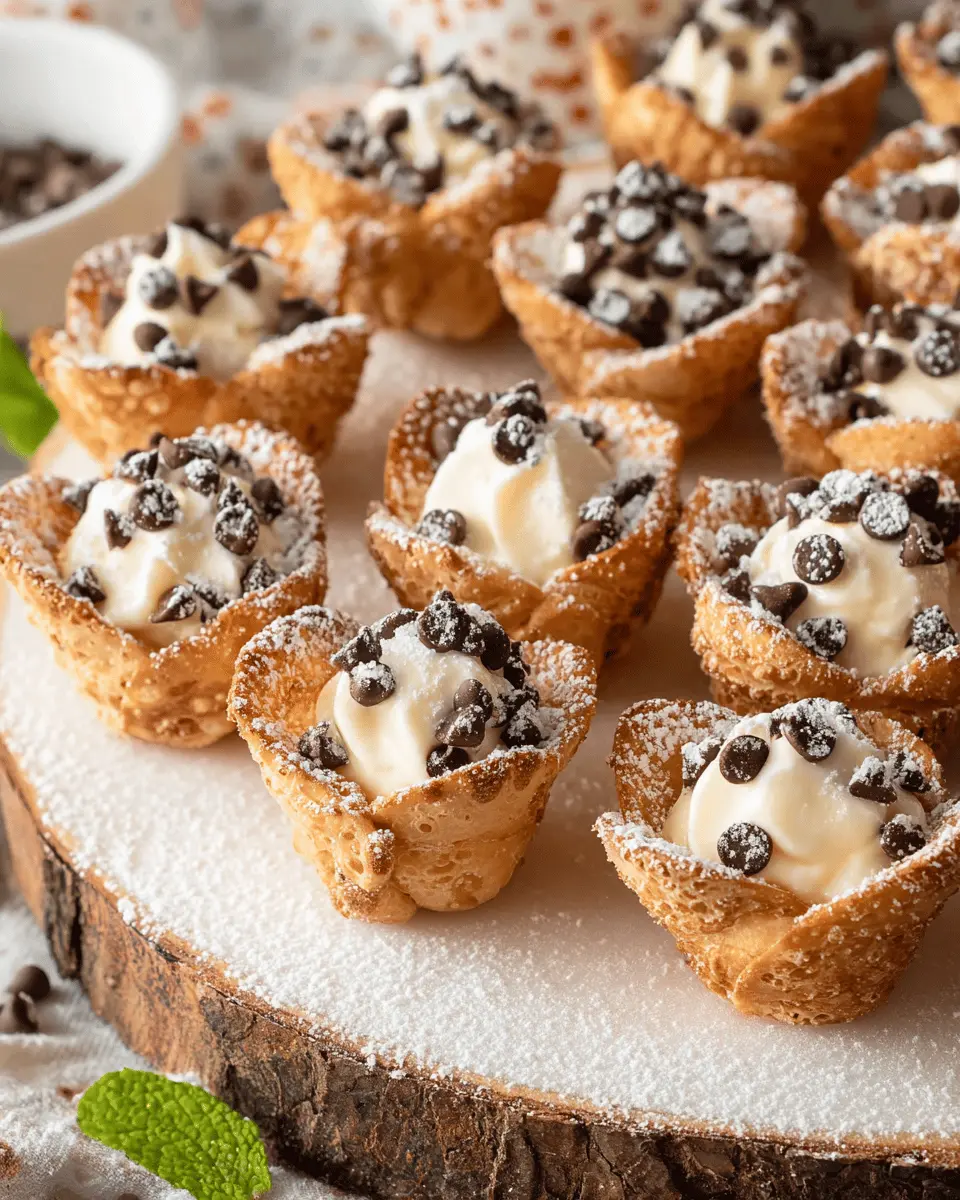
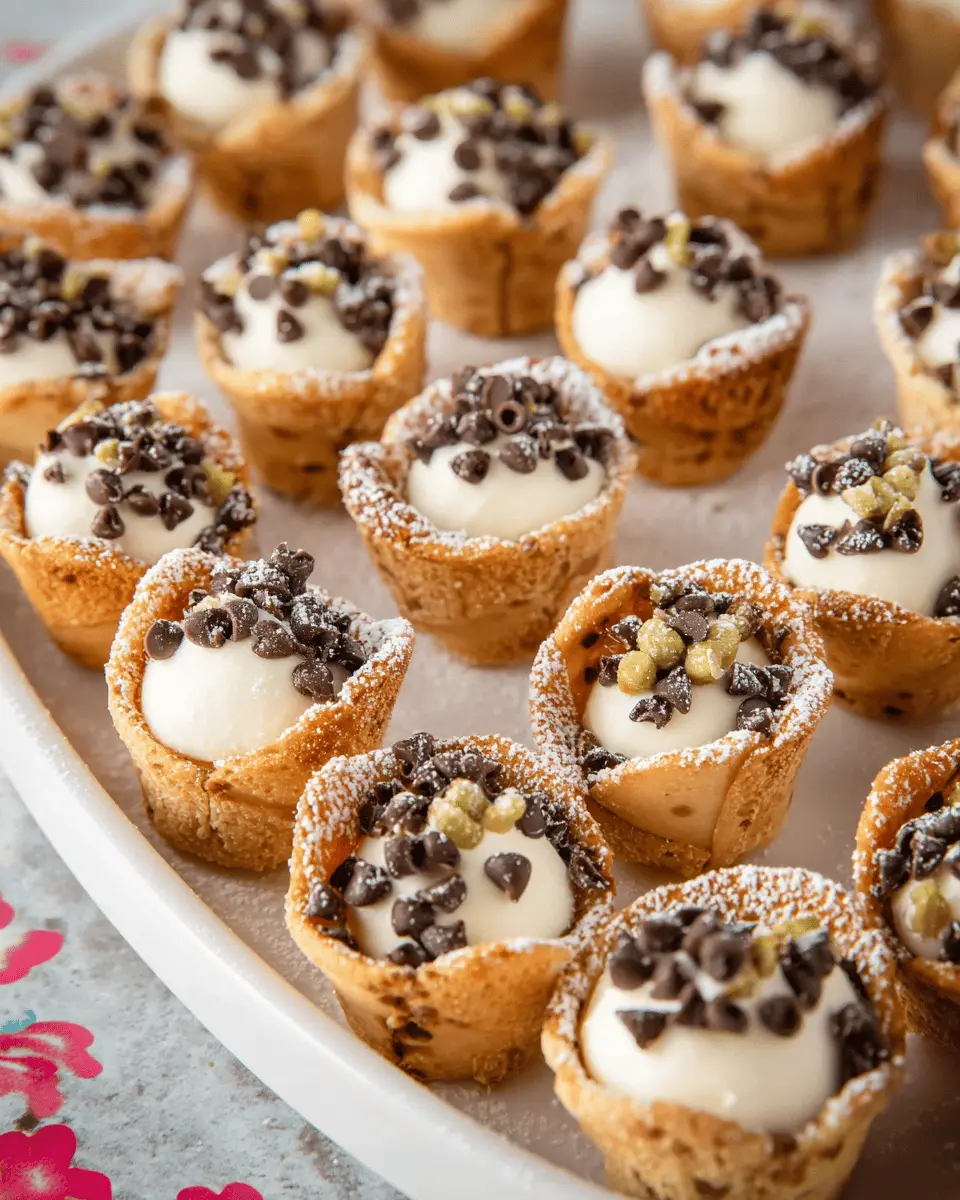
- Miniature semisweet chocolate chips or finely chopped pistachios: About ¼ cup for a delightful pop of color and flavor.
- Additional powdered sugar: A dusting for a beautiful finish.
With these ingredients, your mini cannoli cups will be a show-stopping treat that’s sure to impress guests and satisfy your sweet tooth! For more tips on assembling, check out this article on mastering cannoli fillings.
Step-by-step Preparation of Mini Cannoli Cups
Making mini cannoli cups is easier than you might think, and with this step-by-step guide, you'll create a delightful dessert that's perfect for any occasion. Let's dive into the process!
Preheat the oven and prepare the crust
Begin by preheating your oven to 425°F (220°C). While your oven warms up, grab a surface to work on, lightly flour it, and unroll your two refrigerated pie crusts. Elevate the flavor and texture of your crust by sprinkling both sides with turbinado sugar and ground cinnamon. After that, use a rolling pin to gently press the sugar and cinnamon into the dough, enhancing the sweetness and aroma of your mini cannoli cups.
Roll out the pie crust and cut pastry rounds
Once your crust is ready, it’s time for the fun part. Take a 2½-inch round cookie cutter and start cutting out pastry rounds. You’ll want about 48 circles to fill your mini muffin tin. If you need more, simply re-roll the leftover dough and keep cutting! After you’ve cut out the rounds, carefully press each into the ungreased mini muffin cups. This step ensures that your crusts will have that charming cup shape once baked.
Bake the mini cannoli cups until golden
Pop your tray into the oven and bake the mini cannoli cups for about 10 minutes or until they turn a beautiful golden brown. Keep an eye on them; oven temperatures can vary! Once baked, let the cups cool in the pan for about 15 minutes before transferring them to a wire rack. Patience is key; this wait will prevent soggy bottoms!
Make the creamy filling
While the cups are cooling, it's time to whip up the creamy filling. In a large mixing bowl, combine drained whole-milk ricotta cheese, powdered sugar, granulated sugar, zest, and vanilla extract. Beat everything with an electric mixer on medium speed until the mixture is rich and creamy. For easy filling, scoop the filling into a 1-gallon zip-top resealable bag, seal it, and refrigerate until you're ready to serve.
Assemble the mini cannoli cups
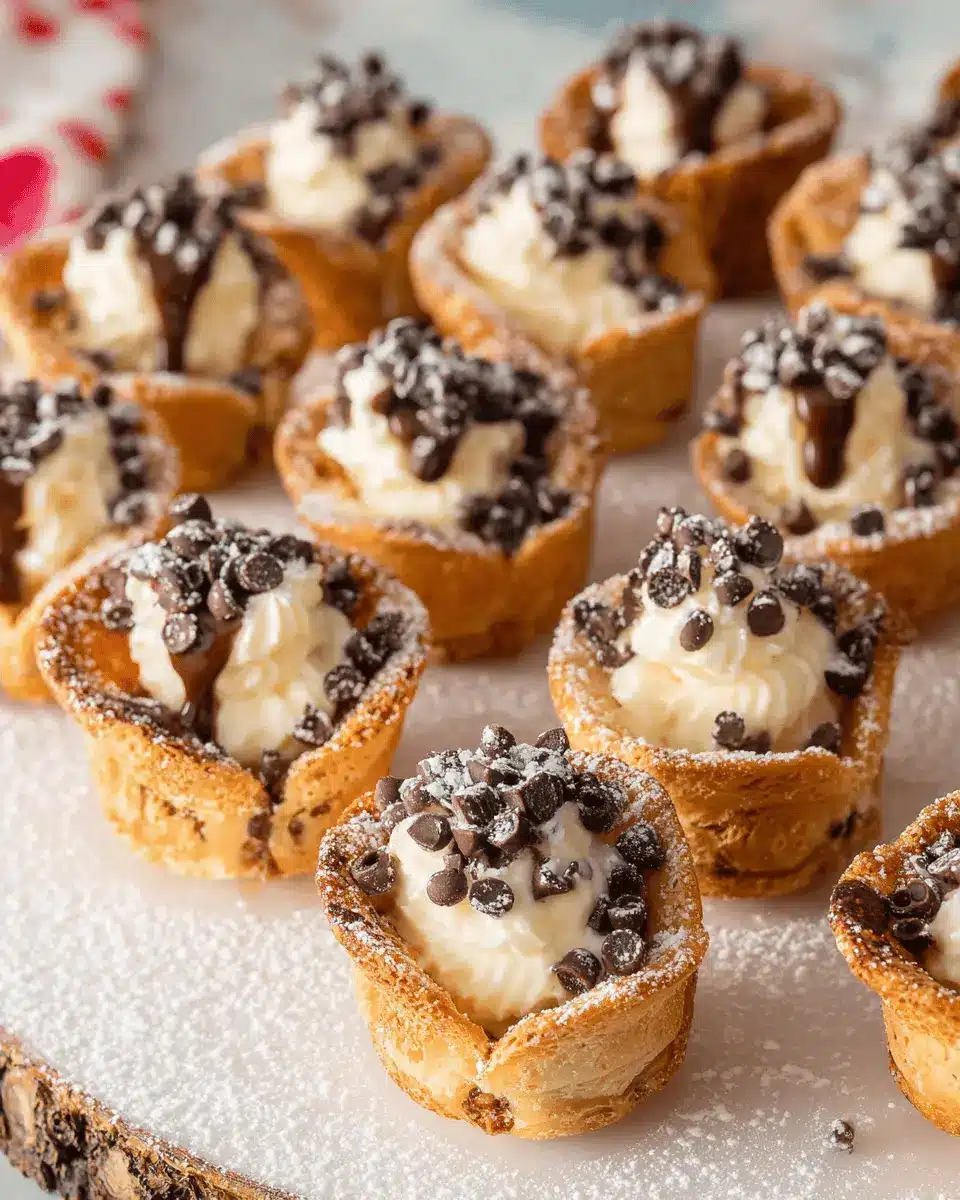
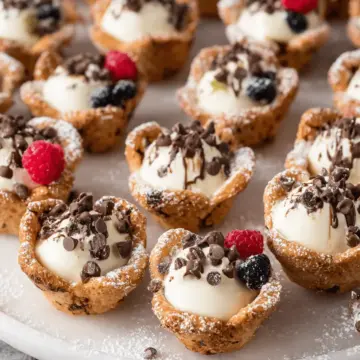
When you're ready to treat your taste buds, grab your chilled filling. Snip a small corner off the bag and pipe approximately 1 tablespoon of the rich filling into each cooled pastry cup. For a finishing touch, sprinkle them with mini chocolate chips or finely chopped pistachios. A light dusting of powdered sugar adds an elegant touch!
Serve your mini cannoli cups immediately for the best experience. They offer a perfect balance of crunchy and creamy, making them irresistible. Enjoy every delightful bite!
For more delightful dessert ideas, consider checking out this food blog for inspiration!
Variations on Mini Cannoli Cups
Mini cannoli cups are versatile and can be customized to suit your preferences. Let’s explore some delightful variations that can cater to different tastes!
Chocolate-Covered Cannoli Cups
Transform your mini cannoli cups into a decadent treat by dipping the edges in melted chocolate. Simply melt your favorite chocolate and dip each cup’s top edge, then let them harden before filling with the luscious ricotta mixture. Drizzling additional chocolate over the filling adds an extra touch of indulgence.
Fruit-Filled Mini Cannoli Cups
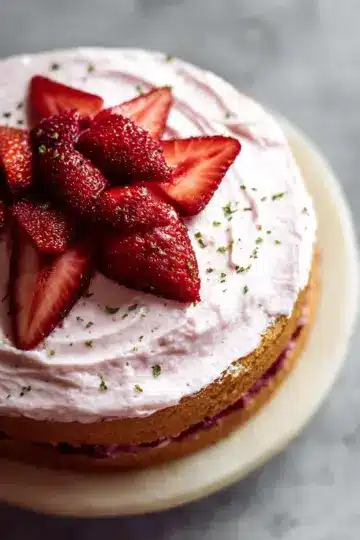
For a refreshing twist, consider filling your mini cannoli cups with seasonal fruits! Mix diced strawberries, peaches, or blueberries into the ricotta filling for a vibrant burst of flavor. The fruit will not only add a pop of color but also a refreshing sweetness that balances the creamy filling beautifully.
These creative variations offer something for everyone and elevate your dessert experience! Consider trying them out—who knows, they might become your new favorite!
Cooking Tips and Notes for Mini Cannoli Cups
The Importance of Draining Ricotta
Draining your ricotta cheese is crucial for achieving that perfect creamy texture in your Mini Cannoli Cups. Excess moisture can lead to a watery filling, spoiling the delightful crunch of your pastry. For best results, strain the ricotta in the fridge using a fine mesh sieve or a cheesecloth-lined colander for several hours or overnight. This simple step is key to a more delicious result!
Storing Filled and Unfilled Cups
To keep your Mini Cannoli Cups fresh, store the unfilled pastry shells at room temperature in an airtight container. Fill them just before serving to prevent sogginess. Meanwhile, keep any unused filling in the refrigerator to maintain its flavor and consistency. This way, you can whip up a delicious batch anytime you need a sweet treat! If you're curious about pastry storage tips, check out resources from Serious Eats.
Serving Suggestions for Mini Cannoli Cups
Pairing Ideas for a Dessert Platter
Elevate your Mini Cannoli Cups by thoughtfully pairing them with complementary desserts. Consider adding:
- Fresh Fruit: Berries or sliced peaches add a refreshing touch.
- Cookies: Italian favorites like biscotti can make excellent companions.
- Chocolate-Dipped Treats: Try combining with chocolate-covered strawberries for a delightful contrast.
Balance flavors and textures to create a visually appealing table that's sure to impress your guests.
Creative Presentation Tips
An appealing presentation can make your Mini Cannoli Cups the star of any gathering. Here are some fun ideas to try:
- Plater Arrangement: Use a colorful platter or tiered stand for visual interest.
- Garnish Options: Sprinkle each cup with additional powdered sugar or drizzle with chocolate sauce for flair.
- Use of Flowers: Consider edible flowers for a pop of color.
With these suggestions, you’re well on your way to making your dessert spread memorable!
Time Breakdown for Mini Cannoli Cups
Preparation time
Getting started on these delightful Mini Cannoli Cups takes about 20 minutes. This includes gathering your ingredients, rolling out the pie crust, and prepping the creamy filling.
Cooking time
Baking the crusts takes a brief 10 minutes. A quick stint in the oven is all it takes for these cups to turn a perfect golden brown.
Total time
In just 30 minutes, you'll have your delicious Mini Cannoli Cups ready to impress at any occasion! Perfect for gatherings or satisfying your sweet tooth, this recipe requires minimal fuss but brings maximum joy.
For more tips on perfecting your cannoli experience, check out this guide on preparing perfect ricotta. Happy baking!
Nutritional Facts for Mini Cannoli Cups
Calories per cup
Each delightful mini cannoli cup contains 71 calories, making them a light yet satisfying treat. Perfect for indulging your sweet tooth without going overboard!
Key nutrients
These little delights pack a decent nutritional punch, offering:
- Carbohydrates: 8g
- Protein: 2g
- Fat: 4g (with just 2g of saturated fat)
- Calcium: 21mg
With the inclusion of ingredients like ricotta cheese, these cups also provide protein, helping to keep you feeling fuller longer. For more information on nutritional balances, consider checking out resources from the USDA or Healthline.
Enjoying these mini cannoli cups allows you to satisfy your cravings in a more mindful manner while still indulging in the sweet flavors you love!
FAQs about Mini Cannoli Cups
Can I make cannoli cups ahead of time?
Absolutely! You can prepare the cannoli cups a day in advance. Bake the pie crusts and store them in an airtight container at room temperature. However, try to fill them just before serving to maintain that delightful crispiness.
What’s the best way to serve mini cannoli cups?
Serve your mini cannoli cups chilled, fresh from the refrigerator. To elevate your presentation, lay them out on a beautiful platter, and consider garnishing with additional chocolate chips or chopped pistachios. If you’re hosting a party, you might even label each one with charming tags!
How do I ensure the filling is the right consistency?
Getting the filling just right is key! Make sure to strain the ricotta cheese overnight—this extra step ensures a smooth texture. Additionally, combine all filling ingredients with an electric mixer until creamy, and store it in the fridge until you're ready to serve. This will help it stay firm but pipeable, making filling your mini cannoli cups a breeze!
For more tips, check out Serious Eats or Allrecipes for even more delicious ideas!
Conclusion on Mini Cannoli Cups
Why These Mini Treats Are a Must-Try Dessert
Mini cannoli cups are not just a delightful way to experience classic Italian flavors; they're a fun and modern twist on a beloved dessert. Featuring a crispy shell and a creamy, zesty filling, these little treats are perfect for any gathering. Easy to make and customizable, you simply can't go wrong with this elegant dessert. Treat yourself today!
Mini Cannoli Cups
Equipment
- mixing bowl
- Rolling Pin
- cookie cutter
- mini muffin pan
- Electric Mixer
- zip-top resealable bag
Ingredients
Filling
- 15 oz whole-milk ricotta cheese drained
- ½ cup powdered sugar
- 2 tablespoons granulated sugar
- 1 teaspoon finely grated orange or lemon zest
- ½ teaspoon vanilla extract
Cannoli Cups
- 1 box refrigerated pie crusts softened as directed on box, 2 count
- 3 tablespoons turbinado sugar raw sugar
- 1 teaspoon ground cinnamon
Garnish
- ¼ cup miniature semisweet chocolate chips or finely chopped pistachios
- additional powdered sugar
Instructions
Base Instructions
- Preheat the oven to 425°F.
- Lightly flour a work surface and unroll the pie crusts. Sprinkle both of the pie crusts with turbinado sugar and cinnamon. Gently roll a rolling pin over the top of the pie crusts to press the sugar and cinnamon into the dough. With a 2½-inch round cookie/biscuit cutter, cut out pastry rounds. Gently press each pastry round into ungreased mini muffin cups. (Note, you may need to gently re-roll the pie crusts and cut out more circles until you have 48 circles.)
- Bake the crusts for 10 minutes, or until golden brown. Allow cannoli cups to cool completely in the pans, about 15 minutes, before removing them to a wire rack to cool completely.
- While the cups are cooling, prepare the filling by beating all of the filling ingredients with an electric mixer on medium speed in a large mixing bowl until creamy. Place the filling in a 1-gallon zip-top resealable bag. Seal bag. Refrigerate until ready to serve.
- Just before serving, remove the filling from the refrigerator. Snip one corner off of the bag and pipe approximately 1 tablespoon of filling into the cooled pastry cups. Sprinkle cups with mini chocolate chips or chopped pistachios. Dust with powdered sugar.
- Serve immediately.


Leave a Reply