
Introduction to Mini Cheesecakes
Are you looking for the ideal dessert that’s sure to impress? Mini cheesecakes are a fantastic choice for any gathering or simply to satisfy your sweet tooth! Their bite-sized portions make them easy to enjoy, allowing you to indulge without overdoing it. Plus, they’re incredibly versatile—they can be topped with fresh fruit, drizzled with caramel, or left plain for a minimalist treat.
What makes mini cheesecakes stand out is their ability to deliver that rich, creamy texture and luscious taste of traditional cheesecake while offering a fun twist. Imagine serving these delightful treats at a party; everyone can pick their favorite flavor without committing to a full slice. You get the best of both worlds—decadent cheesecake goodness and variety!
Whether you're catering for a special event or just treating yourself, mini cheesecakes offer simplicity and ease of preparation. Plus, they store well in the fridge, allowing you to enjoy your dessert over a few days.
If you're intrigued by the prospect of creating your own mini cheesecakes, keep reading for a step-by-step recipe that will guide you through each delicious layer! Learn more about cheesecakes here.
Ingredients for Mini Cheesecakes
When it comes to making delectable mini cheesecakes, the right ingredients can make all the difference. Let’s break down the necessary components to create a luscious treat in your standard muffin pan.
Essential ingredients for the crust
To give your mini cheesecakes a delightful base, you'll need:
- Graham cracker crumbs: About 1 cup, which makes up the heart of the crust. Crush approximately 8 sheets of graham crackers until they turn into fine crumbs.
- Granulated sugar: Just 2 tablespoons to sweeten the crust and add a bit of texture.
- Unsalted butter: Three tablespoons, melted, to bind everything together and create a rich flavor.
With these ingredients, you'll have a crust that beautifully complements the creamy filling!
Must-have ingredients for the filling
Now, let's talk about the star of the show: the cheesecake filling. Gather these ingredients for a smooth, rich texture:
- Full-fat brick cream cheese: 16 ounces, softened to room temperature for easy mixing.
- Granulated sugar: A half cup sweetens this delight without overpowering it.
- Sour cream: Just ¼ cup adds a creamy tang that balances the sweetness perfectly.
- Vanilla extract: One teaspoon elevates the flavor profile.
- Fresh lemon juice: A teaspoon brightens the flavor and helps cut through the richness.
- Large eggs: Two, at room temperature, help achieve that perfect cheesecake texture.
These components work together to ensure your mini cheesecakes are not only easy to make but also incredibly delicious!
Step-by-step Preparation of Mini Cheesecakes
Preheat and Prep Your Muffin Pan
Getting started with mini cheesecakes means preheating your oven first! Set it to 350°F (177°C) and prepare your standard 12-count muffin pan by lining it with cupcake liners. Not only do the liners make for easy removal, but they also elevate your mini creations to a whole new level of presentation. Have fun picking colorful liners to add a personal touch!
Prepare the Crust Mixture
Next, let’s make that delicious crust. In a medium bowl, combine 1 cup of graham cracker crumbs, 2 tablespoons of granulated sugar, and 3 tablespoons of melted unsalted butter. The mixture will feel grainy, but don’t worry—it’s just the way we want it! Use a heaping tablespoon of the mixture to press firmly into each muffin liner. This crust is what makes your mini cheesecakes stand out, giving them that sweet crunch we all love.
Bake the Crusts
Bake the crusts in your preheated oven for just 6 minutes. This short time in the oven will give them that perfectly crisp texture. While they're baking, take a moment to enjoy the buttery aroma filling your kitchen. It’s an excellent preview of the delightful treats to come!
Make the Smooth Filling
Now, for the star of the show—your cheesecake filling! In a large bowl, use a hand mixer to beat 16 ounces of softened cream cheese along with ½ cup of granulated sugar on medium-high speed until it's completely smooth, about 2 minutes. Then, mix in ¼ cup of sour cream, 1 teaspoon of vanilla extract, and 1 teaspoon of lemon juice. Finally, add in 2 large eggs one at a time, making sure not to over-mix. The result? A velvety filling that tastes out of this world.
Optional Water Bath for Baking
Want your mini cheesecakes to come out even creamier? You can give them a gentle water bath! This involves boiling water and pouring it into a roasting pan, ensuring about an inch deep. Place this pan on the bottom oven rack while you bake your cheesecakes on the center rack. Not only does this help maintain moisture, but it also keeps your cheesecakes from sinking too much as they cool.
Bake Until Perfect
Bake your mini cheesecakes in the oven for about 20 minutes. Keep an eye on them—the edges should be set, and the centers should still jiggle a bit when tapped. This is the perfect time to enjoy a cup of tea or coffee while you wait!
Cool Down and Chill
Once baked, set the pan on a cooling rack and let the cheesecakes cool at room temperature for 45 minutes. Afterward, transfer them to the fridge to chill for at least 2 hours. If you’re in a hurry, a quick hour in the freezer will do just fine!
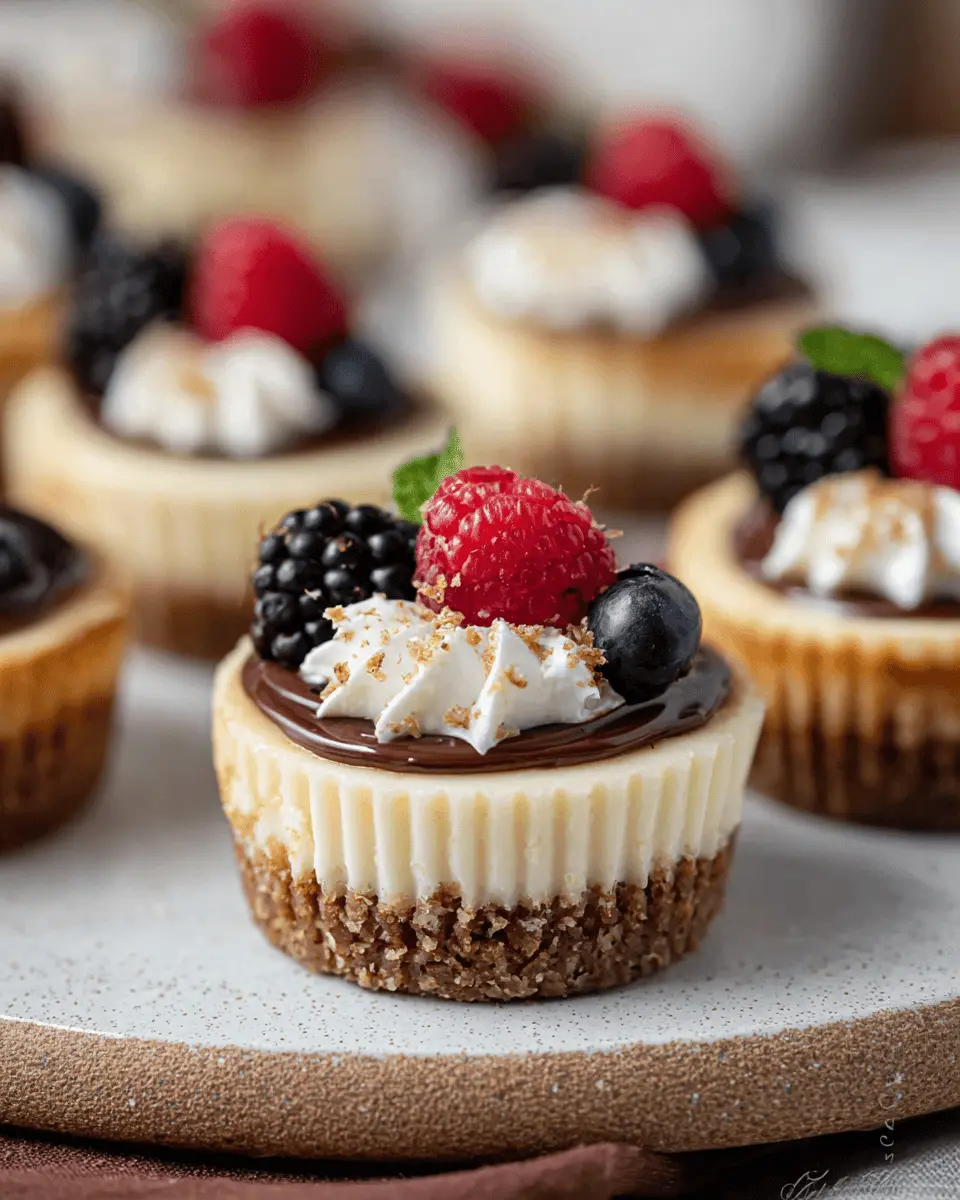
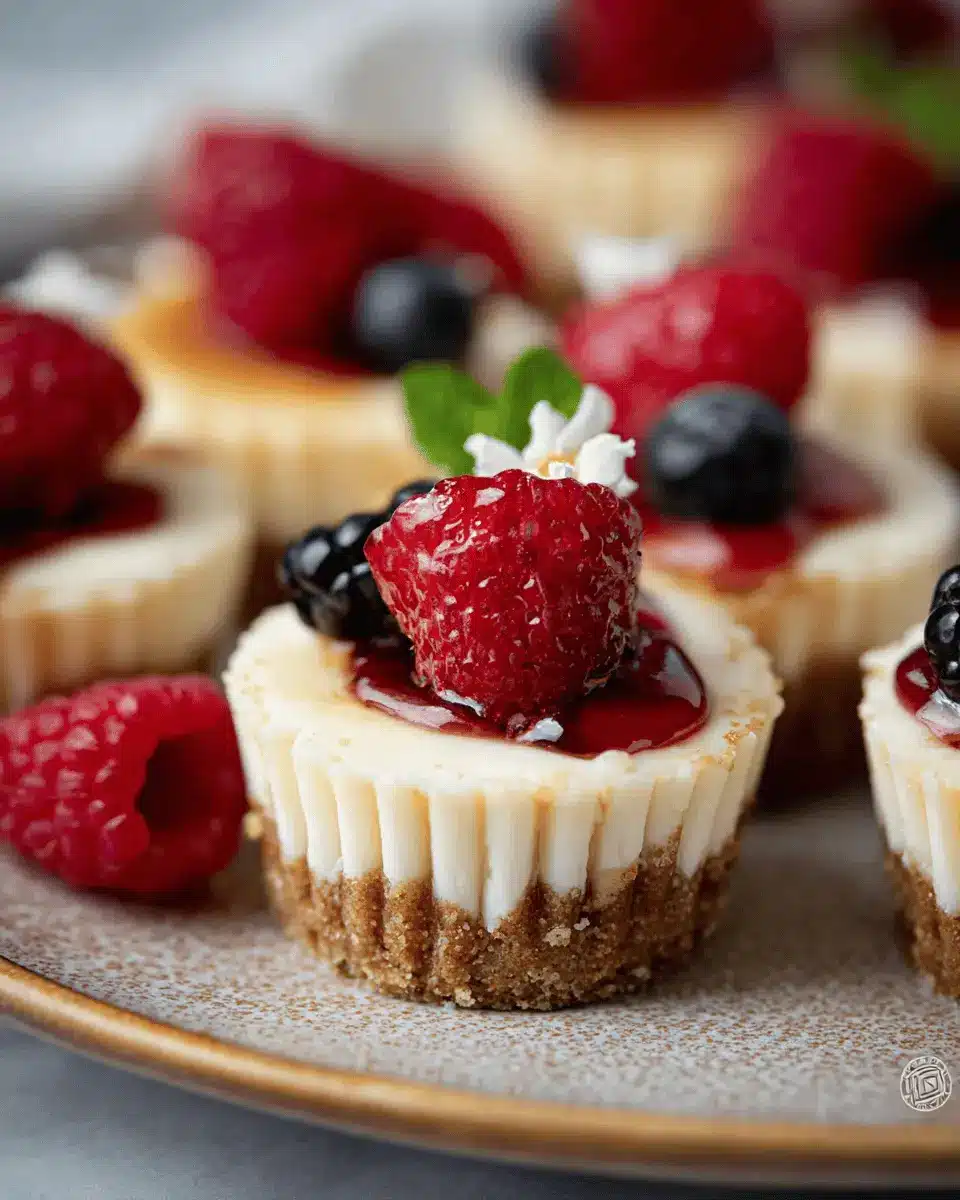
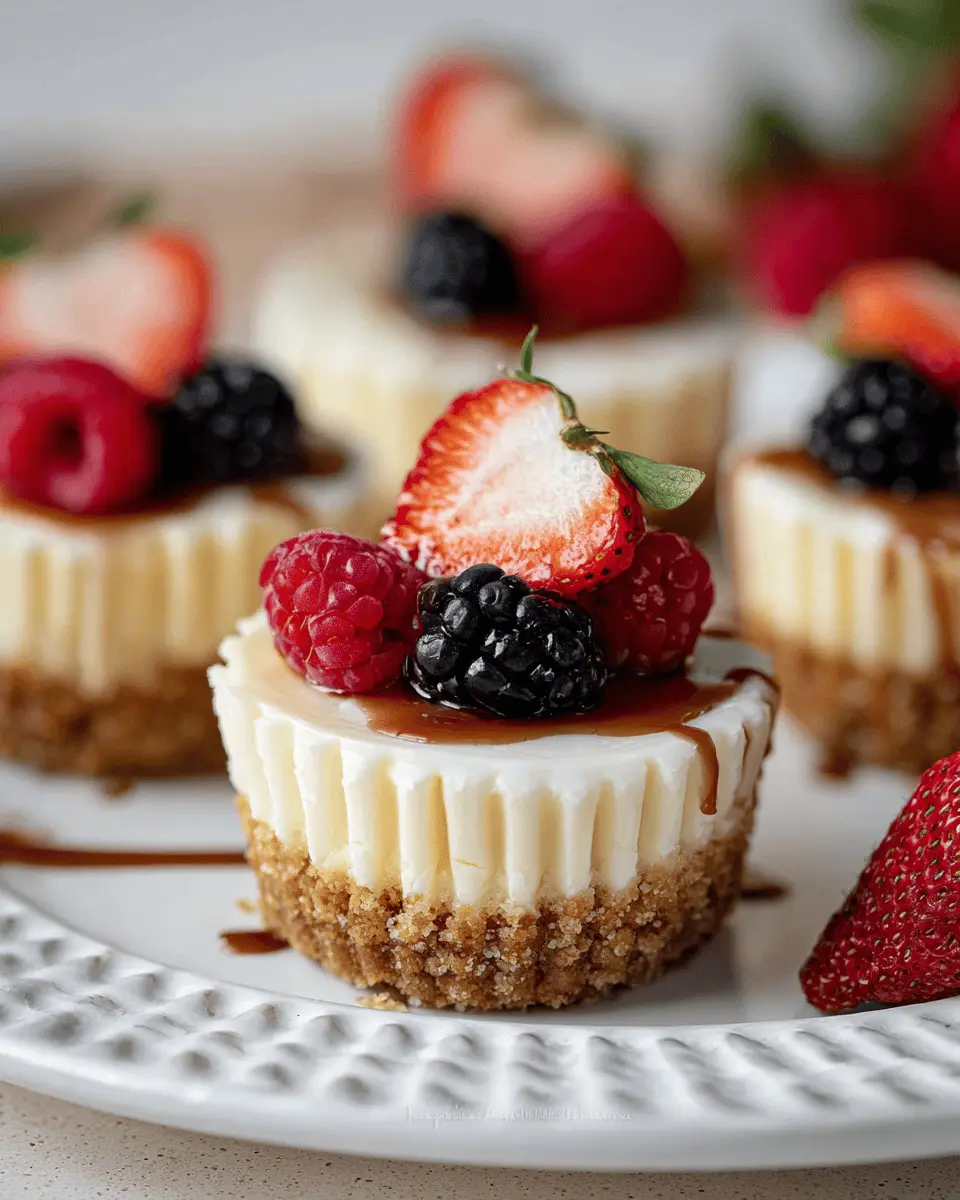
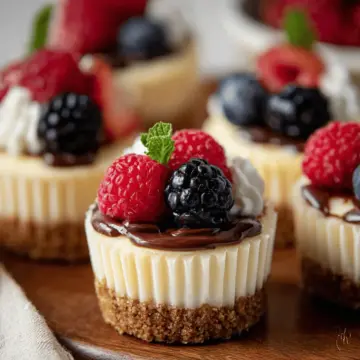
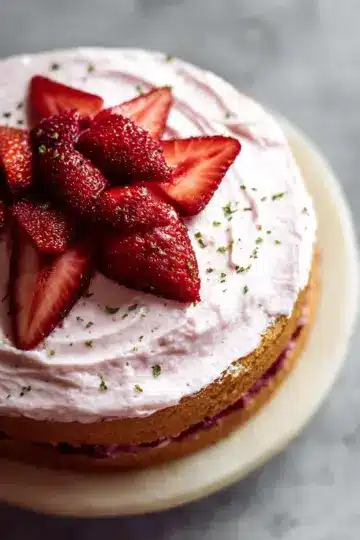
Final Touches with Toppings
Now comes the fun part—toppings! Whether you opt for a swirl of whipped cream, fresh berries, or a sprinkle of chocolate shavings, this is your moment to shine! Use a piping bag with a star tip for a professional finish. Remember, these toppings can be prepped in advance, so make your cheesecakes ahead of time if you want!
Enjoy your homemade mini cheesecakes! They’re sure to be a hit at any gathering or cozy night in.
Variations on Mini Cheesecakes
Fun Flavor Twists on Mini Cheesecakes
Why stick to the classic flavor when you can get creative? Here are some fun twists to try:
- Chocolate Swirl: Fold in melted chocolate into the filling for a rich treat.
- Berry Blast: Mix in pureed strawberries or blueberries for a fruity upgrade.
- Pistachio Delight: Add ground pistachios and a splash of almond extract to bring a nutty flavor.
For detailed flavor ideas, check out Sally's Baking Addiction.
Seasonal and Festive Topping Ideas
Sprucing up your mini cheesecakes with seasonal toppings not only looks stunning but adds an exciting flavor punch. Consider:
- Spring: Fresh berries and edible flowers.
- Summer: Coconut whipped cream and toasted coconut flakes.
- Fall: Pumpkin spice topping or caramel drizzle.
- Winter: Peppermint candy or a rich chocolate ganache.
Experiment and enjoy making these delightful treats your own!
Cooking Tips and Notes for Mini Cheesecakes
Avoiding Cracks and Other Common Issues
To prevent cracks in your mini cheesecakes, make sure all your ingredients are at room temperature. This helps achieve a smoother mixture. Additionally, avoid overmixing, especially after adding the eggs, as this can incorporate too much air, leading to cracks during baking. Using a water bath can also help create a humid environment, reducing the risk of cracking.
Tips for Perfect Texture
For that creamy, luscious texture that is the hallmark of great mini cheesecakes, opt for full-fat cream cheese and sour cream. This richness not only enhances flavor but also contributes to a smooth texture. Don’t forget to cool them slowly—let them chill at room temperature before transferring them to the refrigerator. This method allows them to set perfectly, making each bite heavenly!
Serving Suggestions for Mini Cheesecakes
Creative Plating Ideas
To elevate your mini cheesecakes, think beyond the traditional. Arrange them on a rustic wooden board for a charming touch or stack them on a tiered cake stand, showcasing their delightful layers. A simple drizzle of homemade berry sauce or a sprinkle of crushed nuts can add a pop of color and texture. Use edible flowers for an elegant finishing touch, or even serve them in glass jars for a fun and casual presentation. Personal touches like custom name tags can turn dessert into a delightful experience for guests.
Drinks That Pair Well with Mini Cheesecakes
Finding the perfect drink to accompany your mini cheesecakes can enhance the flavor experience. Consider pairing them with:
- Freshly brewed coffee for a classic combination
- Herbal teas, like chamomile or peppermint, to add a soothing contrast
- Sparkling water with a twist of lemon for a refreshing cleanse between bites
- Fruit smoothies for a fun and fruity blend
No matter your choice, these drinks will complement the creamy richness of your cheesecakes, leaving your guests wanting more! For more tips on pairing beverages with desserts, check out this guide from Serious Eats.
Time Breakdown for Mini Cheesecakes
Planning to whip up some delightful mini cheesecakes? Here’s a handy breakdown of the time you’ll need:
Preparation time
In just 15 minutes, you can have your crust and filling ready. It’s the perfect appetizer to get your kitchen smelling amazing!
Baking time
Let your mini cheesecakes bake for 20 minutes. That’s enough time to clean up the countertops and set the table for indulgence.
Chilling time
Patience is key! Allow your cheesecakes to chill in the fridge for at least 2 hours (or longer if you can resist!) before serving. The wait is well worth it for that creamy, dreamy texture.
For further tips on achieving the perfect cheesecake texture, check out this detailed guide to enhance your baking success!
Nutritional Facts for Mini Cheesecakes
Calories
Each delightful mini cheesecake packs around 160 calories. Perfect for satisfying your sweet tooth without straying too far from your dietary goals!
Sugar Content
With approximately 12 grams of sugar per cheesecake, these treats offer a balanced sweetness, ideal for a satisfying dessert experience.
Protein
You can also enjoy about 3 grams of protein in each mini cheesecake. This makes them a charming, indulgent snack that won’t leave you completely guilty afterward!
For more detailed nutrition insights, check out reputable sources like NutritionData or USDA FoodData Central. Enjoy your delightful creations!
FAQ about Mini Cheesecakes
How do I store my mini cheesecakes?
To keep your delicious mini cheesecakes fresh, store them in an airtight container in the refrigerator. They’ll stay tasty for up to 5 days! If you have decorated them with toppings, ensure they’re covered loosely with plastic wrap to maintain their presentation.
Can I double the recipe?
Absolutely! If you’re planning to serve a crowd or simply want to satisfy your cheesecake cravings, doubling the recipe is a breeze. Just make sure you have enough muffin pans or bake them in batches. This way, everyone can enjoy the scrumptiousness of your mini cheesecakes!
What toppings work best for mini cheesecakes?
The beauty of mini cheesecakes is their versatility when it comes to toppings. Classic whipped cream is always a favorite, but you can get creative with:
- Fresh berries (strawberries, blueberries, or raspberries)
- Chocolate ganache
- Caramel sauce
- Crushed nuts
Consider combining a few to elevate your desserts! For more inspiration, check out this guide on cheesecake toppings.
Conclusion on Mini Cheesecakes
In summary, these delightful mini cheesecakes are perfect for any occasion! Easy to make in a standard muffin pan, they are sure to be a hit at gatherings. Customize them with your favorite toppings, and enjoy delicious, bite-sized treats that everyone will love. Give them a try today!
Mini Cheesecakes in a Standard Muffin Pan: Easy Delicious Treats
Equipment
- Standard Muffin Pan
- mixing bowl
- Electric Mixer
- cooling rack
Ingredients
Crust
- 1 cup graham cracker crumbs (about 8 full sheet graham crackers)
- 2 Tablespoons granulated sugar
- 3 Tablespoons unsalted butter melted
Filling
- 16 ounces full-fat cream cheese softened to room temperature
- ½ cup granulated sugar
- ¼ cup full-fat sour cream at room temperature
- 1 teaspoon pure vanilla extract
- 1 teaspoon freshly squeezed lemon juice
- 2 large eggs at room temperature
Instructions
Preparation
- Preheat oven to 350°F (177°C). Line a standard muffin pan with cupcake liners.
- Make the crust: Combine all of the crust ingredients in a medium bowl. Mixture will be sandy. Firmly press a heaping Tablespoon of crust mixture into each liner. Bake the crusts for 6 minutes.
- Make the filling: Using a handheld or stand mixer, beat the cream cheese and granulated sugar together until smooth, about 2 minutes. Add sour cream, lemon juice, and vanilla extract, and beat until fully combined. Add eggs one at a time, beating until combined. Divide the batter among the liners.
- Optional Water Bath: Boil a pot of water and place a baking pan on the bottom oven rack. Pour boiling water into the pan about 1 inch deep. Place cheesecakes on the center rack and close the oven.
- Bake until the edges are set and the centers slightly jiggle, about 20 minutes.
- Set the pan on a cooling rack and allow cheesecakes to cool at room temperature for 45 minutes. Transfer to the refrigerator and chill for at least 2 hours.
- Top the cheesecakes with whipped cream, berries, or mint. Refrigerate until ready to serve.
- Cover and store leftover cheesecakes in the refrigerator for up to 5 days.


Leave a Reply